Rose plants with their captivating blooms bring the enchanting environment around your house and garden. One of the most beautiful and magical experiences of growing rose bushes can be achieved through their cuttings or stems.
Growing a rose bush might seem daunting but if you follow the right approach and steps, you can give life to a new rose plant in the most delightful way. We present this guide on your feed covering all the aspects of growing rose plants from cuttings.
To learn how to grow roses from stem cuttings, you must have the right cuttings with you, and the important thing to consider while taking rose cuttings is the timing. Although there aren’t any time restrictions while propagating rose plants, it would be best to look out for the weather conditions for the best and most consistent result.
The environmental temperature between 70 and 80 °F is considered ideal for cutting the rose plant and most probably spring and fall season brings the best out of your rose cuttings. Make sure to cut the stem of the rose plant in the right way early in the morning.
Softwood Rose Cuttings
Softwood cuttings just like the name, are the young and soft cutting of the rose plant that is commonly small and flexible in the size of a pencil with some pair of leaves still on. Known as the fastest and easiest to root, these types of cuttings are generally made in the late spring or early summer.
Hardwood Rose Cuttings
Hardwood cuttings as the name implies, are cuttings that are quite hard and mature without leaves. Known as the slowest and quite difficult to root, they are generally cut during late fall or early winter.
If you want an economical way to grow roses in your garden, growing them from cuttings is the most favored and effective method. You certainly need some patience while following the right growing steps, but ultimately, it would be a rewarding and fruitful experience.
Required Tools and Materials
The following items come in handy while growing roses from the cuttings. Make sure these elements are by your side if you are to ensure your work is the most productive and effective.
You need to give good hydration to your matured, parent rose plant before you decide to take cuttings from it. A healthy and well-hydrated rose is found to uplift the root development. Therefore, if you’ve decided to propagate your rose plant, you need to properly water the parent plant in the morning of the day before cutting.
2. Choose the Right Stem to Make Cut
You will find numerous stems and branches in the parent rose plant. Selecting the right one to propagate might seem intimidating but don’t you worry, we have got you covered on this. Make sure to go for softwood as mentioned earlier, for the easiest and quickest root development.
If you give your healthy rose bush a good glance and observation, you will find the stem on it as thick as a pencil and most probably has 3-5 leaf nodes. The leaf node is the bumpy portion within the stem from where the leaf emerges.
It shouldn’t be too soft nor should be very hard or woody. Further, the stem below the flower buds with dropped petals is also the one you can go for the right cutting. Make sure the chosen stem is 4-8 inches long.
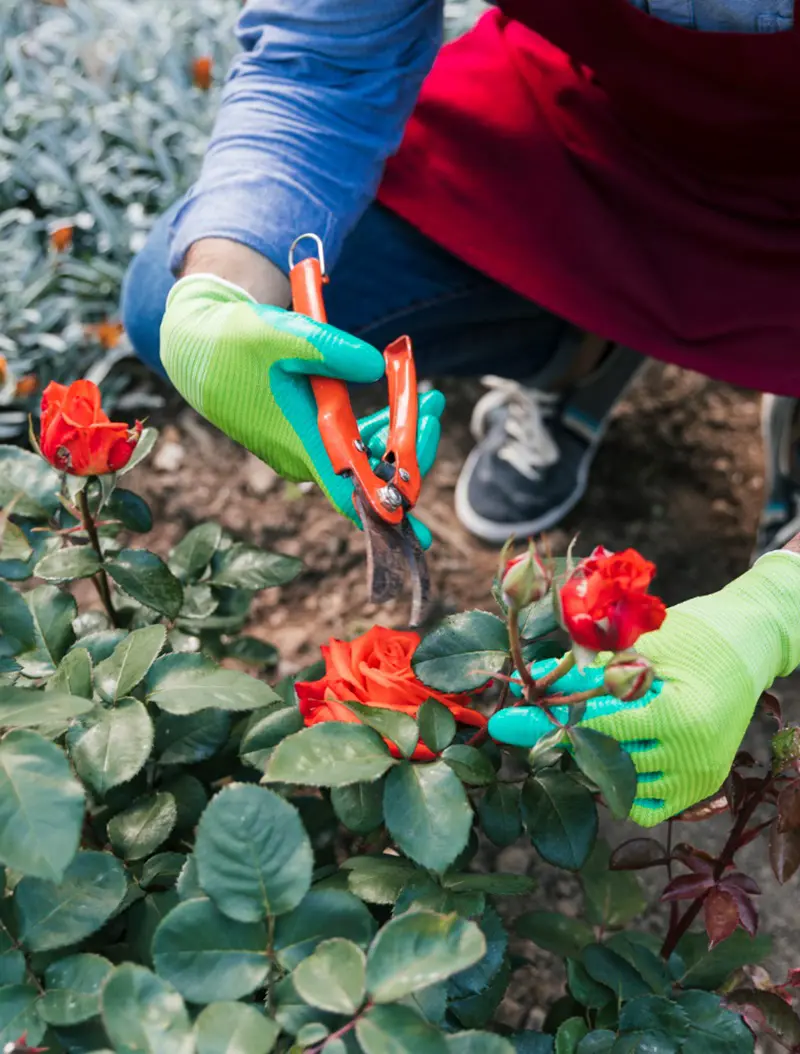
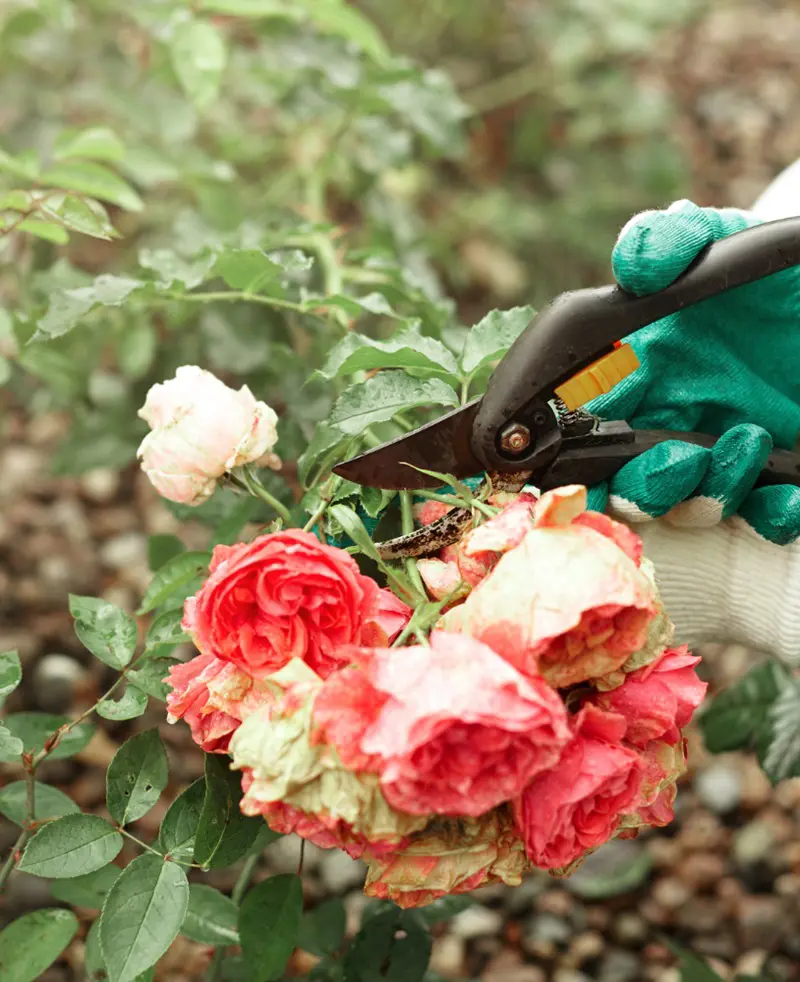
Once the stem is selected, you can cut it using a clean, sterilized, and sharp cutting tool like pruners. While cutting the stem, you need to be careful about the angle you make. Be mindful that a 45-degree angle below the leaf node is the ideal cutting practice.
Adding more to that, if your cutting is at the base of the plant, you need to make sure you cut about a quarter of an inch below a leaf node but if the cut is at the top, you need to cut about a quarter inch above the leaf node.
4. Place Cuttings in the Water
After cutting the chosen stem, your next step should be about care for the fresh cutting. You should know that the cutting is very sensitive and there’s a high risk for it to go dry. Therefore, the cutting needs to be kept away from heat and high temperatures.
You need to place your cutting directly into a container containing water and the container should be kept in a cool place where direct sunlight is prevented. You can also make use of a cooler to keep your cutting before it gets planted.
5. Trim the Bottom End of Cuttings
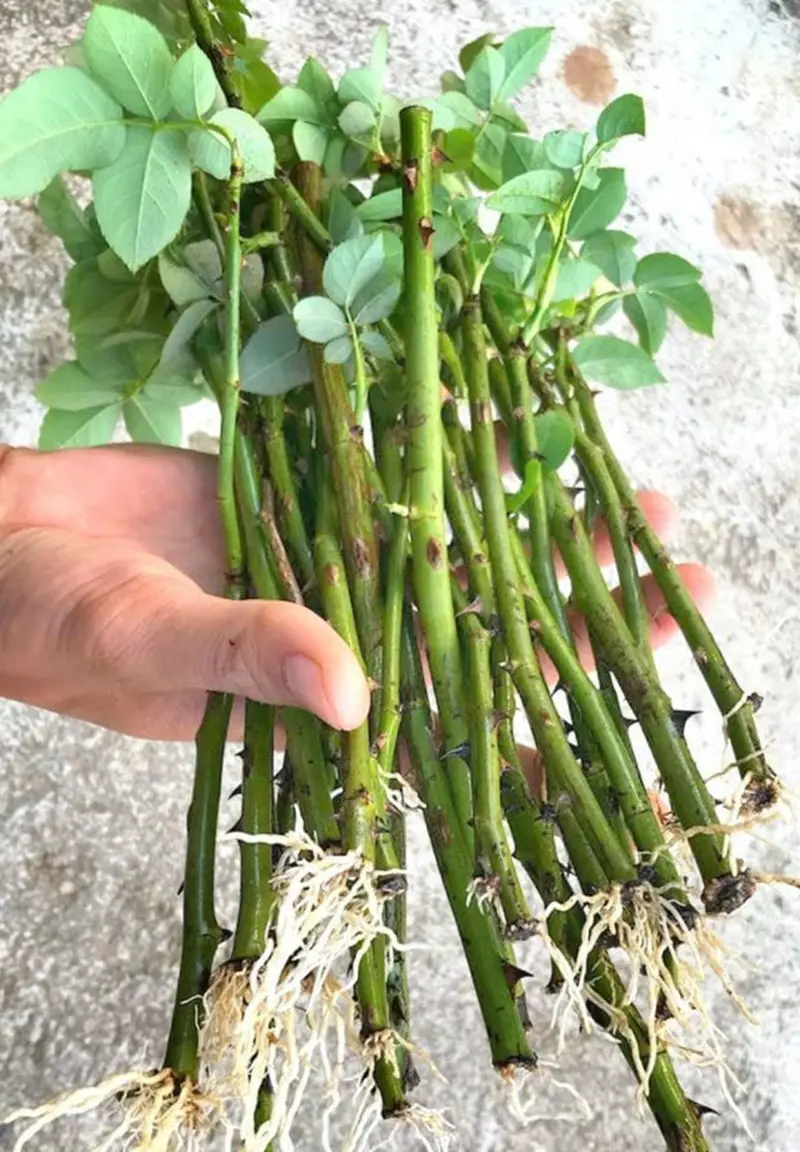
You should know that once you make the cut and take the cutting, the stem and plant both are wounded. The stem will root as a response to the wound but only if you encourage it to do so. It has been found that if you give a trim or vertical slicing at the bottom end of the cutting below a node, rooting is encouraged.
You can also gently scrape off green skin at the bottom of the cutting, but make sure not to pull off the entire skin. Be mindful that you are just making a gentle wound at the bottom of the cutting so that rooting is encouraged.
Well, the use of rooting hormone is optional but if you are to give a boost to the root development of the cutting, you may use it. Make sure to dip the end of the cutting in rooting hormone for about a couple of inches.
Rooting hormone is found to contain plant hormones that encourage new root formation while easing the propagation process. It depends upon you whether you want to use rooting hormone or not while growing roses from the cuttings, just be clear about the role and application method, and decide.
7. Remove Leaves and Flowers
If your cuttings have excess leaves and flowers on them, you need to remove them before planting. Trim away the flower buds or any spent flowers and leaves from the stem but make sure to leave the top pair of leaves.
8. Prepare the Growing Medium
Having done all the necessary preparation beforehand with the right cuttings along with you, you need to prepare for the plantation. For this, a decent and most required growing medium is to be arranged. Begin by preparing a well-draining soil.
If you can arrange for the potting mix then there’s nothing to worry about, you can simply fill the container with the mix and lightly water the soil to make it mildly moist. You should know that potting mix is prepared by mixing equal parts of sand and potting soil.
9. Place Cuttings Into Potting Mix
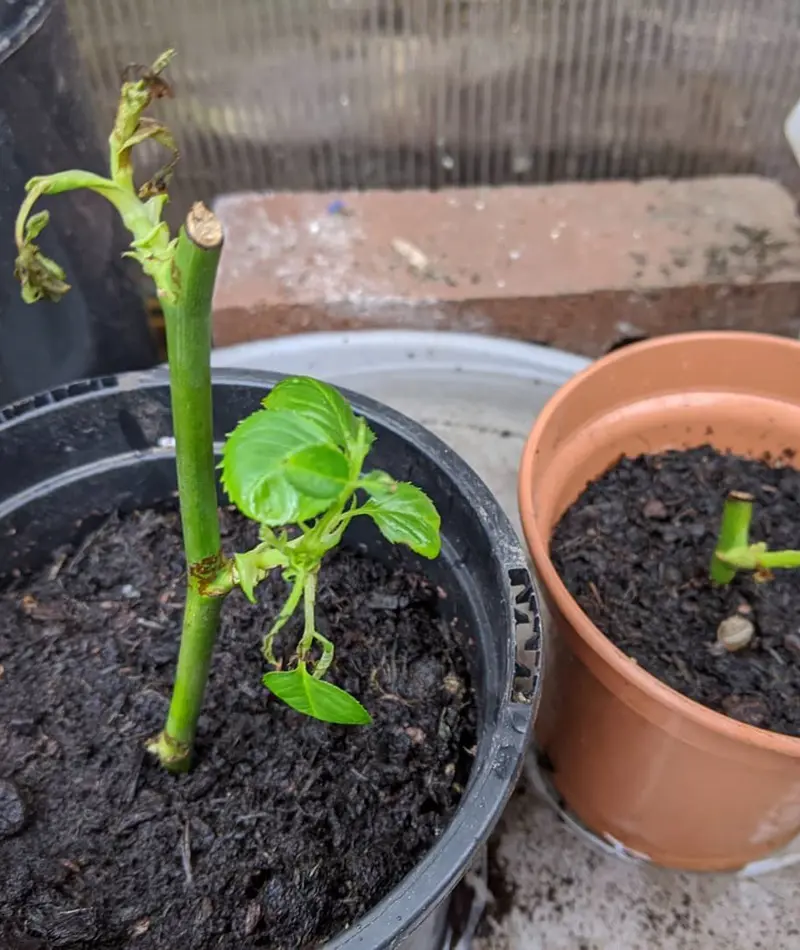
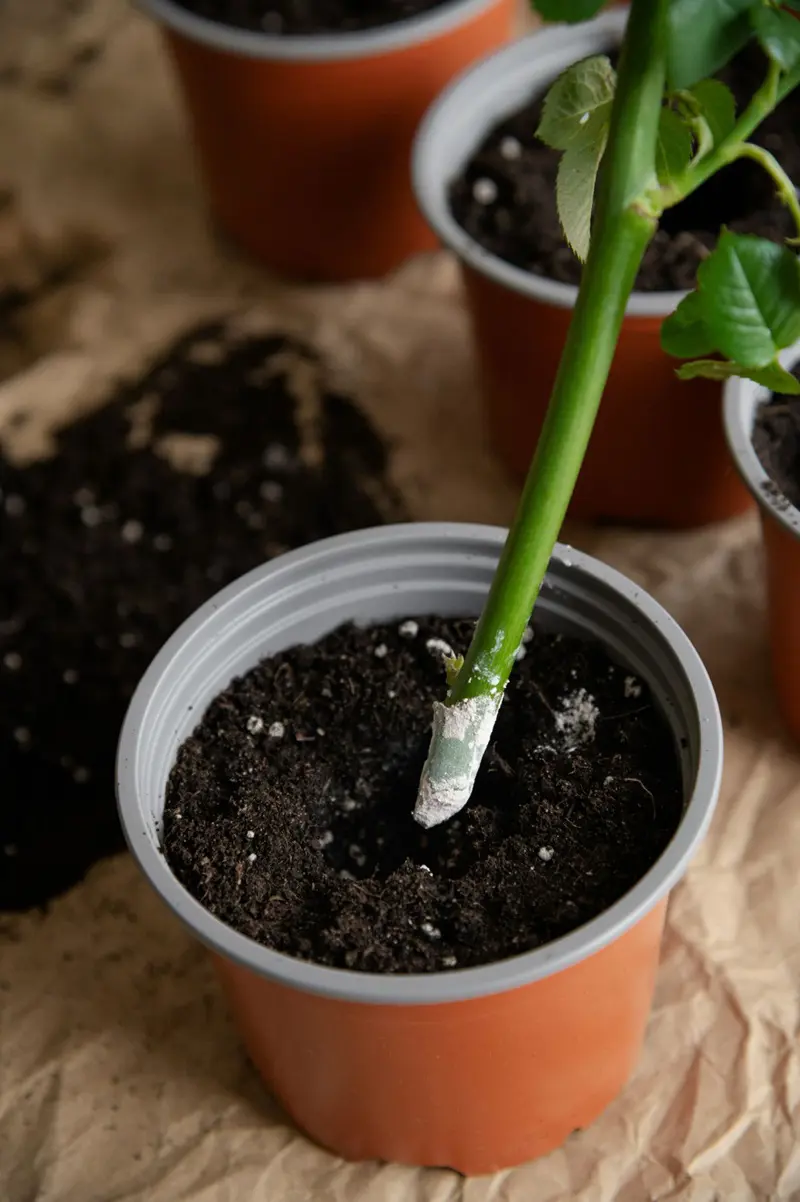
Now is the time to place the cuttings into the soil you prepared freshly, simply insert the wounded end of the cutting into the soil for about a few inches. Give a gentle press around the soil at the base of the stem and lightly water the soil just enough to make it moist.
To ease the insertion of the cutting into the soil, you may use a pencil and create a hole at first. While placing the stem into the soil, you need to make sure at least one node is buried completely.
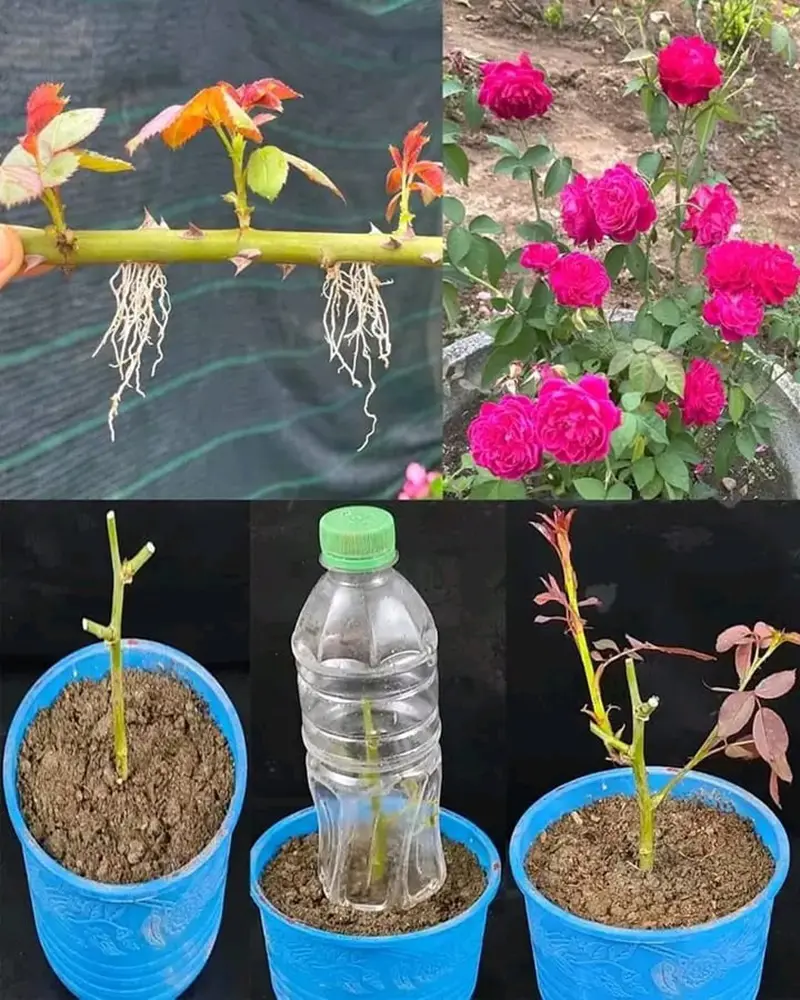
You should know that humidity is crucial while growing roses from the cuttings. Therefore, after placing the stem in the soil, you need to ensure a humid environment around the cutting. To prevent dryness, it has been recommended to add a covering of a plastic bag around the cutting.
While adding an extra layer of plastic bag from outside, remember not to allow the covering to touch the top pair of leaves. Further, you need to place the entire pot where you are growing the rose plant at a location that doesn’t receive direct sunlight. You may choose a spot such as a windowsill, porch, or under the trees around your house.
11. Care for the Cuttings
After you’ve added an extra layer, you need to allow the cutting to develop a root system. But in the meantime, you should check on them regularly. Most importantly, if your plastic bag doesn’t have ventilation, you should poke small holes in it, or you can lift the covering for a short period between 2-3 days.
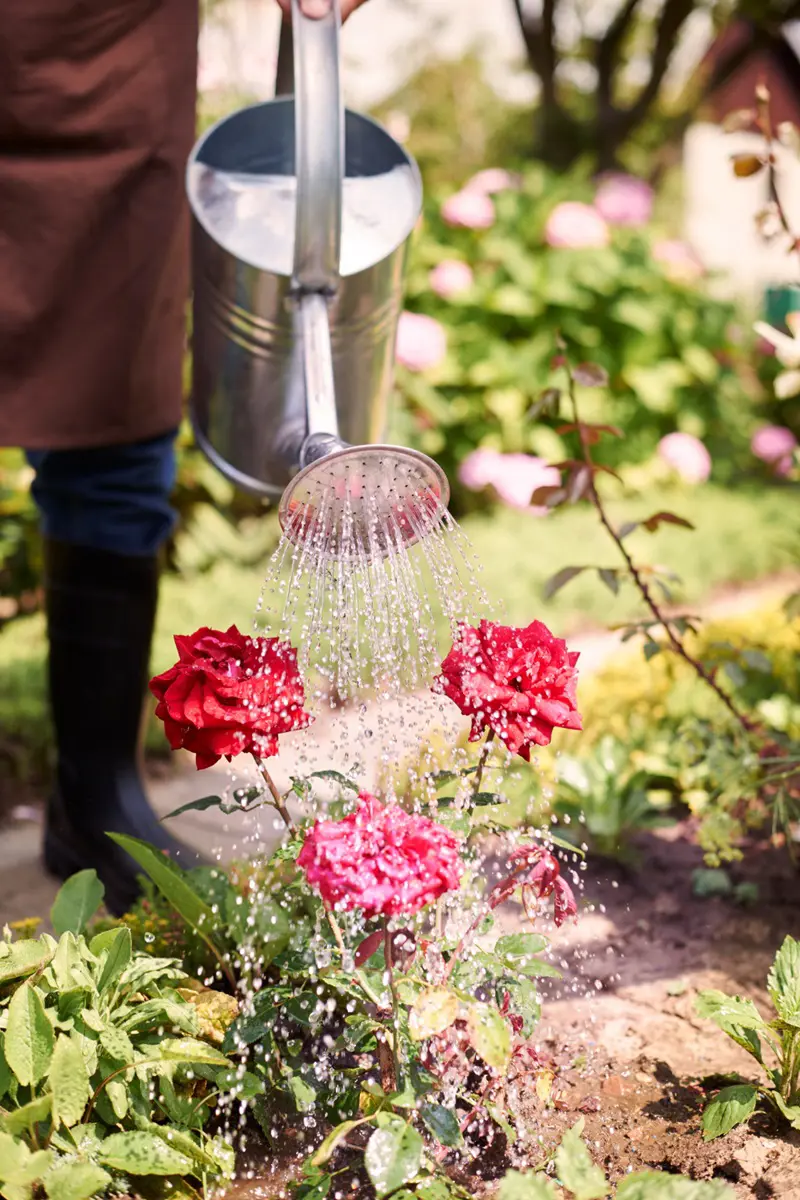
Further, you need to make sure the soil is not completely dry and provide light watering to keep the soil damp. Be mindful not to overwater the soil, or else the cutting will rot and die. If you find any leaves to turn brown or fall off, gently remove them from the cuttings.
12. Remove Covering and Monitor Root Growth
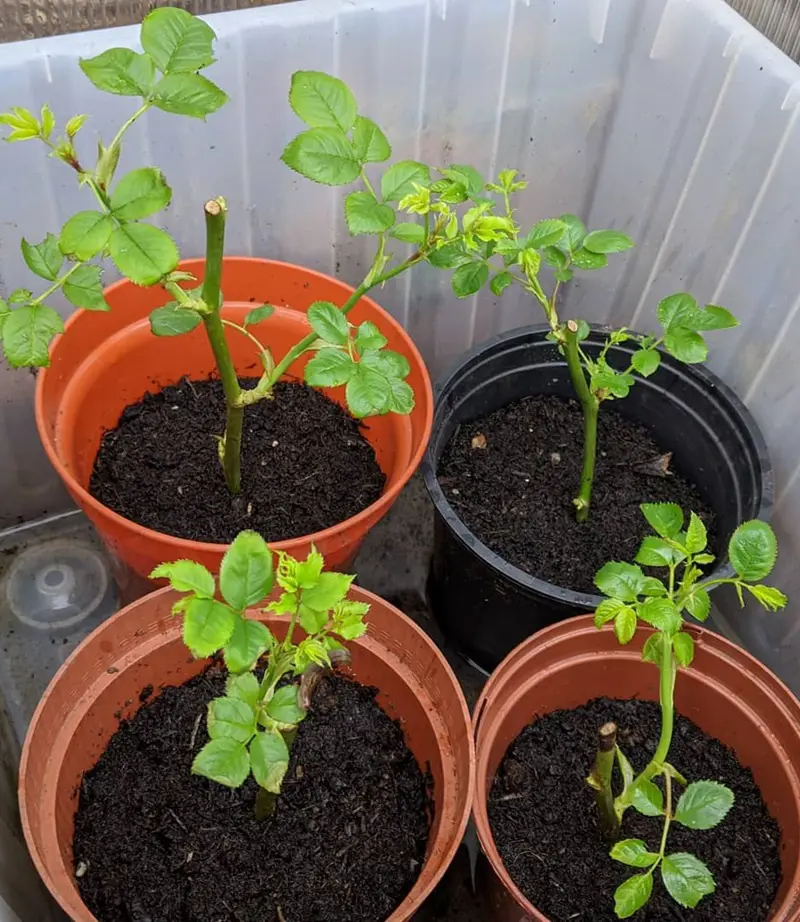
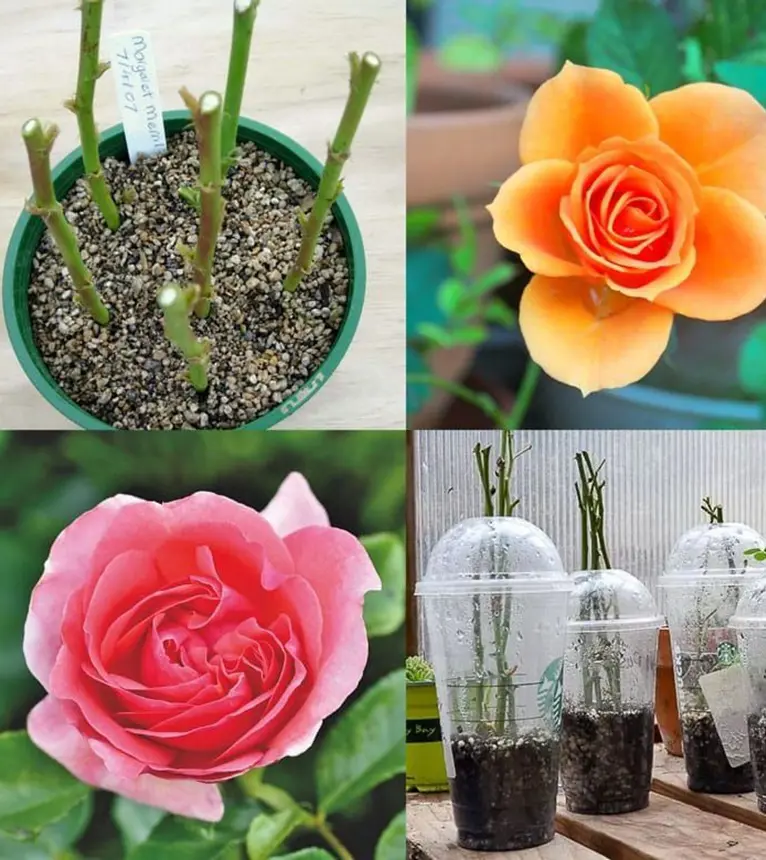
Root formation generally takes a few weeks, therefore growing a rose plant is going to test your consistency and patience level. For a few weeks, you need to constantly maintain the required moisture around the cutting without letting the soil dry, while also watching out for the root development.
After a couple of weeks, or some might even take 5-6 weeks, you may get the sight of a new root. You can gently tug the cutting, if you can feel resistance, the roots are forming and are in the process of developing. Once the roots start to develop, you can remove the covering.
13. Transplant the Cuttings
Once your rose cuttings begin to form new roots, it may take some more months for the root system to fully develop. In general, you need to get prepared for about a year. After the intended period for a well-developed root system, you can transplant roses in your garden.
For the whole year, if you find the chosen pot is not suitable for your rose cuttings, you can also repot roses to a larger pot having the required potting mix along with the fertilizer.
Why Grow Roses From Cuttings Instead of Other Methods?
When planning to grow rose bushes in your garden or around your house, you have several options to go for. The question may arise, why choose to grow roses from cuttings? Well, some specific advantages appeal the garden enthusiasts to choose this method over other prevalent methods.
Replicate the Parent Plant
If you choose to grow roses from the cuttings of the matured parent plant, at the end you will be amazed by the result. The new roses will be the same as the parent plant in all terms. You will get similar blossoms, fragrance, plant size, and even colors.
Therefore, if you are attracted by the neighbor rose plant, do not hesitate to request the cuttings of the same plant, if possible. This way you will have the same rose plant on your property as well after some period if given proper care and maintenance.
Cost-Effective Method
Well, as mentioned earlier, growing roses from the cuttings is the most economical approach. You won't be needing new plants, just a few cuttings and you are all ready to go. This way you save significant money on purchasing new plants from the nursery or floral store.
Faster Results Compared to Seeds
If compared to seed propagation, cuttings of roses are found to develop roots and may offer blooms quite early. Roses from the cuttings, if everything goes as planned, will start to form new roots within a few weeks. Although the roots may take several months to fully develop, root formation will certainly take place way earlier than seed propagation or any other chosen growing method.
While trying to grow a rose from the cuttings, you may experience wilting phenomena. Wilting cuttings simply mean the leaves appear limp or curled up. In some cases, the cutting itself might look droopy. It may have resulted from several causes such as low humidity, excessive sunlight, and under or over-watering.
Therefore, you need to be very careful when it comes to providing balanced humidity, moisture, and sunlight. Make sure to lightly mist the cuttings and provide humidity cover till they start to form roots. Be mindful to keep the cuttings away from the reach of the direct sunlight.
Failure to Root
If you have done all the necessary things to grow a rose plant from the cuttings but the new root is not showing any sign of developing even after several weeks, there may be some problems in the growing medium or the cuttings. If you've chosen weak or poor cuttings or if the prepared soil mix is not good enough, your cuttings may delay forming and developing root systems.
If such a case arises, you need to repeat the process by selecting the right cuttings that are not too soft nor too woody with at least 4-5 leaf nodes. Further, use a well-draining soil mix, and do not forget to apply rooting hormone. Finally, if possible, go for a heat mat so that your soil gets warmed up, encouraging the root-forming phenomena.
Pest Infestations
Another common problem with rose cuttings is pest infestations. If you find the leaves of your rose cuttings to bear tiny holes, or some sort of webs on them, and rose leaves turning yellow, your rose cuttings might be under the attack of pests and fungi inducing rose diseases. Such pests thrive in the moist and damp environments.
In several cases, the rose cuttings are seen as black-brown or pulpy, especially toward the base. This often forces the cuttings to break down from the base. If you have been haphazardly watering your cuttings, or overwatering them, it could be the major cause for such a cutting problem. Further, the use of infected cutting tools or unhealthy soil might make the base of the cuttings go mushy.
Therefore, you need to use clean and sterilized tools while cutting the rose bush and compulsorily avoid overwatering the rose cuttings. Adding more to that, while watering your rose cuttings, you need to take extra care and water only after allowing the top layer of soil to dry.
Slow Growth After Rooting
If you notice your rose cuttings grow rather slowly after rooting, it could be another problem resulting in the slow development of your rose bush. More especially, this case arises after you transplant them. Your rose cuttings might not be getting the required nutrients or might be getting unnecessary exposure to the light.
In such cases, you can use a balanced fertilizer to fulfill the nutrient requirements. Similarly, be very careful with light exposure, your rose cuttings need at least 6 hours of bright but indirect sunlight around them.