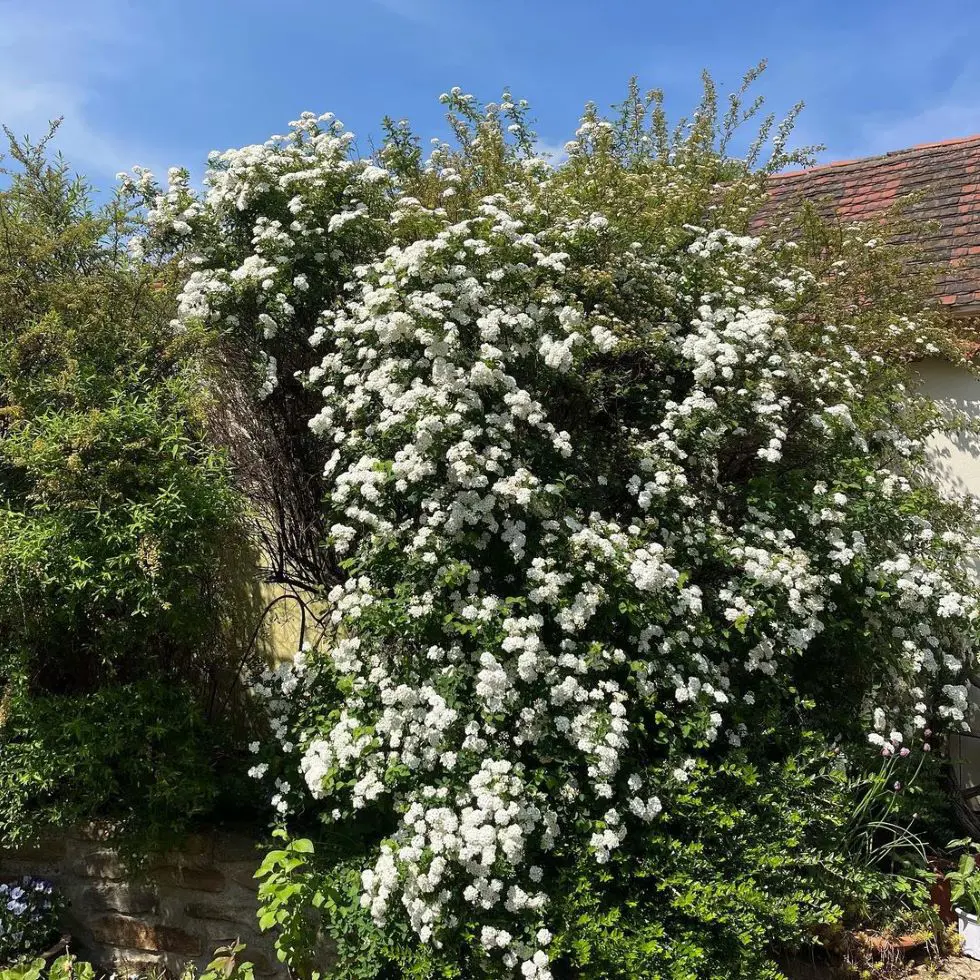
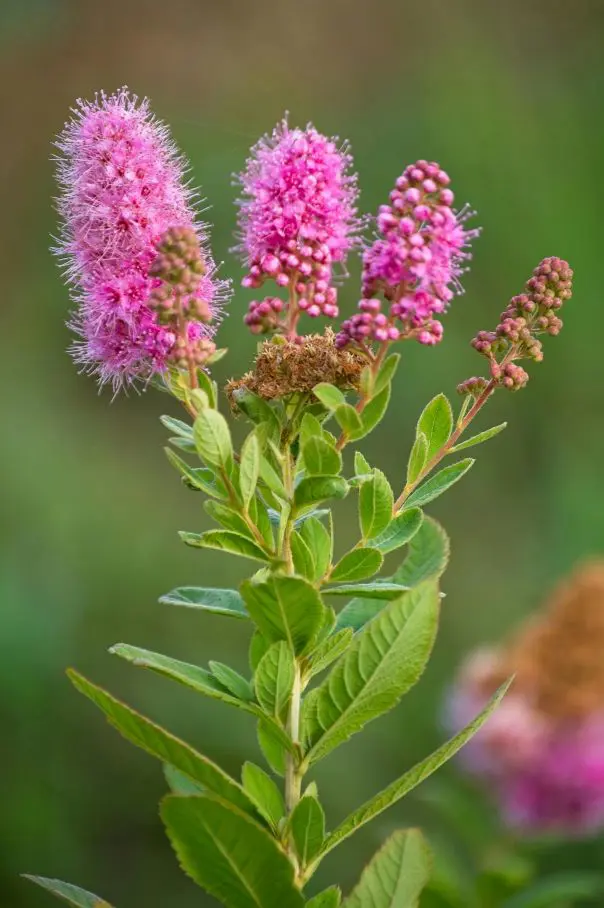
Spirea bushes are beautiful flowering shrubs that come in a variety of shapes, sizes, and colors. They are a popular choice for home gardens because they are relatively low-maintenance and easy to care for.
If you are looking to spruce up your landscape with the low-fuss charm of spirea bushes, our blog unlocks the secrets to cultivating and nurturing spirea bushes, guaranteeing a flourish of vibrant beauty in your garden.
Spirea Shrubs
Spireas hail from temperate regions across the Northern Hemisphere, with a concentration in eastern Asia and North America. They've been documented in cultivation for centuries, with records suggesting their use in China as far back as the Tang Dynasty (618-907 AD).
These beautiful shrubs belong to the genus Spiraea, which falls under the Rosaceae family, the same family as roses and apples.
This classification hints at the ornamental value of spireas, sharing some aesthetic similarities with their more famous cousins. In fact, these shrubs are generally easy-care, requiring minimal pruning and watering once established. This makes them perfect for busy gardeners or those new to horticulture.
Origin
East Asia & North America
Scientific Name
Spiraea (Rosaceae family)
Bloom Time
Spring, Summer, or Both
Flower Color
Pink, White, Purple, Red, Yellow, and Bicolor
Height
1-8 feet tall (depending on variety)
Spread
1-10 feet wide (depending on variety)
Light Preference
Full Sun to Light Shade
Watering Needs
Regular watering, especially in first year.
Soil Preference
Well-drained soil
Fertilizing
Balanced fertilizer in early spring
Pruning
Late winter/early spring
Pests & Diseases
Generally resistant
Garden Uses
Foundation plantings, hedges, borders, container specimens
Additional Benefits
Attracts pollinators, fall foliage interest , low-maintenance, deer resistant
How to Grow Spirea?
The key to thriving spirea bushes begins with proper planting. Ideally, fall is the best time to plant, allowing the root system to establish before the summer heat arrives.
However, early spring is also acceptable. Furthermore, when choosing a location, prioritize well-draining soil and a spot with at least 6 hours of direct sunlight for optimal flowering.
While some varieties can tolerate lighter shade, keep in mind that this may reduce flower production. But if your garden has clay-heavy soils, amending the planting area with compost or composted manure will improve drainage.
• Spirea Bush Planting
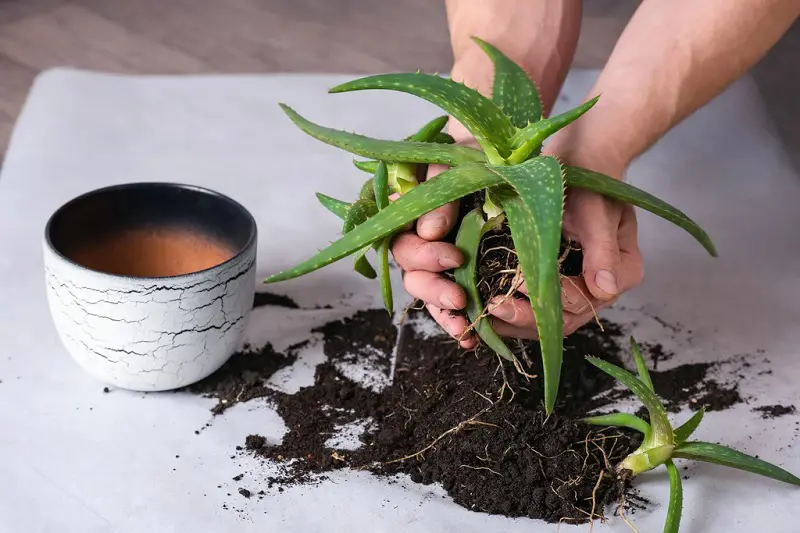
Carefully remove your spirea from its nursery pot. Tilt on its side and gently tap the rim to loosen the root ball. Slide the plant out of the pot, taking care not to damage the stems or leaves.
Then, take a close look at the ball, if it appears tightly compacted or circling around the root ball, gently tease it apart with your fingers. This encourages the roots to spread out and establish themselves more effectively in the surrounding soil.
Next, place your spirea in the hole and adjust its position until the top of the root ball sits at or slightly above the surrounding soil level. It's important not to bury the plant too deeply, as this can suffocate the roots and hinder growth.
Use a level to ensure your spirea is positioned straight. This is especially important for creating a visually pleasing border or hedge.
Dig a planting hole 2-3 times wider than the root ball of your spirea and slightly deeper. Gently loosen any compacted roots around the root ball before placing the plant in the hole.
Ensure the top of the root ball sits at or slightly above soil level. Backfill the hole and tamp down the soil gently to remove air pockets. Water your newly planted spirea thoroughly to settle the soil around the roots.
Finally, apply a 2-3 inch layer of mulch around the base of the plant, keeping it away from the stems. Mulch helps retain moisture, regulate soil temperature, and suppress weeds.
When planting multiple spireas, remember to factor in their mature size. Generally, space them 2-15 feet apart to allow for proper growth.
Filling and Tamping
Use the topsoil you set aside earlier to begin refilling the hole around the spirea. As you fill the hole, gently break up any large clumps of soil to ensure good drainage. Once the hole is about halfway full, use your foot or the blunt end of your shovel to gently tamp down the soil.
This removes air pockets that can prevent proper root-to-soil contact and hinder water absorption. Continue filling and tamping the soil in stages until the hole is completely filled.
Watering
Grab your watering can or hose and give your newly planted spirea a thorough soaking. The goal is to saturate the soil around the root ball. You should see water draining from the bottom of the hole.
This initial deep watering helps settle the soil around the roots and ensures they have the moisture they need to establish themselves.
Mulch Benefits
The mulch layer serves several purposes. It helps retain moisture in the soil, regulates soil temperature by keeping it cooler in summer and warmer in winter, and suppresses weed growth.
How to Care for Spirea?
Once established, spirea bushes are relatively low-maintenance. However, some ongoing care will ensure they continue to thrive. Regular watering is essential, especially during the first year after planting and during hot, dry periods. Once established, spirea's drought tolerance comes into play.
1. Growing Spirea with Fertilizers
Early spring is a critical growth period for spirea bushes. This is when new leaves and flower buds are forming. So, by applying a balanced fertilizer at this time, you're providing the essential nutrients the plant needs to develop strong, healthy growth and produce abundant flowers.
Types of Fertilizer
For spirea bushes, a balanced fertilizer is key. This means a fertilizer with equal parts nitrogen (N), phosphorus (P), and potassium (K). The numbers on the fertilizer packaging will represent this ratio (e.g., 10-10-10, 12-12-12).
Nitrogen promotes healthy leaf growth, phosphorus supports root development and flower formation, and potassium helps with overall plant health and disease resistance.
While a little fertilizer goes a long way, too much can actually harm your spirea bush.
2. Spirea Pruning
Pruning is essential for spirea plant care, as well as maintaining shape and encouraging flowering. For spring-blooming varieties, prune in late winter or early spring before new growth appears.
Summer-blooming varieties can be pruned lightly after flowering to maintain their shape and encourage new growth.
Spirea isn't particularly picky about soil pH, which refers to the acidity or alkalinity of the soil. It can tolerate a range of pH levels from slightly acidic (pH 6.0) to slightly alkaline (pH 7.5).
However, if you're concerned about your soil pH, a simple soil test can be conducted to determine its level. Most garden centers offer soil testing kits or can recommend a testing service.
If a soil test reveals your soil is far outside the preferred pH range, you can take steps to adjust it. However, for spirea, adjusting the pH usually isn't necessary as long as drainage is good. If your soil is heavy clay, add compost, composted manure, or other organic matter to improve drainage and aeration.
These amendments also help add nutrients to the soil. Also, consider planting your spirea in a raised bed if your soil drainage is poor. Raised beds allow you to create a planting area with well-draining soil, ideal for spirea.
Additional Tips for Spirea Bush Care
Deadheading spent flowers (removing them after blooming) can encourage additional blooms in some varieties. Different spirea varieties have varying growth habits. Consider dwarf varieties for smaller spaces or taller varieties for creating a hedge or privacy screen.
By following these steps, you can cultivate beautiful spirea bushes that will bring color and joy to your garden for years to come.
Common Pests, Diseases & Solution
While spirea bushes are known for their resilience, no plant is entirely immune to pests and diseases. Here's a closer look at the occasional challenges spirea bushes might face, along with solutions to keep them healthy and thriving.
Aphids
One potential threat comes from tiny troublemakers called aphids. These soft-bodied insects are common garden pests that feed by sucking sap from the leaves and stems of plants.
Signs of an aphid infestation include curled or distorted leaves, sticky residue on the plant (honeydew secreted by aphids), and yellowing leaves as the plant weakens from sap loss.
Thankfully, there are solutions for aphid control. If the infestation is minor, a strong blast of water from your hose can knock them off the plant. You can also introduce beneficial insects like ladybugs or lacewings, natural predators of aphids, into your garden.
For a more targeted approach, insecticidal soap can be effective.
Remember to always follow the instructions on the product label for proper application and dilution rates to ensure safety and effectiveness.
Another occasional foe is scale. These immobile insects attach themselves to stems and leaves and come in various forms. Symptoms of a scale infestation include black or brown bumps on the plant (the bodies of the scale insects), yellowing leaves due to sap loss, and the presence of sticky honeydew.
To combat scale, horticultural oil sprays applied in late winter before bud break can be very effective. These oils smother the overwintering eggs and adult scales.
For active infestations, insecticidal soap can be used similarly to how it's used for aphid control. In cases of light infestations, you can even try physically removing the scale insects with your fingers or a cotton swab dipped in rubbing alcohol.
Fungus
Finally, powdery mildew, a fungal disease, can also affect spirea bushes. Signs of powdery mildew include a white powdery coating on the leaves and stems, stunted growth as the plant weakens, and leaf distortion.
To prevent powdery mildew, ensure good air circulation around your spirea by avoiding overcrowding plants and pruning to remove any branches that restrict airflow.
If necessary, a fungicide specifically labeled for powdery mildew can be applied, following the instructions on the product label for proper application and safety precautions. Remember, avoiding overhead watering and watering at the base of the plant instead can also help prevent the spread of powdery mildew.
By being observant and taking action upon any signs of these occasional problems, you can keep your spirea bush healthy and ensure it continues to be a source of vibrant beauty in your garden for years to come.
Propagating Spirea
Spirea bushes aren't just a delightful addition to your garden; they're also surprisingly easy to propagate. This means you can create more plants and share their beauty with others, or simply expand the spirea haven in your own garden. There are two popular methods for propagating spirea:
Summertime Softwood Cuttings
If you're looking to propagate spirea in the summertime, the softwood cutting method is ideal. This method works best in mid to late summer when the stems are flexible but not woody. Here's what you'll need to get started:
Sharp pruners or shears
Potting mix
Pots with drainage holes
Rooting hormone (optional)
Transparent plastic bag (optional)
The process is fairly straightforward. First, select healthy, non-flowering stems that are 6-12 inches long. Look for stems that bend easily but snap with a clean break.
Using your pruners, make a clean cut just below a leaf node (the point where a leaf joins the stem). You can remove the bottom few leaves to expose more stems for rooting.
Dipping the cut end of the stem in rooting hormone powder can encourage faster root growth, but it's not essential for spirea. After shaking off any excess powder, plant the cutting in a pot filled with a well-draining potting mix.
Moisten the soil thoroughly and make a hole in the center with your finger. Insert the stem cutting, ensuring at least 2-3 nodes are buried below the soil surface.
To create a humid environment that encourages root growth, you can enclose the pot with a transparent plastic bag. Just remember to poke a few small holes in the bag for air circulation. Place your pot in a location with indirect sunlight and keep the soil consistently moist, but not soggy.
After a few weeks, you should start to see new growth on your spirea cutting. Once the roots are well-established, typically in 4-6 weeks, you can remove the plastic bag (if used) and gradually acclimate the plant to outdoor conditions before transplanting it to its permanent location in the spring.
The hardwood cutting method is another option, and it's best suited for propagating spirea in late winter or early spring before new growth appears. Here's what you'll need:
Sharp pruners or shears
Garden gloves
Saw (optional)
Potting mix
Pots with drainage holes
Sand (optional)
For this method, you'll want to choose mature, woody stems from the previous year's growth. These stems will be thicker and less flexible than those used for softwood cuttings.
Aim for stems 10-12 inches long. Wear gloves to protect your hands from thorns as you make a clean cut with your pruners or shears just above a leaf node. If the stems are very thick, you can use a saw to make the cut.
Come late winter or early spring, before new growth appears, it's time to plant! Remove the cuttings from storage and plant them individually in pots filled with well-draining potting mix.
Bury about one-third of the cutting depth in the soil. Water the pots regularly to keep the soil moist but not soggy, and place them in a location with indirect sunlight. Wait patiently for new growth to appear.
Once the roots are established and new growth is evident, typically in 6-8 weeks, you can gradually acclimate the spirea to outdoor conditions before transplanting it to its permanent location in the spring or early summer.
Types of Spirea
Here are a few of the most commonly grown spireas-
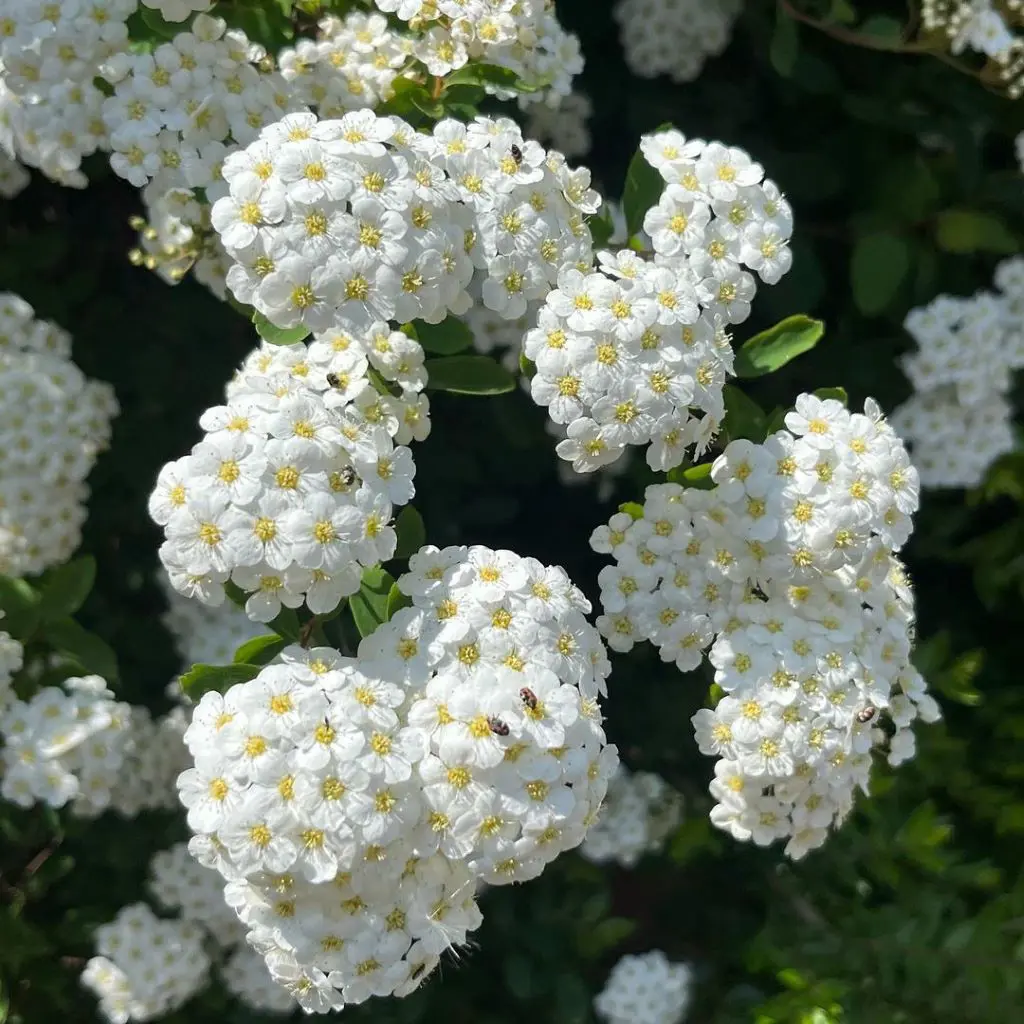
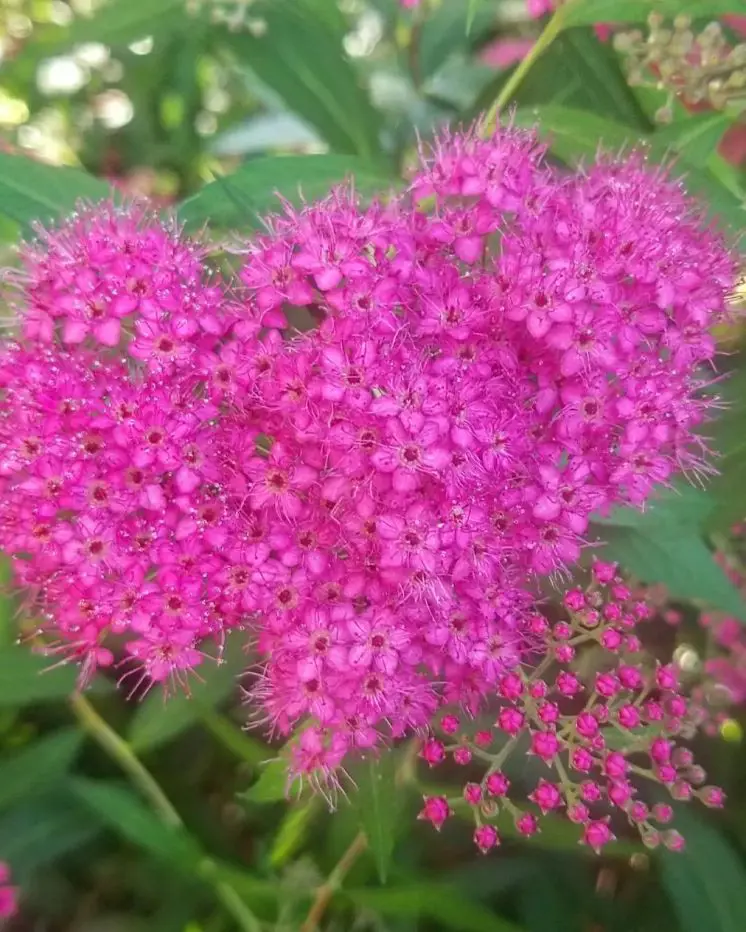
• Japanese spirea (Spiraea japonica): This spirea has the most comprehensive color range, with foliage in shades of green, blue, gold, or chartreuse. Their flowers bloom from late spring into summer in pink, purple, red, or white colors.
• Birchleaf spirea (Spiraea betulifolia): This spirea has a dense mounding habit, white flowers, and toothed birch-like green leaves. Its rich fall color, in shades of red, orange, and purple, is a kaleidoscope.
• Nippon spirea (Spiraea nipponica): Also known as snow mound Nippon spirea, this spirea has an upright cascading habit, snow-white flowers, and blue-green foliage that turns yellow in fall.