Aloe vera is a popular succulent known for its medicinal properties and minimal care requirements. Despite being easy to maintain, Aloe vera does benefit from repotting every couple of years.
Whether your goal is to upsize the pot or split aloe pups, repotting Aloe vera ensures it continues to thrive. This comprehensive guide covers everything you need to know about repotting Aloe vera, including best practices, tips, tricks, and answers to frequently asked questions.
Why Repotting is Important
Aloe Vera plants are known for their hardiness and minimal care requirements, making them a favorite among both novice and experienced gardeners. However, repotting is essential for several reasons:
- Preventing Root Bound: Over time, Aloe Vera roots can become cramped in their pot, restricting growth.
- Refreshing Soil: Fresh soil provides new nutrients essential for the plant's health.
- Encouraging New Growth: Repotting can stimulate the production of new leaves and offshoots (pups).
Repotting Aloe Vera to Upsize a Pot
Aloe vera plants can outgrow their pots relatively quickly, leading to root binding and reduced plant health. Repotting to a larger pot can provide more space for growth, improve nutrient availability, and enhance overall plant health.
When to Upsize the Pot
Signs that your Aloe vera needs a larger pot include:
- Roots growing out of the drainage holes.
- The plant is top-heavy and tipping over.
- Soil dries out too quickly after watering.
- The plant has stopped growing or looks unhealthy.
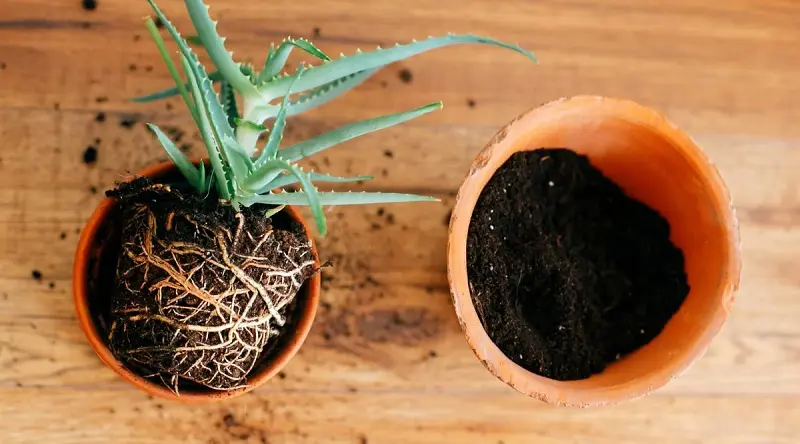
Choosing the Right Pot
When selecting a new pot, consider the following:
- Size: Choose a pot that is 1-2 inches larger in diameter than the current pot.
- Material: Terra cotta pots are ideal as they are breathable and help prevent overwatering.
- Drainage: Ensure the pot has drainage holes to prevent waterlogging.
Steps to Repot
-
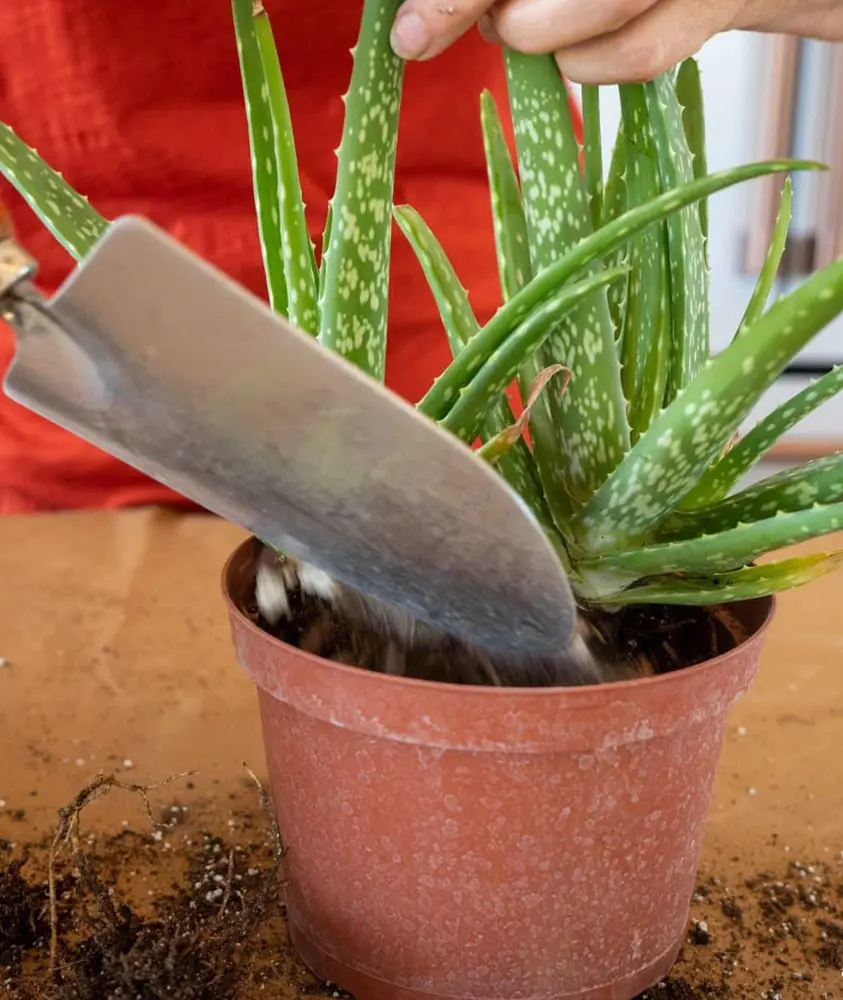
Prepare the New Pot:
- Fill the bottom with a layer of gravel or pebbles to improve drainage.
- Add a well-draining potting mix, such as cactus or succulent soil, up to about one-third of the pot's height.
-
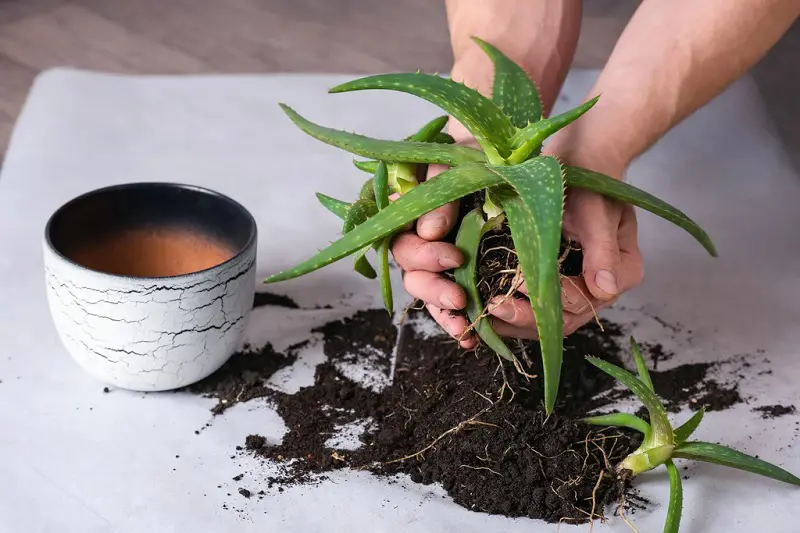
Remove the Aloe Vera:
- Gently tap around the edges of the current pot to loosen the soil.
- Carefully lift the plant out, supporting the base and roots.
-
Examine and Prune the Roots:
- Check for any dead or damaged roots and trim them with clean scissors.
- If the roots are tightly bound, gently loosen them to encourage new growth.
-
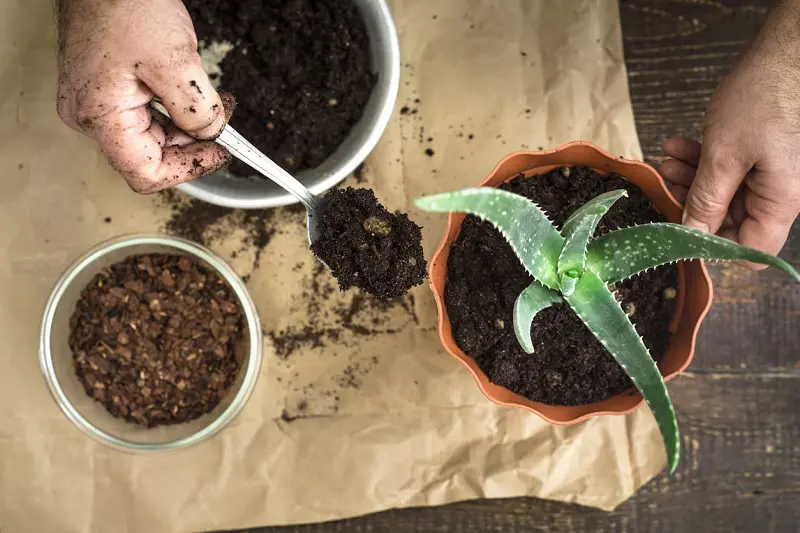
Place in the New Pot:
- Position the Aloe vera in the center of the new pot.
- Fill around the roots with the potting mix, pressing down gently to remove air pockets.
-
Watering:
- Water the plant lightly to settle the soil.
- Allow the soil to dry out completely before the next watering to prevent root rot.
Repotting Aloe Vera to Split Aloe Pups
Aloe vera often produces offsets or "pups" that grow around the base of the parent plant. Splitting these pups is a great way to propagate new plants and give your Aloe vera more room to grow.
When to Split Aloe Pups
Splitting Aloe pups can be done when:
- The pups are at least a few inches tall and have their roots.
- The parent plant looks crowded.
Steps to Split Aloe Pups
-
Prepare Your Supplies:
- A clean knife or pair of scissors.
- Separate pots with well-draining soil for each pup.
-
Remove the Parent Plant:
- Follow the same steps as above to gently remove the Aloe vera from its pot.
-
Separate the Pups:
- Identify the pups and their roots.
- Carefully cut or pull the pups away from the parent plant, ensuring each pup has some roots attached.
-
Plant the Pups:
- Place each pup in its own pot, filling around the roots with potting mix.
- Ensure the pups are at the same soil level as they were before.
-
Watering and Care:
- Water the pups lightly and allow the soil to dry out before the next watering.
- Place the pots in a location with indirect sunlight and gradually introduce them to more light.
Potting Aloe Vera Leaves
Potting broken or detached Aloe vera leaves can propagate new plants successfully. Follow these steps to ensure a successful replanting:
-
Prepare the Pot and Soil: Choose a small pot with drainage holes to prevent waterlogging. Prepare a well-draining soil mixture by combining equal parts of cactus or succulent potting mix with perlite or coarse sand.
-
Create a Trench and Plant the Leaf: Using your fingers or a small tool, create a shallow trench in the prepared soil. Lay the broken Aloe vera leaf horizontally in the trench. While you can bury the leaf completely, leaving it partially exposed tends to yield better results.
-
Lightly Water After 24 Hours: Allow the leaf to sit in the soil undisturbed for 24 hours to allow any wounds to callus over, which helps prevent rotting. After this period, lightly water the soil around the leaf. Ensure the soil is moist but not soggy.
-
Choose an Optimal Location: Place the pot in a bright location with indirect sunlight. Aloe vera thrives in bright, indirect light but can tolerate some direct sun. Avoid placing the pot in extremely hot or cold drafts.
-
Monitor for Growth: Check the leaf periodically for signs of new growth. Typically, new roots will begin to develop within two to three weeks. You may also notice small plantlets (pups) forming around the base of the leaf.
-
Transplanting Pups (Optional): Once the pups have developed roots and are at least a few inches tall, you can transplant them into individual pots using the same 50/50 soil mixture. Handle the pups carefully to avoid damaging their delicate roots.
5 Best Practices for Repotting Aloe Vera
-
Use Well-Draining Soil:
- Aloe vera requires soil that drains well to prevent root rot. A cactus or succulent mix is ideal.
-
Avoid Overwatering:
- Allow the soil to dry out completely between waterings. Aloe vera is drought-tolerant and prefers dry conditions.
-
Provide Adequate Light:
- Place the repotted Aloe vera in a spot with bright, indirect sunlight. Too much direct sunlight can scorch the leaves.
-
Acclimate to New Conditions:
- After repotting, gradually acclimate your Aloe vera to its new environment to reduce stress on the plant.
-
Monitor for Pests and Diseases:
- Check regularly for signs of pests like aphids or diseases such as root rot, and treat promptly if detected.
Give Your Aloes a New Lease of Life
Repotting Aloe vera rejuvenates the plant and provides an opportunity to refresh the soil and ensure optimal growing conditions. Healthy, happy Aloe vera plants can better withstand environmental stressors and are more likely to produce offsets for propagation.
Revitalize the Soil
Over time, soil can become compacted and depleted of nutrients. Repotting allows you to replace old soil with fresh, nutrient-rich soil, giving your plant a boost.
Improve Root Health
Repotting provides a chance to inspect the roots and prune any that are damaged or diseased, promoting healthier growth and reducing the risk of root rot.
Enhance Aesthetic Appeal
A fresh, new pot can enhance the aesthetic appeal of your Aloe vera plant, making it a more attractive addition to your home or garden.
Tips and Tricks
Timing is Everything
- The best time to repot Aloe vera is during the spring or early summer when the plant is actively growing.
Be Gentle
- Handle the plant and its roots with care to avoid damaging them during the repotting process.
Use Clean Tools
- Always use clean, sterilized tools to prevent the introduction of diseases or pests.
Adjust Watering Schedule
- After repotting, adjust your watering schedule based on the new pot and soil conditions. New soil may retain water differently than the old soil.
Fertilize Sparingly
- Aloe vera does not require much fertilizer. If you do choose to fertilize, use a diluted cactus or succulent fertilizer during the growing season.
Tips on Repotting and Maintaining Aloe Vera
- It's a very good idea to wear garden gloves when repotting aloe vera. The spines on these plants aren't just decorative.
- Any gel released through a wound can mix with dirt and create a gooey mess, so this is a task best performed outdoors.
- Some aloe starts may be tall but shallow-rooted. In this case, a wooden support may be necessary for the first couple of months. I often use crossed chopsticks from local restaurants to support medium-sized offshoots.
- For very large plants, I've been known to place stones in the bottom of the pot for better weight distribution.
- With aloe vera, water sparingly.
- Any broken leaves or dislodged pups should be hardened off for at least 24 hours before replanting.
- Although aloe can be maintained in the same pot for years, it's a good idea to report annually or semi-annually.
FAQs About Repotting Aloe Vera
Q: How often should I repot my Aloe Vera?
A: Every 1-2 years, or when you notice the plant is root-bound or not growing well.
Q: Can I repot Aloe Vera in winter?
A: It's best to repot during the growing season (spring to early summer) for optimal recovery and growth.
Q: My Aloe Vera is drooping after repotting. What should I do?
A: Ensure it’s not overwatered and is in a bright location with indirect sunlight. Drooping can be a sign of transplant shock, which should resolve in a few weeks.
Q: Can I use regular potting soil for Aloe Vera?
A: Regular potting soil is not ideal as it retains too much moisture. Use a cactus or succulent mix instead.
Q: What should I do if the roots are rotting?
A: Trim off the rotten parts with sterilized scissors and let the plant dry out for a few days before repotting in fresh, well-draining soil.