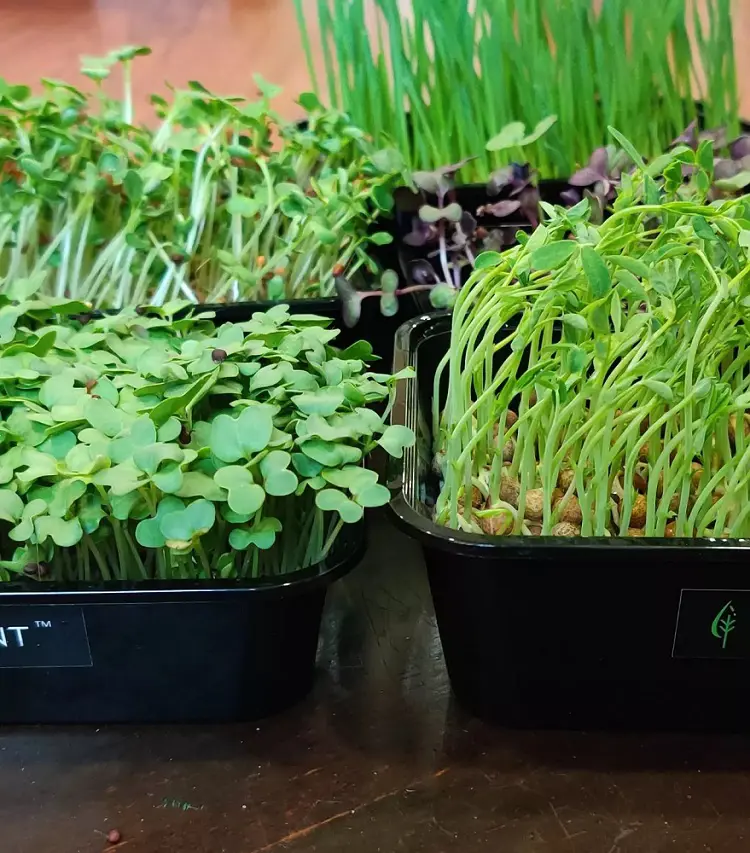
Microgreens have surged in popularity due to their nutrient density, ease of growth, and versatility in the kitchen. These tiny greens pack a punch of flavor and nutrition, making them a favorite among health enthusiasts and gourmet chefs alike.
Growing microgreens is a simple process that can be done in various settings, including indoors, making it accessible to almost anyone. In this article, we will delve into the details of planting and growing microgreens from seed, providing you with step-by-step instructions and essential tips.
Microgreens can be grown year-round, making them a versatile addition to your home gardening repertoire. The best part is that they do not require much space or specific seasons to thrive.
When to Grow
Microgreens are remarkably adaptable to different growing conditions. Since they can be grown indoors, you can start a new batch at any time of the year. However, if you prefer to grow them outdoors, the best time is during the spring and summer months when temperatures are moderate. Avoid extreme heat or cold, as these conditions can affect germination and growth.
Where to Grow
The versatility of microgreens extends to their growing locations. They can be grown:
Indoors: Ideal for year-round cultivation, indoors provides a controlled environment where you can manage light, temperature, and humidity.
Outdoors: If you have a garden or balcony, microgreens can be grown outside during suitable weather conditions.
Greenhouses: These structures offer a protected environment that combines the benefits of both indoor and outdoor growing.
When growing indoors, a sunny windowsill, a grow light setup, or even a simple shelf system with adequate lighting can suffice. Outdoors, choose a spot with partial shade to prevent the delicate seedlings from scorching under intense sunlight.
How To Grow Microgreens: Step-By-Step Instructions
Growing microgreens is a straightforward process that can be broken down into manageable steps. Here’s a detailed guide to get you started.
Step 1: Choose Your Seeds
Select high-quality seeds specifically labeled for microgreens to ensure successful growth. Popular choices include radish, broccoli, sunflower, peas, basil, and cilantro due to their quick germination and flavorful profiles.
Opt for organic seeds when possible, as they are free from chemicals and contaminants. The quality and type of seeds you choose will influence the taste, texture, and nutritional value of your microgreens, so choose varieties that you enjoy and that grow well in your environment.
Step 2: Prepare Your Growing Medium
Microgreens can thrive in soil, soilless mixes, or hydroponic systems. For soil, use organic potting soil or a seed-starting mix, ensuring it is contaminant-free and offers good drainage.
For soilless mediums, coconut coir, peat moss, or vermiculite are excellent choices due to their ability to retain moisture while providing adequate aeration. These mediums support healthy root development and prevent waterlogging, creating an optimal environment for microgreens to flourish.
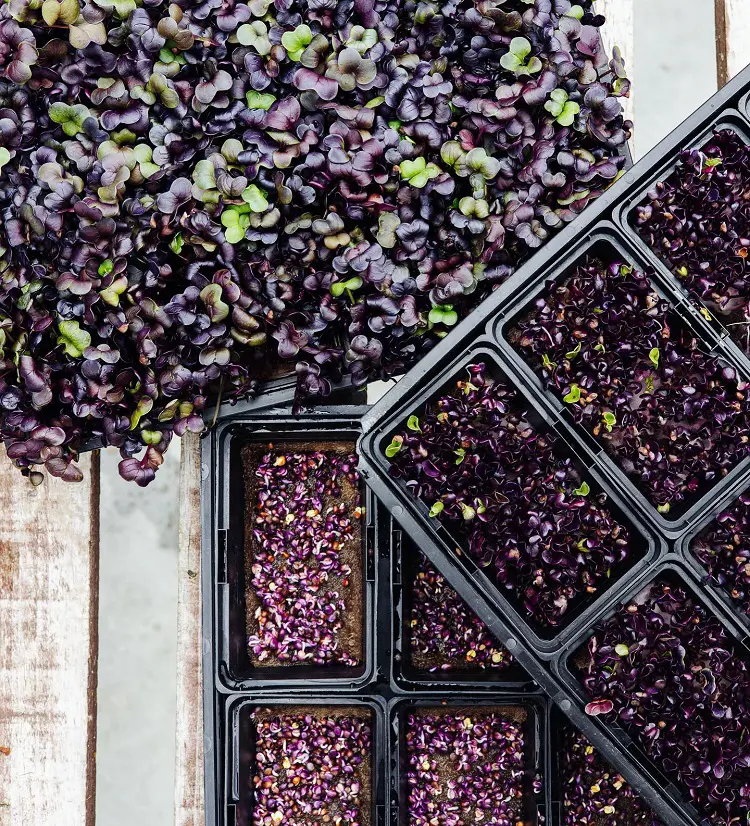
Step 3: Select Your Containers
Choose shallow trays or containers with drainage holes to prevent waterlogging. Seedling trays, baking dishes, or repurposed plastic containers work well, provided they are clean and sterilized to avoid contamination.
The shallow depth of these containers is ideal for microgreens, which have short root systems. Ensure your chosen container allows for easy water drainage, promoting healthy root growth and reducing the risk of mold and other fungal issues that can affect the microgreens.
Step 4: Sow Your Seeds
Begin by filling your container with the selected growing medium to a depth of 1-2 inches. Level and gently press the surface to create an even bed for the seeds. Water the medium until it is evenly moist but not soaked.
Evenly scatter the seeds over the surface, keeping them close but not overcrowded. Lightly press the seeds into the medium and, if necessary, cover them with a thin layer of soil or soilless mix. This ensures good seed-to-soil contact for germination.
Step 5: Watering and Germination
Gently mist the seeds using a spray bottle to keep them moist without disturbing them. Cover the container with a clear plastic lid or plastic wrap to maintain humidity and encourage germination.
Place the container in a warm spot, ideally between 60-75°F (15-24°C). This warm, humid environment is crucial for seed germination. Check daily to ensure the medium remains moist, misting as needed until the seeds sprout, usually within 2-7 days.
Step 6: Provide Light
Once the seeds germinate, remove the cover and move the container to a well-lit area. If natural light is insufficient, use a grow light positioned about 12-18 inches above the seedlings.
Microgreens require at least 4-6 hours of light daily, with grow lights providing consistent, adequate light essential for healthy growth. Ensure the light source is not too close to avoid overheating, which can damage the delicate seedlings.
Step 7: Regular Care
Maintain consistent moisture in the growing medium, avoiding waterlogging by misting the plants or using bottom watering methods. Place the tray in a shallow dish of water to allow the medium to absorb moisture from below.
Ensure good air circulation to prevent mold growth, which can be facilitated by using a small fan. Regularly check the microgreens for any signs of stress or disease, and adjust watering and lighting as needed to keep them healthy and thriving.
Caring for microgreens involves maintaining optimal conditions for their rapid growth. Here are some key considerations:
Light
Microgreens need at least 4-6 hours of light per day. If growing indoors, a south-facing window or supplemental grow lights can provide adequate lighting. LED or fluorescent grow lights are energy-efficient options that can ensure your microgreens receive the light they need.
Watering
Microgreens have shallow roots, so they require consistent moisture. Check the soil or growing medium daily and water as needed. Avoid overwatering, which can lead to root rot and fungal issues. Using a spray bottle to mist the plants can help maintain the right moisture level.
Temperature and Humidity
Maintain a temperature range of 60-75°F (15-24°C) for optimal growth. Microgreens also thrive in moderate humidity levels. Too much humidity can promote mold growth, so ensure proper ventilation.
Thinning
If your microgreens are too densely packed, consider thinning them slightly to improve air circulation and reduce the risk of mold. This can be done by carefully snipping some seedlings at the base with scissors.
Pest Management
Microgreens are generally less susceptible to pests, especially when grown indoors. However, keep an eye out for any signs of pests and take action promptly. Using clean, sterilized containers and soil can help prevent pest issues.
Harvesting microgreens at the right time ensures you get the best flavor and nutritional value. Here’s how to do it:
Timing
Most microgreens are ready to harvest 7-21 days after planting, depending on the variety. Harvest when they are about 1-3 inches tall and have their first set of true leaves (the second set of leaves that appear after the initial seed leaves).
This stage ensures maximum flavor and nutritional value. Regularly monitor their growth, as harvesting too early or too late can affect the taste and texture. Quick-growing varieties like radish or broccoli may be ready sooner, while slower ones like basil might take longer.
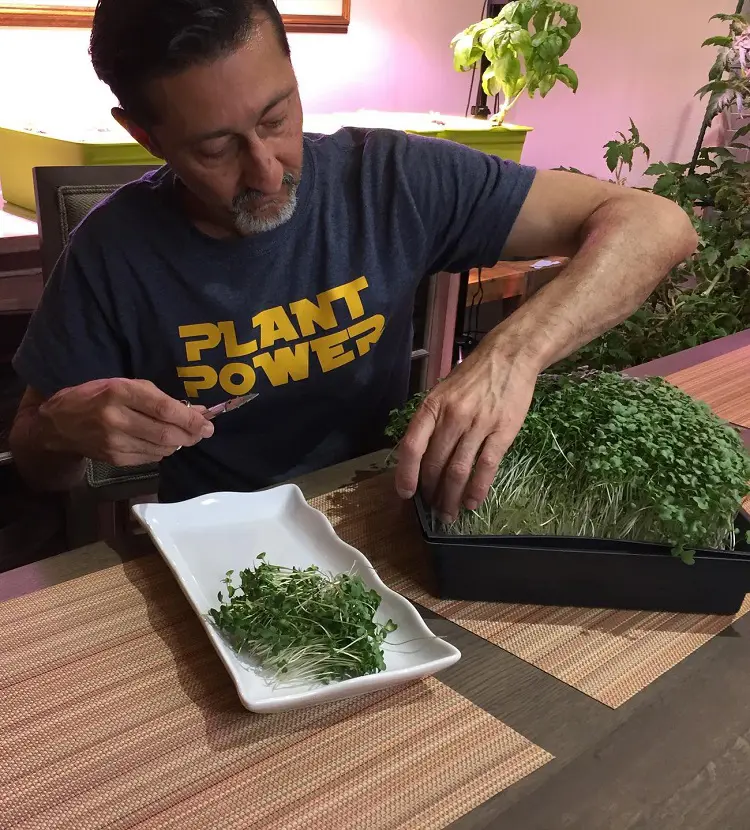
Harvesting Technique
To harvest microgreens, use sharp scissors or a knife to avoid damaging the delicate plants. Cut the microgreens just above the soil line, being careful not to pull up any roots or soil. This method preserves the integrity of the greens and prevents contamination from soil particles.
Gather the harvested greens in a clean container, ready for rinsing. Using sharp tools ensures clean cuts, reducing the risk of bruising and prolonging the freshness of the microgreens.
Rinse and Dry
After harvesting, gently rinse the microgreens in cold water to remove any soil or debris. Handle them carefully to avoid bruising the delicate leaves. Use a salad spinner to dry them quickly and efficiently, or lay them out on paper towels to air dry. Ensuring the microgreens are thoroughly dry before storage prevents mold and extends their shelf life.
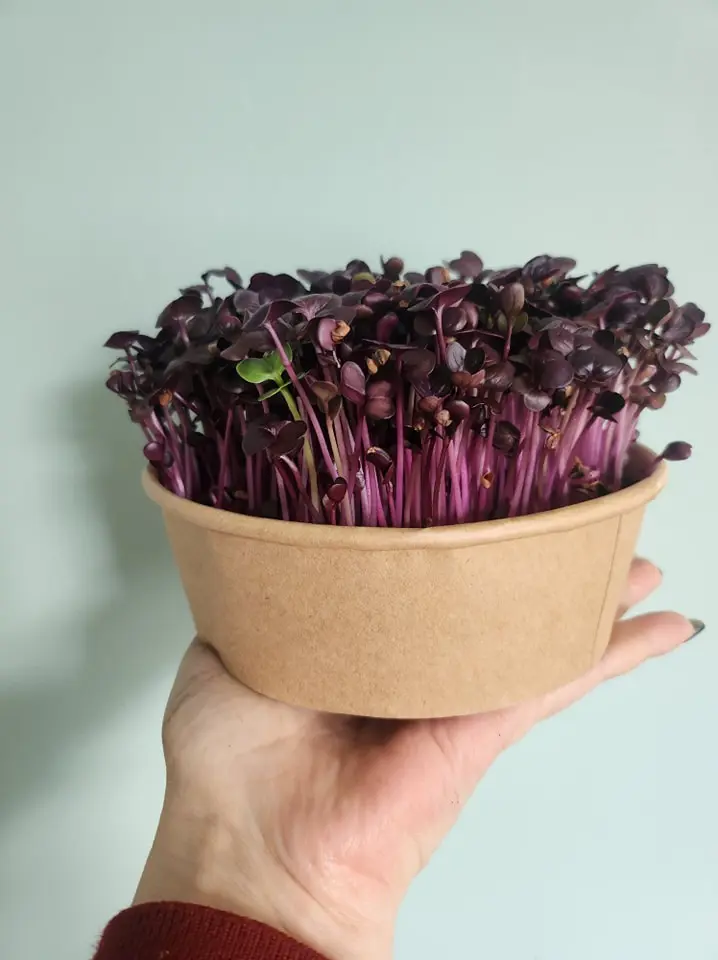
Storage
Store harvested microgreens in an airtight container lined with a paper towel to absorb excess moisture. This setup helps keep them dry and fresh. Place the container in the refrigerator, where the microgreens can stay fresh for up to a week.
Regularly check the paper towel and replace it if it becomes too damp. Proper storage preserves the flavor, texture, and nutritional value of the microgreens, making them ready to use in various dishes whenever needed.
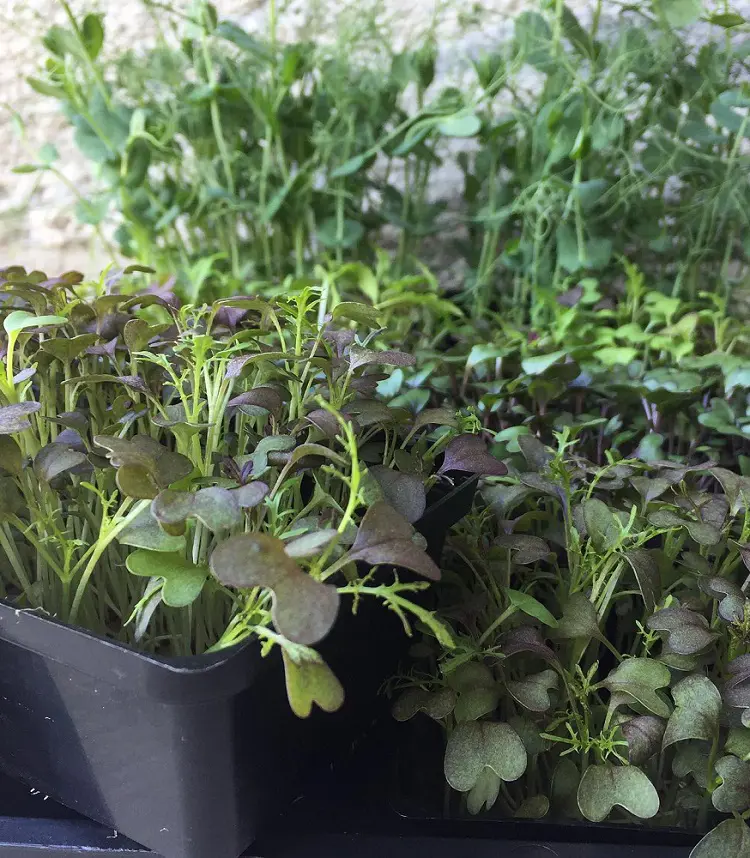
For beginners, starting with the easiest microgreens can lead to a successful and rewarding experience. Here are some of the easiest and most popular microgreens to grow:
1. Radish
Radish microgreens are among the fastest-growing, taking just 7-10 days to harvest. They have a spicy flavor similar to mature radishes, making them a zesty addition to salads, sandwiches, and garnishes. Their quick growth and vibrant green color make them ideal for beginners.
2. Broccoli
Broccoli microgreens are nutrient-dense and boast a mild, slightly sweet taste. They typically take 10-14 days to grow and are rich in vitamins and antioxidants. These microgreens are perfect for adding a nutritional boost to smoothies, salads, and sandwiches.
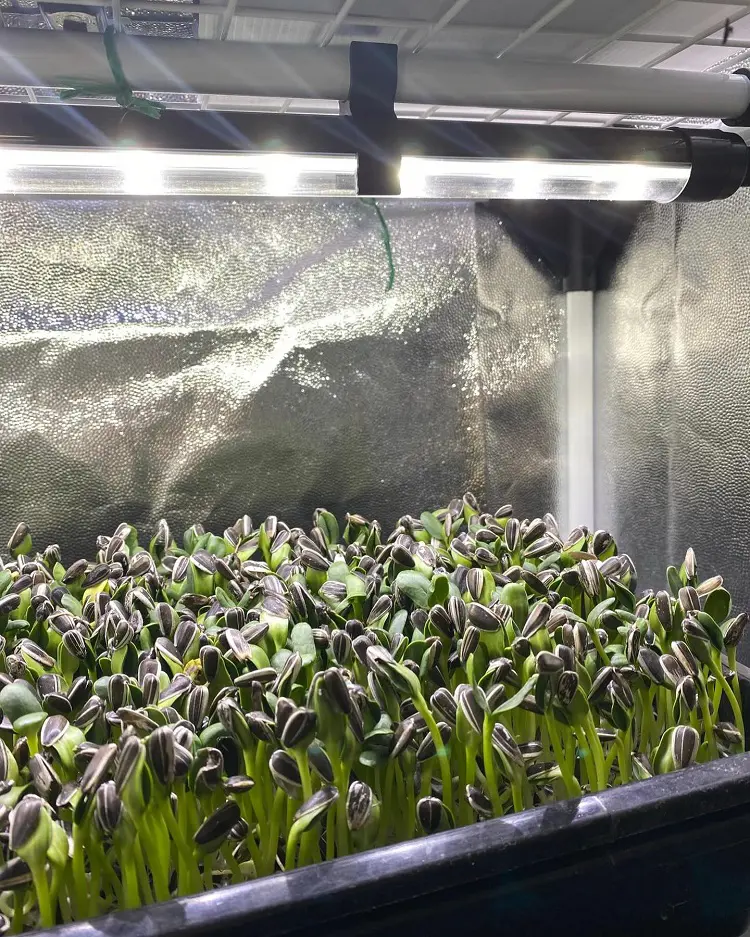
3. Sunflower
Sunflower microgreens are larger than most and have a nutty, slightly sweet flavor. They take about 12-14 days to grow and are known for their crunchy texture. Ideal for adding to salads and sandwiches, sunflower microgreens are also a great source of protein.
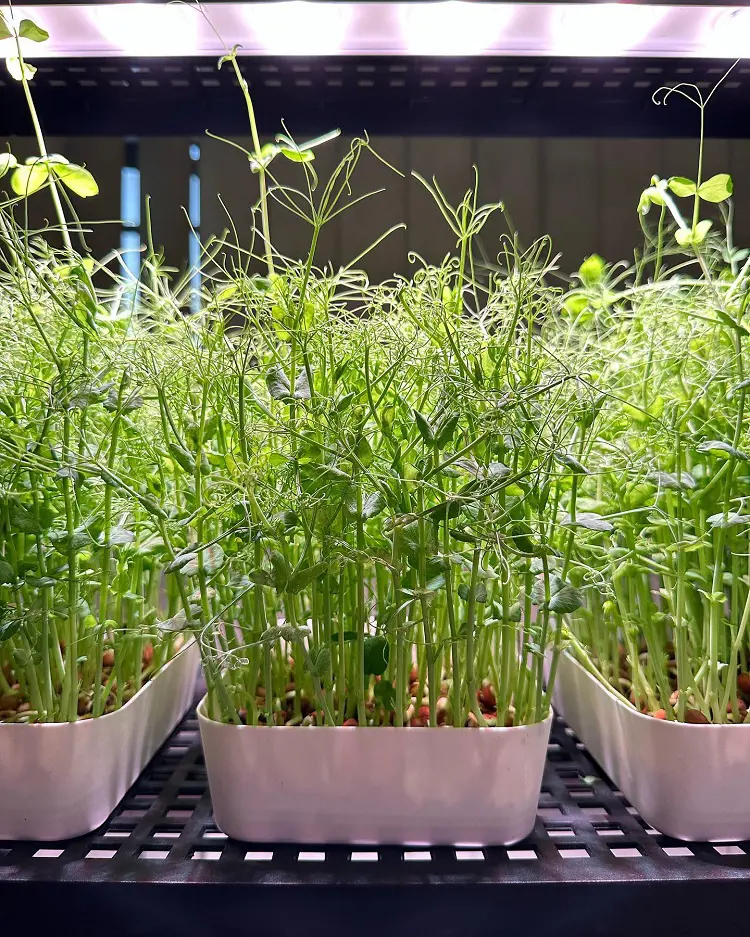
4. Peas
Pea shoots are sweet, crunchy, and ready to harvest in 10-14 days. Their tender texture and pleasant taste make them a popular choice for salads, stir-fries, and garnishes. Pea microgreens are also high in vitamins A, C, and folic acid.
5. Basil
Basil microgreens have a strong, aromatic flavor similar to mature basil leaves. They take around 10-14 days to grow and are perfect for adding to Italian dishes, pestos, and salads. Basil microgreens are also rich in vitamins A, C, and K.
6. Cilantro
Cilantro microgreens are slower to grow, taking 14-21 days, but their strong, fresh flavor is worth the wait. These microgreens add a burst of flavor to tacos, soups, and salads. These microgreens are also known for their detoxifying properties and are rich in antioxidants.
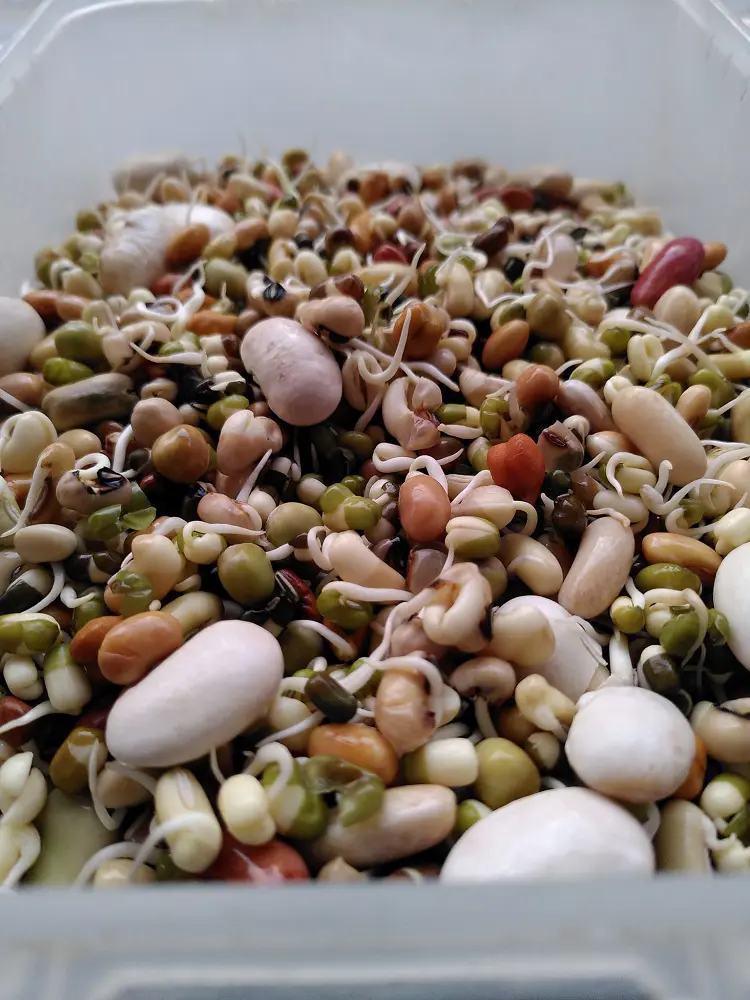
Understanding the difference between microgreens and sprouts can help you choose the right method for your needs.
Growth Medium
Microgreens are grown in soil or soilless mediums such as coconut coir, peat moss, or vermiculite. They are planted in shallow containers and harvested above the soil line, leaving the roots and growing medium behind. This method allows for more substantial growth and leaf development.
Sprouts are grown without soil, typically in water or jars. The seeds are soaked, rinsed, and drained regularly until they germinate and produce shoots. Both the seed and the young shoot are consumed, making the process simpler and quicker than growing microgreens.
Growth Time
Microgreens are typically harvested 7-21 days after planting, depending on the variety. They are grown until the first set of true leaves (second leaves) appears, allowing for more developed flavors and nutritional content. This longer growth period compared to sprouts provides a greater variety of textures and flavors.
Sprouts are ready to eat much faster, usually within 2-7 days. The germination process is quick because they are harvested at the early shoot stage before the leaves develop. This makes sprouts an excellent option for those seeking rapid results and a quick source of fresh greens.
Nutritional Content
Microgreens have a higher concentration of vitamins, minerals, and antioxidants compared to sprouts. They are packed with nutrients such as vitamin C, vitamin K, and beta-carotene, providing significant health benefits. The extended growth period allows microgreens to develop more complex nutritional profiles, making them a potent addition to any diet.
Sprouts are also nutritious but have different nutrient profiles. They are rich in protein, enzymes, and certain vitamins like B vitamins. While not as nutrient-dense as microgreens, sprouts still offer substantial health benefits and are a good source of quick energy and easy-to-digest nutrients.
Taste and Texture
Microgreens have a more developed flavor and a crisp texture. They often taste similar to their mature counterparts but with a more intense flavor, making them ideal for garnishes, salads, and culinary uses. The variety of flavors and textures available in microgreens can enhance dishes and provide culinary versatility.
Sprouts have a milder flavor and a tender, crunchy texture. Their taste is often described as fresh and slightly sweet, making them suitable for sandwiches, salads, and smoothies. The simplicity of sprouts' flavors allows them to blend easily into various dishes without overpowering other ingredients.
Growing microgreens indoors is not only possible but also highly recommended for those with limited outdoor space or harsh climates. Here’s a beginner-friendly guide to growing microgreens indoors.
Growing Microgreens Indoors for Beginners
Select a well-lit area, such as a windowsill, kitchen counter, or under lights.
You’ll need trays, a growing medium, seeds, a spray bottle, and a light source.
Fill the trays with your chosen growing medium and moisten it.
Evenly scatter the seeds over the surface and cover them lightly with soil or leave them uncovered, depending on the seed type.
Mist the seeds and cover the tray to maintain humidity.
Place the tray in a bright location or under grow lights once the seeds germinate.
Keep the growing medium moist, provide adequate light, and ensure good air circulation.
Benefits of Growing Indoors
Indoor microgreen gardening allows for year-round development that is not influenced by seasonal variations. It makes it possible to create a regulated atmosphere with easily controlled humidity, light, and temperature, guaranteeing ideal growing conditions.
It also saves a lot of room, which makes it perfect for apartments and compact locations where you can still enjoy fresh microgreens.
Growing microgreens without soil, or hydroponically, is a clean and efficient method. Here’s how to do it:
Materials Needed
To grow microgreens hydroponically, you'll need a hydroponic growing tray with a mesh bottom for drainage, a hydroponic mat like coconut coir or hemp for the growing medium, seeds suitable for hydroponic growth, and a watering system such as a spray bottle or misting system to keep the seeds moist.
Step-by-Step Hydroponic Growing Guide
Place the growing mat in the hydroponic tray.
Spray the mat with water until it is evenly moist.
Scatter the seeds evenly over the mat.
Cover the tray with a lid or plastic wrap to maintain humidity.
Once seeds germinate, remove the cover and place the tray under grow lights or in a bright area.
Keep the mat consistently moist by misting it regularly.
Ensure good light and air circulation to prevent mold growth.
Advantages of Hydroponic Growing
Hydroponic growing offers several advantages: it's clean and soil-free, reducing mess and the risk of contamination. It's also efficient in space use, making it ideal for small indoor setups.
Additionally, hydroponic systems conserve water, using significantly less compared to traditional soil-based methods, making them an environmentally friendly option for growing microgreens.