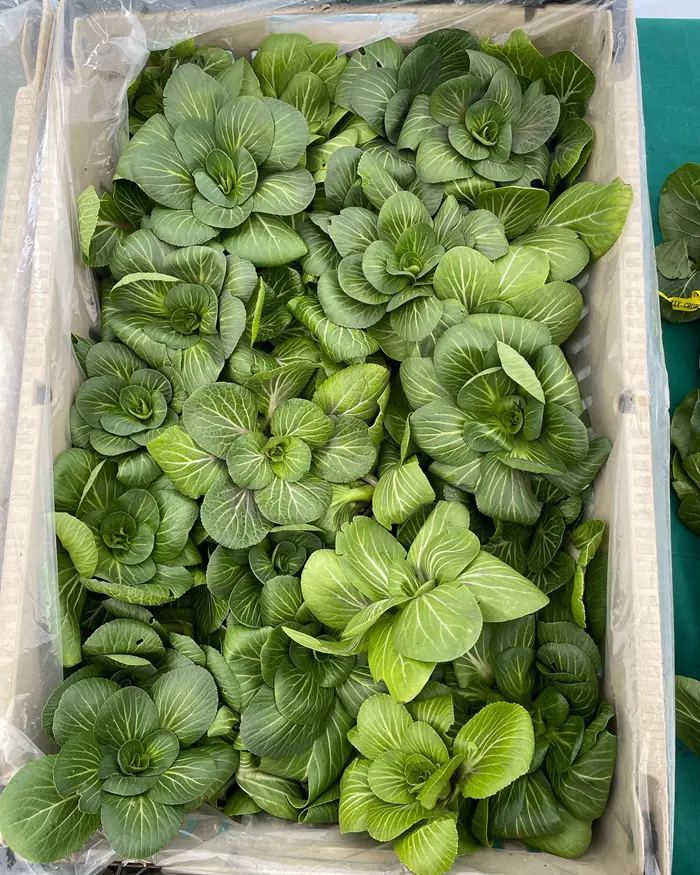
Bok choy is an Asian green vegetable that is regarded as a fast-growing and rewarding addition to any garden. Its crisp leaves and tender stalks are packed with nutrients. They are popular in the grocery market as baby bok choy.
Whether you're a seasoned gardener or a beginner, growing bok choy is relatively easy. With the right conditions and care, you may enjoy a homegrown bok choy in no time. This guide can help you through the process from planting to harvest.
Where & When To Plant Bok Choy
To achieve the dream of a healthy Bok Choy in your garden, you need to understand the basics of cultivating these beautiful plants. The success of creating a perfect Bok Choy depends on your knowledge of when and where to plant them.
Here are some of the factors that you need to know before planting a Bok Choy in your garden:
Light
Bok choy thrives in full sun but can tolerate partial shade, particularly in warmer climates. It should generally receive at least 4-6 hours of direct sunlight every day. In areas with intense heat, partial shade may prevent bolting, which occurs when the plant flowers prematurely and becomes bitter.
If growing bok choy indoors or in containers, you should place it near a south-facing window for sufficient light. Using grow lights can supplement natural light during shorter days or in areas with limited sunlight.
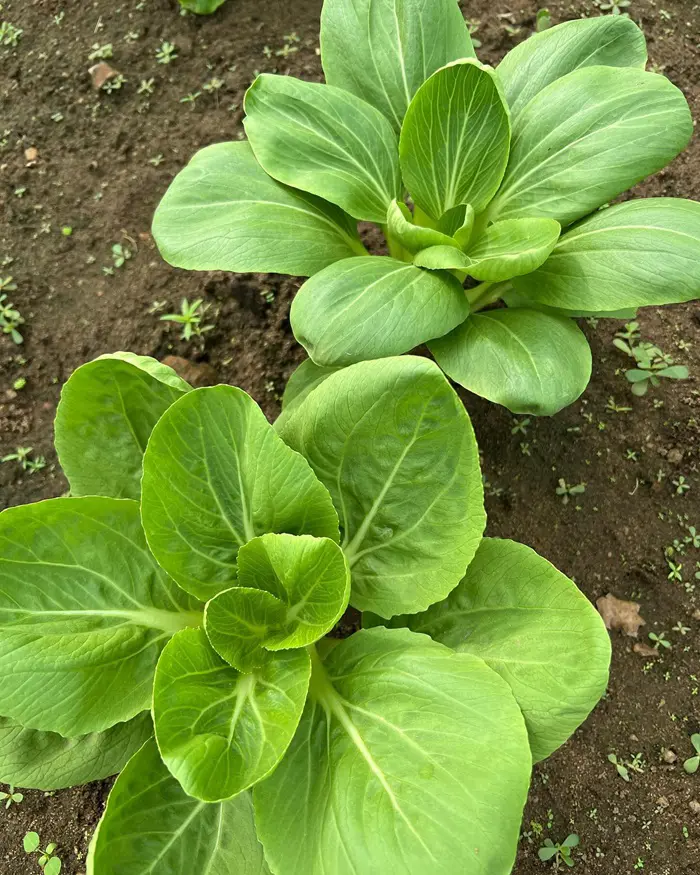
Spacing
Spacing is necessary when planting bok choy to ensure healthy growth and minimize competition for resources. For optimal development, you should space bok choy plants 6 to 8 inches apart within rows. This allows sufficient room for each plant to expand without crowding.
Rows should be spaced about 18 to 24 inches apart to facilitate proper air circulation and ease of access for maintenance. Overcrowding might lead to smaller, less vigorous plants and increased susceptibility to fungal infections and other problems.
Soil
Bok choy thrives best in well-draining, fertile soil that has a neutral pH and is rich in organic matter. Ensure the soil retains moisture but does not become waterlogged, since bok choy prefers consistent moisture.
Raised beds or well-tilled garden plots can help improve drainage and root development. Consistent soil testing could help maintain the ideal pH and nutrient levels. This will contribute to a robust and healthy plant throughout the growing season.
Planting Time
Bok choy thrives in cool weather, making it ideal for planting in early spring or late summer. For a spring harvest, sow seeds outdoors 2-3 weeks before the last expected frost. Meanwhile, you can also plant the seeds 6-8 weeks before the first expected frost for a fall harvest.
This plant thrives best when daytime temperatures range between 55 F and 75 F. Succession planting every 2 weeks could offer a continuous harvest. Make sure the soil is well-drained, fertile, and rich in organic matter. Keeping the plant consistently moist may encourage healthy growth.
There are many ways to learn about how to plant Bok Choy in your home. Understanding these methods is essential to grow and care for them. Growing them from seeds is a traditional (yet common) way.
Here are the steps you need to follow to grow Bok Choy with the help of a seed in a beautiful pot:
Step 1: Obtain Fresh Seed
When starting your Bok Choy growing journey, the first crucial step is to gain fresh seeds. Fresh ones feature a higher germination rate, ensuring that more of them will sprout and grow into healthy plants.
You can buy fresh Bok Choy seeds from a reputable garden center, nursery, or online supplier. Seek for varieties that are suited to your climate and growing conditions. You should also check the packaged date to not receive any seeds that have been stored for a long time.
Step 2: Prepare the Potting Mix
The next step is to prepare a suitable potting mix. Bok Choy thrives in well-draining soil that is rich in organic matter. You can create an ideal potting mix by combining equal parts of garden soil, compost, and perlite.
This mixture offers good drainage while providing the nutrients required for healthy plant growth. If you prefer a simpler option, you can use a high-quality commercial potting mix designed for vegetables.
Step 3: Prepare the Pots
Selecting the right pots is integral for growing Bok Choy successfully. Opt for pots that are at least 6 to 8 inches deep to accommodate the plant’s root system nicely. The pots must have good drainage holes at the bottom to prevent the occurrence of root rot.
Clean the pots properly before use to get rid of any contaminants. If you're using previously used pots, sterilize them by soaking them in a solution of one part bleach to nine parts water for about 10 minutes, then rinse well.
Step 4: Fill the Pots
After your potting mix and pots are ready, you need to fill the pots. Fill each pot with the potting mix, leaving about an inch of space at the top to allow for watering. Press down the soil gently to remove any air pockets.
Once the pots are filled, you need to water the soil lightly to ensure it's evenly moist. Your pots are now ready for planting the Bok Choy seeds.
Step 5: Plant the Seeds
Plant the bok choy seeds about 1/4 inch deep in the soil. You should space them evenly to give each plant enough room to grow. If planting multiple seeds in one pot, you can thin them out later to avoid overcrowding.
Cover the seeds lightly with soil and press gently. Each pot must be labeled with the planting date to keep track of germination times. Water the soil lightly after planting to settle the seeds.
Step 6: Create a Humid Environment
Maintain humidity around the seeds to encourage germination. Cover the pots with plastic wrap to trap moisture. There should be small ventilation holes to prevent mold growth.
Remove the cover once the seeds germinate to allow airflow and reduce the risk of fungal diseases. The soil has to be moist but not soggy during this timeframe.
Step 7: Place in a Sunny Location
Place the pots in a location where they will receive at least 6 hours of sunlight every day. Bok choy thrives in full sun, but it can also tolerate partial shade.
If growing indoors, place the pots near a south-facing window. Rotate the pots frequently to ensure even light distribution and prevent the plants from leaning toward the light source.
Step 8: Maintain Moisture
Keep the soil moist as the bok choy grows to avoid drying out and waterlogging. Water the plants at the base to reduce the risk of fungal diseases.
Use a watering can with a fine rose to deliver water gently. Monitor the plants regularly for signs of stress and adjust watering as needed.
After you have planted your Bok Choy, you shouldn't;t sit idle and expect the plant to grow properly. Caring for them is an integral element of your plant's healthy growth process.
Here are some of the tips you need to understand before you embark on your Bok Choy's caring journey:
Growth Habit
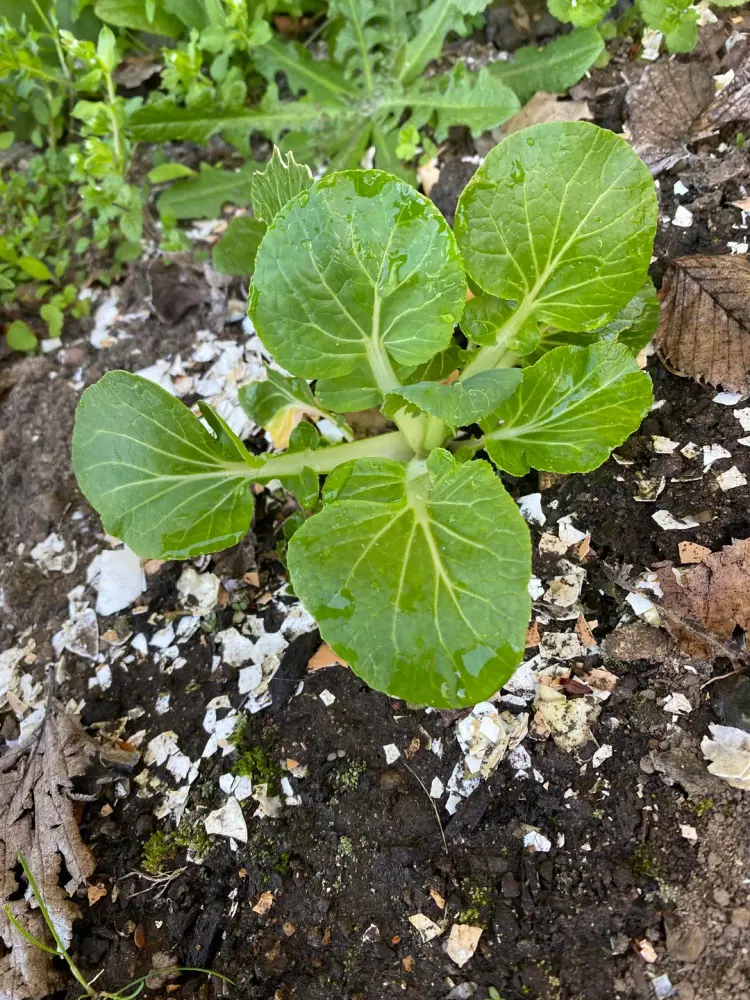
Bok choy has a distinct growth habit characterized by its rosette of smooth, dark green leaves and thick, white stems. This vegetable grows upright and can reach heights of 12 to 24 inches, depending on the variety.
The leaves form loosely around a central cluster, creating an open head. Bok choy prefers full sun but can tolerate partial shade. They also thrive in well-drained, fertile soil with consistent moisture.
Watering
It thrives with consistent moisture, so it's crucial to water it regularly. Ensure the soil remains evenly moist but not waterlogged, as excessive water can lead to root rot. During dry spells, you can increase the watering frequency to prevent the plants from wilting.
Aim to water the plants early in the morning to reduce evaporation and allow leaves to dry by evening, minimizing the risk of fungal diseases. Utilizing a soaker hose or drip irrigation system is great for efficient watering.
Fertilizing
Fertilization can enrich your plant and aid in its optimal growth. Begin by placing compost or well-rotted manure in the soil before planting. Once the plants are established, you can employ a balanced fertilizer every four weeks.
Apply the fertilizer according to package instructions to ensure even distribution. Water the plants after fertilizing to help nutrients reach the roots. Do not over-fertilize since excessive nitrogen can lead to lush foliage but poor head formation.
Mulching
This is an essential thing required for Bok Choy care. It helps retain soil moisture and suppresses weeds. You can apply a layer of organic mulch (straw or shredded leaves) around the base of the plants. It is vital to ensure it’s about 2-3 inches thick.
Mulch gradually decomposes and adds nutrients to the soil, improving its structure. Frequently checking and replenishing the mulch can keep your plant healthy and thriving throughout its growth cycle.
Pests and Diseases
When caring for Bok Choy, it's crucial to be aware of common pests and diseases. Aphids, cabbage worms, and flea beetles can destroy the leaves, causing discoloration and holes. Inspect your plants and use insecticidal soap to control infestations.
Bok choy is susceptible to diseases like downy mildew and black rot. To prevent these issues, offer good air circulation and avoid overhead watering. Get rid of any affected leaves quickly and practice crop rotation to decrease the risk of soil-borne diseases.
As bok choy approaches the end of its growing season, end-of-season care is crucial for ensuring healthy growth and overall maintenance. Without proper care during this time, your plant could suffer from winter or harsh conditions.
Below are some of the caring tips you can follow to have a healthy Bok Choy year-around:
Pruning
Bok Chou doesn't need extensive pruning since you could eat them as a veggie. However, you can conduct this activity to maintain plant health and optimize yield. You need a sharp pruner/knife that is clean and sterilized to cut the plant parts safely.
As the plant matures and begins to flower, it's crucial to remove the old leaves and any flowering stalks. This helps redirect energy to the remaining foliage and improves overall plant health. Pruning should be done during cooler parts of the day to minimize the plant's stress and promote faster recovery.
How to Prune
Analyze Plant Condition - Check the bok choy plants for any signs of bolting, disease, or pest damage.
Remove Dead or Diseased Leaves - It is vital to cut away any yellowing, wilting, or damaged leaves to prevent disease spread.
Trim Overly Large Leaves - Prune excessively large leaves to improve air circulation and reduce the risk of fungal infections.
Remove Flower Stalks - If the plants have started to bolt, you can get rid of any flower stalks to redirect the plant's energy away from seed production.
Clean Up Debris - Don't forget to collect and dispose of any fallen leaves or plant debris to decrease pest and disease problems.
Prune for shape - If you want a desired shape in your Bok Choy, you can conduct prune the plant.
Reduce Watering
As the growing season winds down, you can reduce watering as part of bok choy's end-of-season care. Bok choy requires consistent moisture to thrive, but overwatering can lead to root rot and other issues as the plant nears maturity.
Gradually decrease the watering frequency as it allows the soil to slightly dry out between sessions. This aids the plant in preparing for cooler weather and prevents excessive moisture.
Protection from Frost
As temperatures drop, bok choy becomes vulnerable to frost damage. Consider using row covers or cloches to insulate them from cold air. Putting mulch around the base could also help stabilize soil temperature and provide a frost barrier.
You can move pots indoors for added protection too. In severe conditions, an old blanket or frost cloth can be draped over the plants during the night.
Potting And Repotting Bok Choy
Potting of Bok Choy is possible and you can witness healthy growth in a potted form. If you offer proper care to the plant, you can successfully build an environment where the Bok Choy plant thrives well in a container.
Potting a Bok Choy Plant
Select a pot with good drainage holes. A size of at least 6-8 inches in diameter works well.
Use a well-draining, nutrient-rich potting mix. A mix designed for vegetables is ideal in this case.
You should ensure the soil is moist but not waterlogged.
Plant bok choy seeds or seedlings at the same depth they were growing in their nursery container.
If potting multiple plants, you need to space them about 6-8 inches apart to enable proper growth.
Remember to water thoroughly after planting. Keep the soil moist to promote robust growth.
Repotting a Bok Choy Plant
Re-potting becomes necessary when the plant becomes root-bound or outgrows its current container. This is generally every 6-12 weeks if grown in a pot.
Choose a pot that is 1-2 inches larger in diameter than the current one to accommodate root growth.
Utilize a well-draining potting mix rich in organic matter. A mix of compost and potting soil works well.
Gently remove the plant from its current pot, being careful not to damage the roots. You should loosen any bounded roots.
Position the plant in the center. Make sure that the top of the root ball is level with the rim of the pot.
Remember to put a layer of soil at the bottom of the new pot before moving it into the container.
After that, you need to fill in around the roots with soil. Press gently to remove air pockets.
Finally, you should put the re-potted plant in a location with sufficient light and temperature.
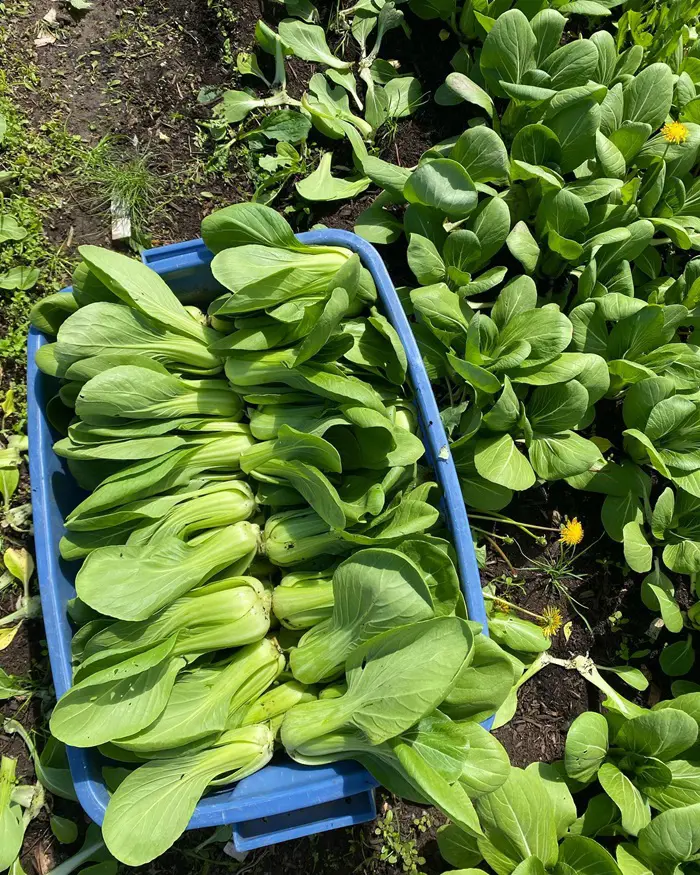
If you're thinking big about your Bok Choy, you can harvest these plants for edible and business purposes. It's important to take care of them to make a good harvest. Below are some tips on when you should harvest Bok Choy along with how you can do it:
When to Harvest
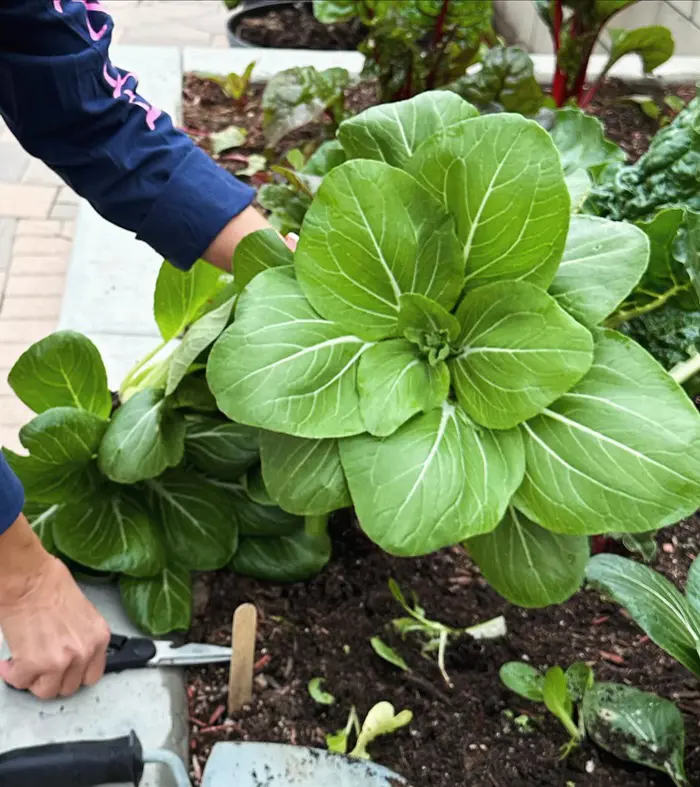
Bok choy is generally ready for harvest 45 to 60 days after planting. The best time to harvest is when the plant reaches a height of 12 to 18 inches. The plant should have firm, crisp leaves and a well-formed head.
Some varieties can be harvested earlier, i.e. around 30 to 35 days. It is best to harvest in the morning when the temperatures are cooler to ensure the leaves are crisp and fresh. Avoid harvesting during the hottest part of the day to prevent wilting.
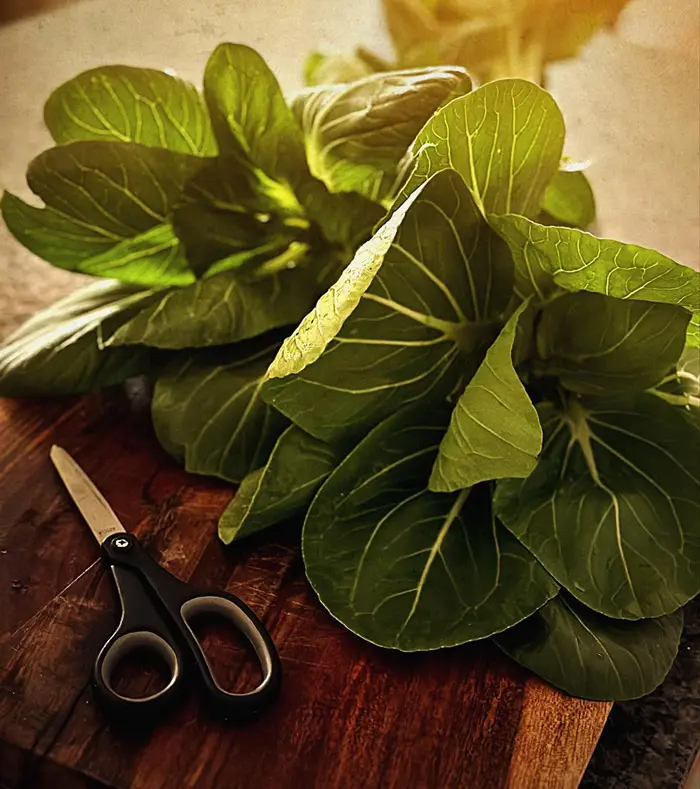
How to Harvest
Use a sharp knife to cut the plant at the base, just above the soil line. Remember to make a clean cut to prevent the plant's damage. For continuous harvest, you can also pick individual outer leaves, allowing the inner leaves to continue growing. Gently remove any damaged or yellowing leaves after cutting.
Handle the harvested bok choy with care to prevent bruising. Once harvested, you must rinse the bok choy thoroughly to remove soil and debris. Store the harvested plant in the refrigerator to maintain freshness and crispness.
Win-Win Choi is a unique variety of bok choy with broad, flat leaves and thick, juicy stems. This variety features a mild, slightly sweet flavor that makes it versatile in various dishes.
Great for stir-fries, soups, and salads, Win-Win Choi can also be quickly cooked or eaten raw. It's also an excellent addition to hot pots and noodle dishes, adding both flavor and nutritional value.
Black Summer
This is a compact variety of bok choy with dark green leaves and crisp white stems. Black Summer matures fast and is often ready to harvest in just 35 days. Its resistance to bolting in warmer temperatures is well-known.
Black Summer bok choy is perfect for sauteing and braising, where its leaves become tender while the stems retain a pleasant crunch.
Mei Qing Choi
Imagine a bok choy that’s perfect for small spaces. Mei Qing Choi fits the bill in this case. This dwarf variety grows in tight clusters, making it a favorite for urban gardeners and those with limited space.
Mei Qing Choi is great for quick stir-fries and addition to brothy soups. Its compact size also makes it easy to handle and prepare.
Joi Choi
This robust variety has lush green foliage and white stems. It can resist pests and thrives in a range of climates, making it a reliable choice for gardeners.
It's crunchy stems are excellent for hearty dishes like stews and casseroles. Joi Choi holds up well to prolonged cooking as well. This makes it a great addition to slow-cooked meals.