Orchids are known for their stunning beauty and elegance, making them popular among plant enthusiasts.
However, keeping an orchid healthy and thriving requires more than just basic care; repotting is a crucial aspect of maintaining their well-being.
This article will guide you through understanding the need for repotting orchids when to repot them, the materials needed, a step-by-step guide to the repotting process, post-repotting care tips, and troubleshooting common issues.
Understanding The Need For Repotting Orchids
Orchids are epiphytic plants, meaning they grow on other plants rather than in traditional soil. In their natural habitat, orchids attach themselves to tree bark, where they receive plenty of airflow and drainage.
When grown as houseplants, orchids are typically potted in a medium that mimics this environment. Over time, this medium breaks down and becomes less effective at providing the necessary air circulation and drainage.
Reasons For Repotting Orchids
- Decomposing Potting Medium: The organic components of the potting mix decompose over time, reducing aeration and drainage. This can lead to root rot and other issues.
- Overgrown Roots: Orchids outgrow their pots, leading to overcrowded roots, which can hinder growth and nutrient absorption.
- Pest and Disease Management: Repotting allows you to inspect the roots for pests and diseases, ensuring that your orchid remains healthy.
- Nutrient Renewal: Fresh potting medium provides a renewed source of nutrients, promoting healthier growth.
Understanding these reasons highlights the importance of regular repotting to ensure your orchid's long-term health.
When To Repotting Orchids?
Timing is crucial when it comes to repotting orchids. The best time to repot your orchid is typically after it has finished flowering and is starting a new growth cycle.
This period allows the plant to recover from the stress of repotting and establish itself in the new medium before its next blooming phase. Here are some signs that your orchid needs repotting:
- Decomposed Medium: If the potting medium looks broken down, soggy, or compacted, it's time to repot.
- Roots Outgrowing the Pot: When roots start circling the inside of the pot or growing out of the drainage holes, it's a clear sign that the orchid needs more space.
- Pest Infestation: If you notice pests like mealybugs, aphids, or spider mites, repotting can help eliminate the infestation.
- Root Health: Inspect the roots regularly. If you see mushy, dark, or foul-smelling roots, repotting is necessary to prevent further damage.
Most orchids benefit from repotting every one to two years, but this can vary depending on the type of orchid and its growing conditions.
Materials Needed For Repotting
Before you begin the repotting process, gather all necessary materials to ensure a smooth and efficient experience. Here's a list of what you'll need:
- New Pot: Choose a pot that is slightly larger than the current one, with good drainage holes.
- Orchid Potting Mix: Use a mix specifically designed for orchids, typically consisting of bark, perlite, and charcoal.
- Sterilized Cutting Tools: Scissors or pruning shears should be sterilized to prevent the spread of disease.
- Water: For soaking the orchid roots before repotting and watering afterward.
- Orchid Fertilizer: To feed the plant after repotting.
- Support Stakes and Clips: For stabilizing the orchid if needed.
Having these materials ready will make the repotting process more straightforward and efficient.
Step-by-Step Guide To Repotting An Orchid
Repotting an orchid can seem daunting, but with a clear, step-by-step approach, it becomes a manageable task. Follow these steps to ensure a successful repotting:
Step 1: Prepare the New Pot and Medium
- Select the Right Pot: Choose a clean pot with adequate drainage. Orchids require excellent drainage to prevent water from sitting at the roots, which can cause rot. Clear plastic pots are often preferred as they allow you to monitor root health.
- Prepare the Potting Mix: Soak the new orchid potting mix in water for a few hours before use. This step helps to hydrate the medium and remove any dust, ensuring it is ready to support the orchid's roots.
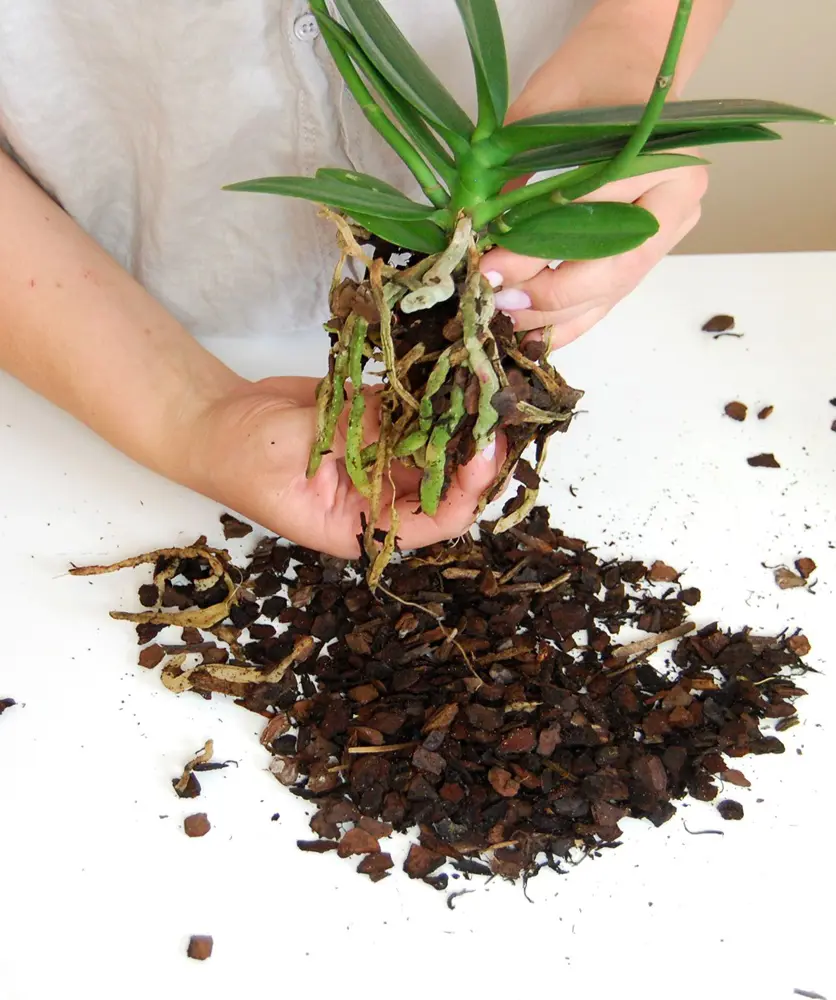
Step 2: Remove the Orchid from Its Current Pot
- Water the Orchid: Water your orchid a day before repotting. This makes the roots more pliable and easier to remove from the pot without causing damage.
- Gently Remove the Plant: Hold the orchid at the base and carefully tip it out of its current pot. If necessary, squeeze the sides of the pot gently to loosen the roots. Be patient and avoid pulling too hard, which can damage the roots.
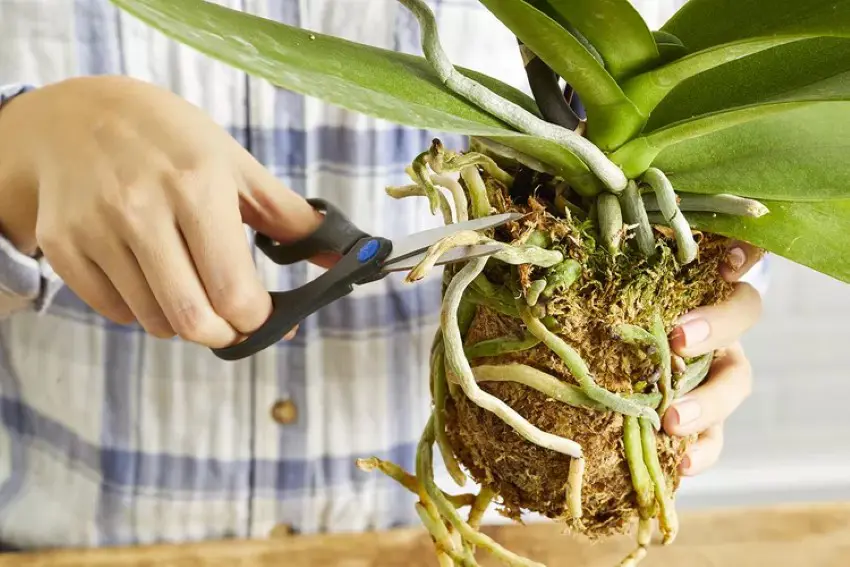
Step 3: Inspect and Trim the Roots
- Inspect the Roots: Examine the roots carefully. Healthy roots are firm and white or green. Identify any dead, mushy, or discolored roots, which should be removed.
- Trim the Roots: Using sterilized scissors or pruning shears, trim away the unhealthy roots. Be careful not to damage the healthy roots, as this can hinder the plant’s ability to absorb water and nutrients. Trimming encourages new, healthy root growth.
Step 4: Place the Orchid in the New Pot
- Position the Orchid: Hold the orchid in the center of the new pot. Spread the roots out gently to allow them to settle naturally in the potting mix.
- Add Potting Mix: Gradually add the pre-soaked potting mix around the roots. Ensure the mix fills in the gaps without packing it too tightly, which could impede airflow and drainage. The roots should be supported but still have some room to breathe.
Step 5: Secure the Orchid
- Stabilize the Plant: If the orchid is top-heavy or has long flower spikes, use support stakes and clips to hold it upright. This prevents the plant from tipping over and damaging the roots or new growth. Insert the stakes carefully to avoid harming the roots.
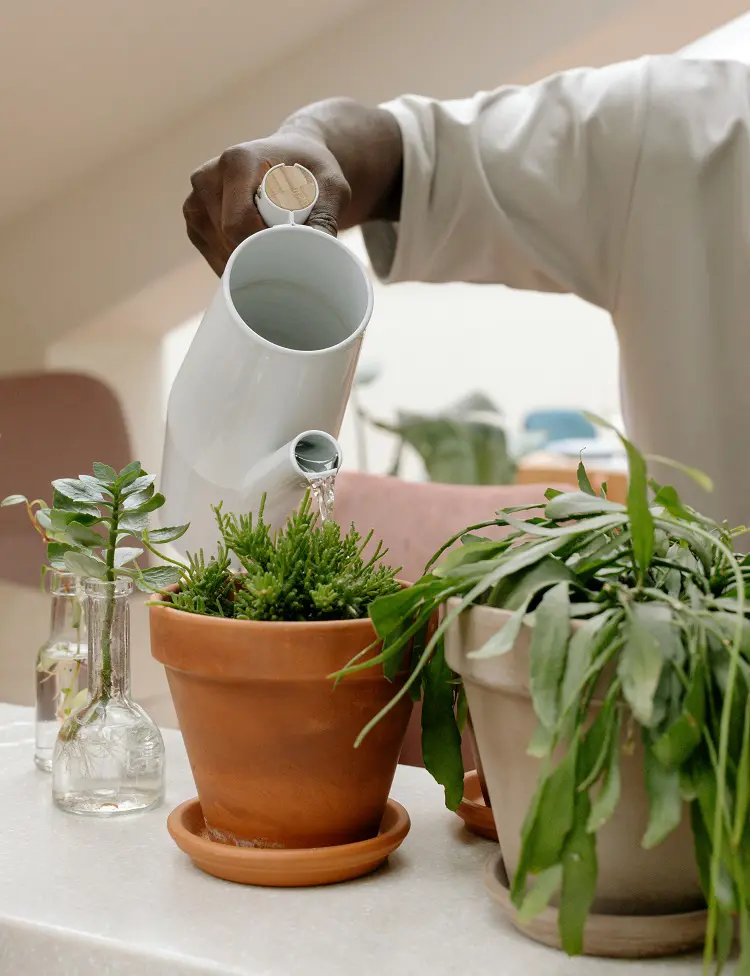
Step 6: Water the Orchid
- Water Thoroughly: After repotting, water the orchid thoroughly to help settle the new potting mix around the roots. Allow the water to drain out completely, ensuring there is no standing water in the pot. This initial watering helps to eliminate any air pockets in the potting mix.
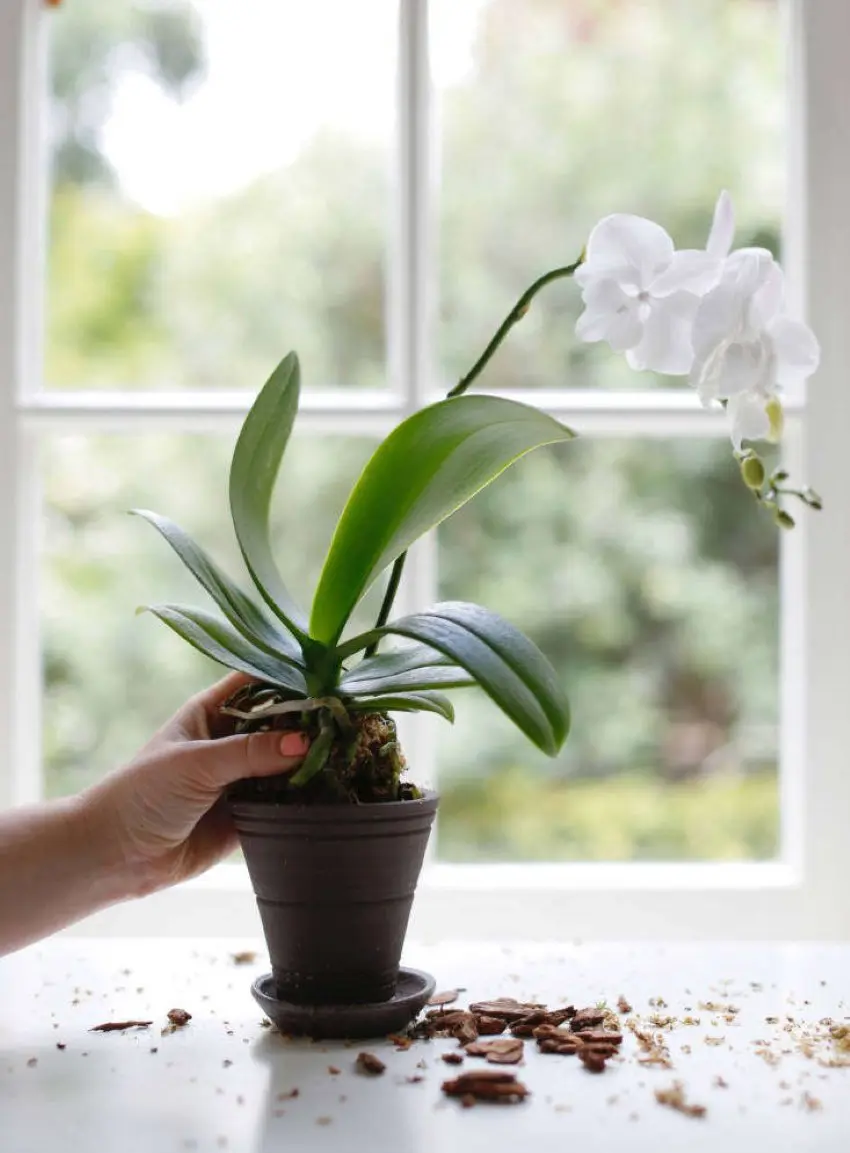
Step 7: Place the Orchid in an Optimal Environment

- Find the Right Spot: Place the repotted orchid in a location with bright, indirect light. Orchids thrive in environments with good air circulation but should be protected from direct sunlight, which can scorch the leaves. Ensure the temperature and humidity are consistent with the orchid’s natural habitat.
Post-Repotting Care Tips
After repotting, your orchid will need some extra care to recover and thrive in its new environment. Here are some essential post-repotting care tips:
- Monitor Watering: Newly repotted orchids need less water initially. Allow the potting mix to dry out slightly before watering again. Overwatering can lead to root rot.
- Maintain Humidity: Orchids prefer higher humidity levels. Use a humidity tray or mist the leaves to maintain adequate moisture.
- Fertilize Sparingly: Wait a few weeks before resuming fertilization. Use a balanced orchid fertilizer at half strength to promote new growth.
- Watch for Stress Signs: It's normal for the orchid to show some stress after repotting, such as wilted leaves or slower growth. However, if the symptoms persist, recheck the root health and potting medium.
Adjust Light and Temperature: Ensure the orchid receives the right amount of light and maintains a stable temperature. Avoid drastic changes in its environment.
Troubleshooting Common Issues
Repotting orchids can sometimes lead to unexpected challenges. Here are some common issues and how to troubleshoot them:
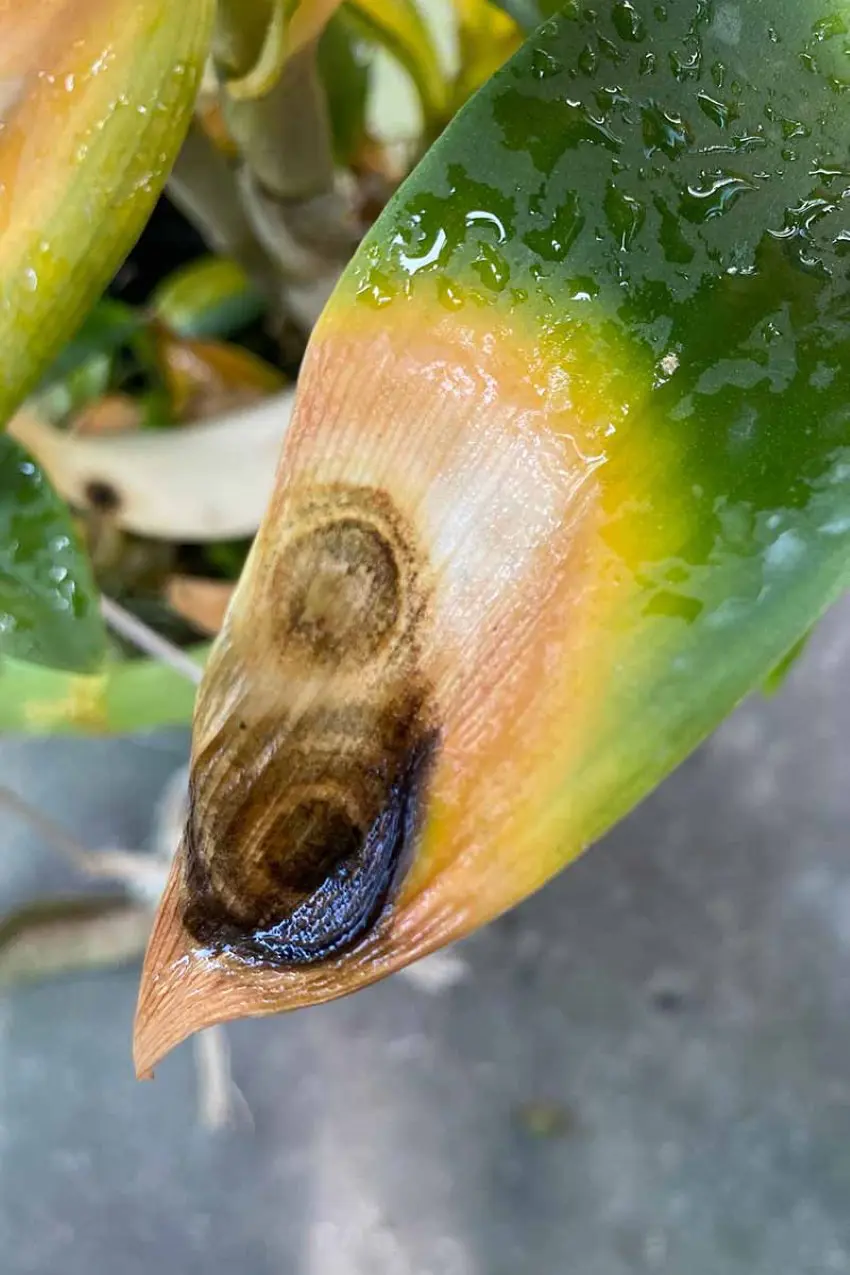
Issue 1: Yellowing Leaves
- Cause: Overwatering, underwatering, or poor drainage.
- Solution: Check the moisture level of the potting mix. Adjust watering frequency and ensure proper drainage.
Issue 2: Root Rot
- Cause: Excessive moisture and poor air circulation around the roots.
- Solution: Remove affected roots and repot in fresh, well-draining potting mix. Reduce watering frequency.
Issue 3: Orchid Not Blooming
- Cause: Insufficient light, incorrect temperature, or lack of nutrients.
- Solution: Ensure the orchid receives bright, indirect light. Maintain optimal temperature and provide balanced fertilization.
Issue 4: Pests and Diseases
- Cause: Poor hygiene or infected potting medium.
- Solution: Inspect and treat the orchid for pests. Use sterilized tools and fresh potting mix to prevent infections.
Issue 5: Wilting or Drooping
- Cause: Stress from repotting or environmental changes.
- Solution: Give the orchid time to adjust. Maintain consistent care and avoid disturbing the plant unnecessarily.