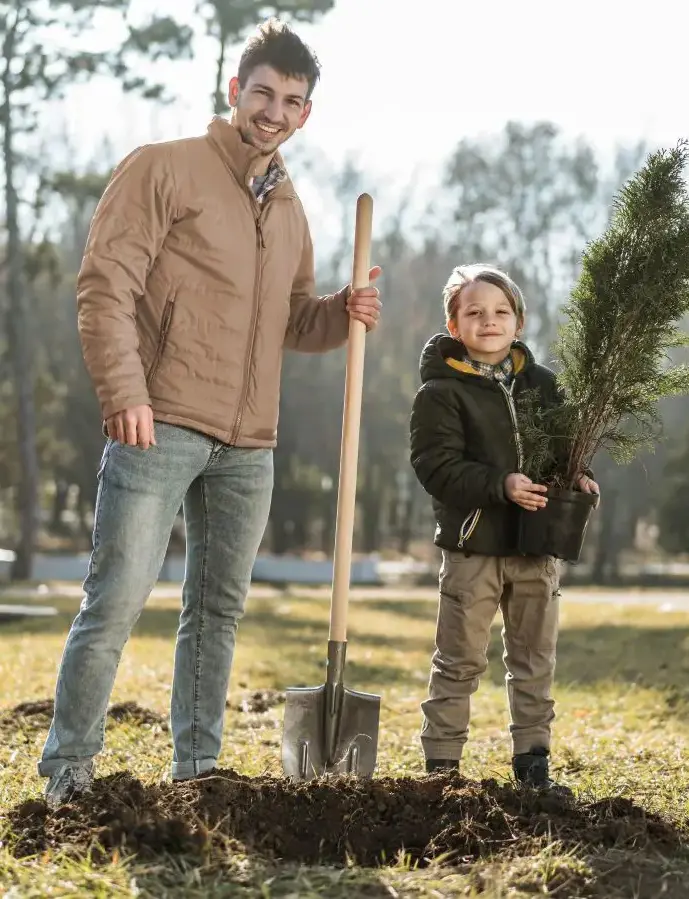
Planting a tree is a fantastic way to leave a lasting positive impact on your environment. Not only will you get the satisfaction of nurturing new life, but a healthy tree provides shade, improves air quality, and beautifies your surroundings.
This 15-step guide will walk you through everything you need to know to plant a thriving tree in your yard.
Preparation
Step 1: Pick the Perfect Tree
Picking the perfect tree for your landscape is the first crucial step towards a thriving and harmonious addition to your property. It's not just about finding a pretty face! So, consider your climate and growing zone because different tree species thrive in different temperatures and rainfall patterns.
Therefore, knowing your growing zone, which is typically a map-based system that defines plant hardiness, will help you select a tree that can withstand your local winters.
Step 2: Plan Your Location
Before you wonder how to plant a tree and act upon it, you have plan a location in your garden. As different tree species flourish under specific temperatures and rainfall patterns, knowing your growing zone, typically defined by a map system that indicates plant hardiness, is vital. This information helps you choose a tree that can withstand your local winters.
Next, delve into the sunlight situation of your planting area. Is it a sun-drenched haven that basks in afternoon rays or a shady retreat dappled with filtered light? Sunlight requirements vary greatly between species. Some trees, like mighty oaks and vibrant maples, crave a good dose of sunshine to fuel their growth.
Others, like elegant dogwoods and graceful hemlocks, prefer the gentle embrace of shade.
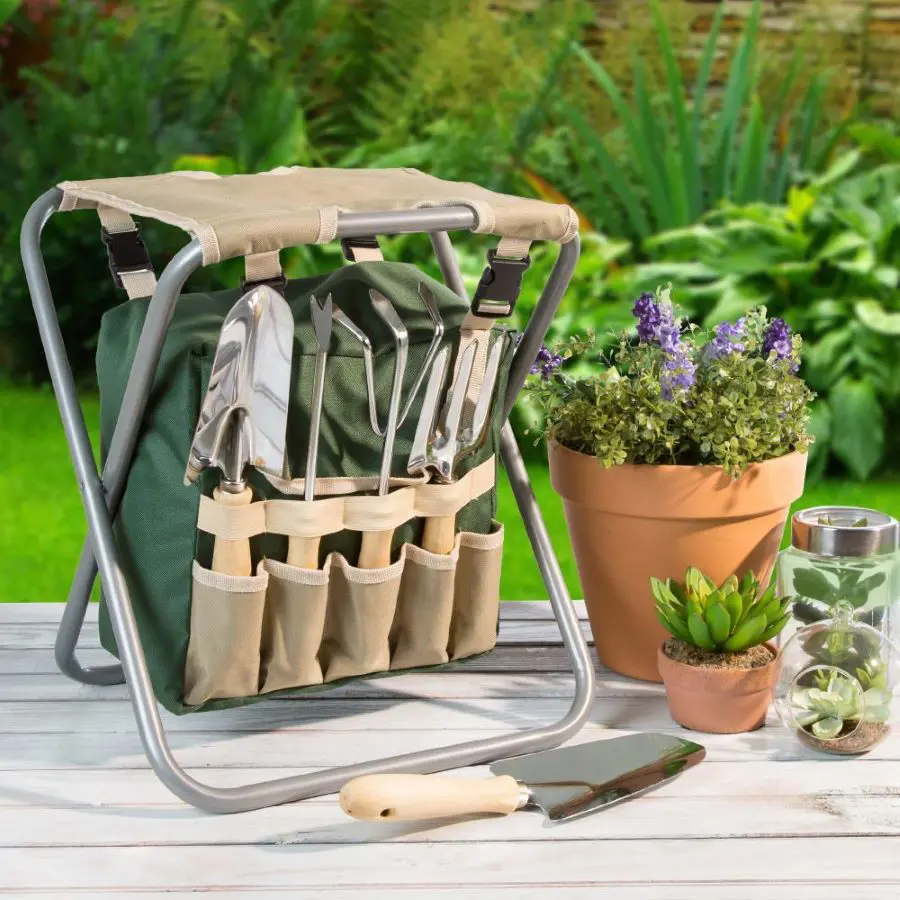
Planting a tree is an exciting project, and before you dive in, it's essential to gather the right tools for the job. This ensures a smooth and efficient planting process, minimizing stress on both you and your new tree. So, let's assemble your tree-planting arsenal:
Shovel that's comfortable for your grip and size.
Sharp and bypass pruners for ideal clean cuts.
Rake to clear debris and smooth the soil around the planting hole.
A water can or hose is crucial for watering.
Mulch to grow a tree healthyly.
While not essential, a few additional tools can enhance your planting experience. A tarp can help you manage removed sod and soil. Gardening gloves protect your hands, and a kneeling pad provides comfort when working on the ground.
Step 4: Timing
Most trees in the northern hemisphere enter dormancy during late fall or early spring, focusing on root growth rather than leaf and branch production. Planting during dormancy minimizes stress and helps establish a strong root system.
Cooler fall or spring temperatures are ideal for root development before extreme weather arrives. However, consult local gardening experts to determine the best planting time for your region, considering climate and rainfall patterns.
Digging a proper hole is often counterintuitive to what we might think, so, forget deep and narrow – for optimal root growth and tree health, we want a wide and shallow excavation. Aim for a hole 3-4 times wider than the root ball of your tree, but only deep enough to accommodate it without burying the root flare.
Also, an irregular hole with jagged edges encourages roots to venture out and explore the surrounding soil, leading to a stronger and more stable tree. Once you've achieved this ideal shape and size, loosen the soil around the edges with your shovel.
This creates a smooth transition zone between the planting hole and the native soil, making it easier for the tree's roots to establish themselves in their new home.
Step 6: Loosen the Soil
After digging a hole, the next step focuses on the soil itself, loosening it around the edges of the hole. This seemingly minor step plays a big role in your tree's future success.
Loosen the soil around the edges with your shovel. This creates a smooth transition zone between the planting hole and the native soil. The loosened soil encourages the tree's roots to readily extend outwards, establishing a strong and healthy network that will support the tree for years to come.
Step 7: Prepare the Tree
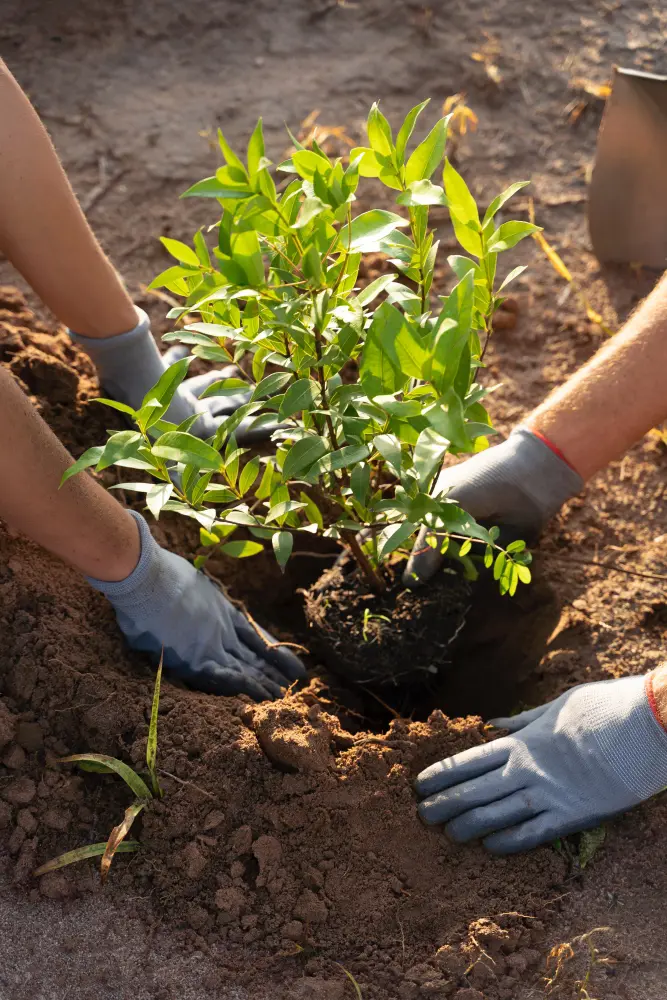
Now that you've created the perfect home for your tree's roots, it's time to focus on the tree itself. So, carefully remove the tree from its container. If it's in a pot, gently tap the sides and tip it on its side to loosen the root ball.
Then, slide the tree out, taking care not to damage the trunk. For burlap-wrapped trees, remove any twine or wire holding the burlap in place. You may also carefully peel away some of the burlap itself, especially at the bottom, to encourage root growth outward.
Next, inspect the roots because healthy roots should be white or light brown and have a hair-like texture. Thus, gently tease apart any circling roots with your fingers. Circling roots can restrict future growth, so it's best to encourage them to grow outward. Prune away any dead, broken, or diseased roots using sharp pruning shears. Make clean cuts to minimize damage.
Lastly, submerge the root ball in a bucket of water for 15-20 minutes to ensure the roots are well-hydrated before they are placed in the planting hole.
Step 8: Position the Trees
With the hole prepared and the tree hydrated, it's time to position your new arrival in its forever home carefully. As straight is great, ensure the tree stands straight in the hole. Use your eye or a level to check for plumpness because a leaning tree can not only look unsightly but also compromise its stability in the wind.
Once you've positioned the tree for straightness and proper root flare exposure, gently center it within the hole. There should be equal space between the root ball and the edges of the hole on all sides. This allows for proper backfilling with soil and avoids smothering the roots.
Before proceeding with backfilling, take a step back and assess your positioning. Is the tree straight? Is the root flare exposed? Make any necessary adjustments now, as moving the tree once the hole is filled will be difficult.
Step 9: Backfill and Water
The backfill material you use is crucial, so, avoid using the soil you removed from the hole as it may be compacted or depleted of nutrients. Instead, use the loosened soil you created earlier by breaking up the edges of the hole for good drainage and also to encourage root growth into the surrounding soil.
Begin backfilling the hole with the loosened soil, gently filling around the root ball. Don't tamp down the soil too firmly because you want it to settle naturally. As you fill, gently shake the tree slightly to help settle the soil and eliminate air pockets. These air pockets can hinder root growth and water absorption.
Once the hole is about half full, give your tree a thorough watering. Use your watering can or hose with a gentle spray to soak the soil around the root ball. The water will help settle the soil further and eliminate any remaining air pockets.
A berm is a circular mound of soil built around the base of the tree. It acts like a shallow basin, directing water towards the root ball and helping it retain moisture, especially during the crucial establishment period after planting.
While not always necessary, creating a berm around the base of your newly planted tree can be an optional step to aid in proper watering and root development.
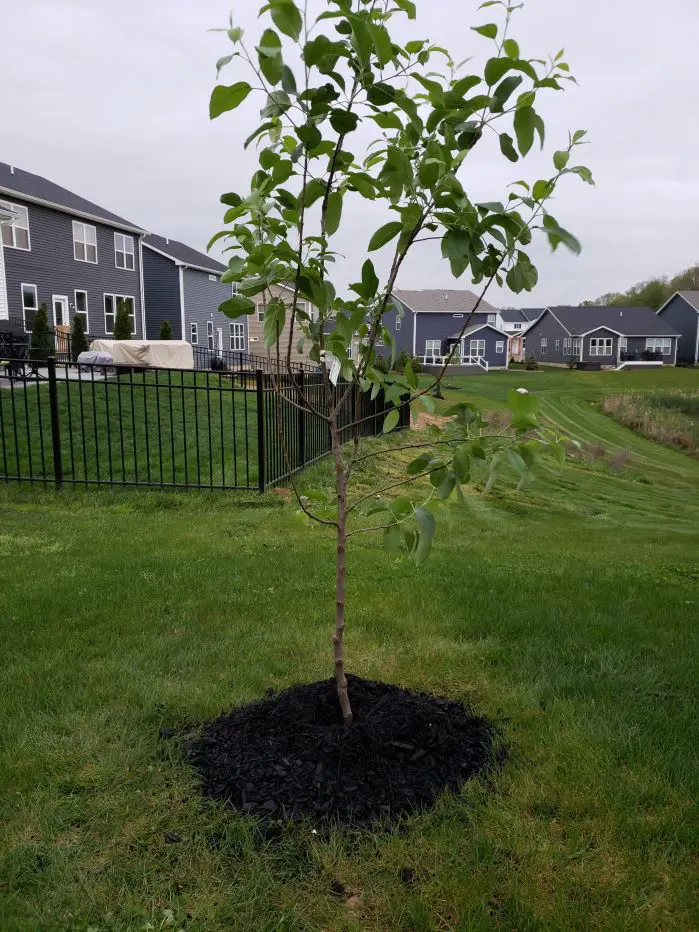
Step 11: Mulch
Planting your tree is almost complete! The final step involves applying mulch around the tree's base, creating a protective and beneficial layer. Mulch acts like a blanket, helping retain moisture in the soil around the root zone.
This is especially beneficial during hot weather or in areas with limited rainfall, reducing the frequency of watering needed for your newly planted tree.
Mulch also helps suppress weed growth, giving the tree a fighting chance to establish itself without the added stress of competing vegetation. It also helps regulate soil temperature and prevent soil erosion around the base of the tree, especially during heavy rains. This protects the root system and keeps the planting area looking neat and tidy.
Aftercare
Step 12: Water Regularly
Water is the lifeblood of all plants, and newly planted trees are especially dependent on it. During establishment, the tree focuses its energy on developing a strong root system, so, consistent watering ensures the roots have the moisture they need to grow and establish themselves in the surrounding soil.
Without adequate water, the roots can become stressed and struggle to develop, hindering the tree's overall health and growth. In addition, the frequency of watering will depend on several factors, including weather conditions, soil type, and the size of your tree.
However, a good rule of thumb is to water your newly planted tree deeply 1-2 times a week, especially during the first few weeks after planting of trees.
As large trees with a heavy canopy can be susceptible to wind sway, especially during establishment. Staking can provide temporary support, helping them remain upright until the root system matures and can provide sufficient stability on its own.
Similarly, trees with weak or underdeveloped root systems, such as bare-root trees or those grown in containers for extended periods, may benefit from temporary staking.
The stakes offer support, while the roots focus on growing outward and establishing themselves in the surrounding soil. If your planting location is particularly windy, staking can help minimize excessive tree sway. This can benefit young trees by reducing stress on the developing root system.
Step 14: Prune Strategically
While it may seem counterintuitive, pruning can actually benefit your young tree. The key is to prune strategically, focusing on promoting healthy growth and structure. Therefore, resist the urge to prune your tree right after planting and wait for establishment.
The first priority is for the tree to focus its energy on establishing a strong root system. So, pruning during this critical period can divert energy away from root development and stress the tree unnecessarily.
Once your tree has been established for a year or two, you can start thinking about pruning for structure. The goal is to remove any dead, diseased, or damaged branches.
Step 15: Monitor and Enjoy
Planting a tree is a rewarding experience that requires ongoing care. Schedule regular checkups to observe its health, looking for signs of stress like wilting leaves, discoloration, or insect activity.
Early detection allows timely action. Water your tree regularly, especially in the first year or two, adjusting as it matures and based on weather conditions. Refresh the mulch layer every 1-2 years to retain moisture, suppress weeds, and regulate root temperature.
Enjoy the changing seasons as your tree transforms, providing vibrant spring foliage, summer shade, fiery fall hues, and winter beauty. As it grows, it offers cleaner air, habitat for wildlife, and joy for generations.