The potatoes can be grown effectively if you know the right techniques to harvest them. Harvesting them at the right time and the right way can ensure your plant yields potatoes of great quality.
New potatoes, or potatoes you expect to consume right away, are harvested earlier than those you want to preserve and store for the winter. This guide will take you through the crucial processes of determining how to harvest potatoes, what equipment you'll need, and how to handle them for optimal results.
1. Timing
Timing is one of the most important elements while harvesting potatoes. It helps to ensure the best and highest-quality potatoes. To know about the best timing for harvesting potatoes, you need to know the following things first:
Plant Maturity
Potato plants show multiple indicators of maturity. When a plant reaches maturity, its leaves usually die back, turning yellow and beginning to wither. For the majority of maincrop varieties, the condition of the foliage is more important than flowering, which in some early types may indicate approaching maturity.
The skins of mature tubers are tough to rub off. Gently dig up a few potatoes from various locations to test. Additionally, take note of the maturation duration of that particular variety; maincrops often take 90-120 days to mature, whereas early kinds typically take 60-90 days.
Signs of Ripeness
To begin with, see if the foliage of the plant has turned yellow and withered back, which is a sign that the tubers are ready. The potatoes are ripe if you can gently press the skins with your thumb and they remain firm without rubbing off.
Make sure the potatoes are no longer tiny and immature and have grown to their proper size. Your potatoes may be ready for harvesting and long-term storage if they exhibit these symptoms.
Test Harvest
While deciding when to harvest potatoes, carefully dig up a few tubers from various parts of your garden. Examine their firmness and size. It's a good idea to begin harvesting the remaining tubers when they are ripe, the desired size has been reached, and the skin is tough to scrape off.
By using this method, you can determine whether you're ready and prevent harvesting too soon or too late.
Timing for Different Varieties
You can harvest potatoes a few weeks before the plants die. They typically have thinner skin and are smaller. Maincrop varieties are harvested following a full regrowth of the plants. Depending on the breed, there are several times to harvest potatoes.
Early types can be picked when the plants are still green and in bloom, usually 60 to 90 days after planting. Maincrop types need 90–120 days to mature; don't pick until the foliage has returned and the tuber skin is solid. For small, sensitive tubers, new potatoes are picked earlier, roughly 60–70 days after planting.
To make sure the skins are thick enough for long-term storage, storage types should be left in the ground until the plants have completely died back, which is often after 100 to 120 days. Adapt your timing to the unique requirements of your variety and the local conditions.
To prepare an appropriate space for harvesting potatoes, you need to follow the following steps:
Water the Soil
Watering the soil thoroughly facilitates making the soil soft and moist. So you need to water the soil before harvesting the potatoes. This makes it easier for you to dig the soil without damaging them.
Remove Weeds and Debris
You need to clean the area where you want to harvest the potatoes. Clear the areas with weeds, rocks, and other debris to avoid damage to the tubers. This also helps to make the harvesting process of potatoes smoother and more efficient.
Loosen the Soil
To delicately loosen the soil surrounding the potato plants, you need to use a shovel or garden fork. When you dig out the tubers, this helps keep them from breaking.
Check Soil Texture
You need to make sure that the soil is neither cold nor too dry. While dry soil can be hard and compacted, excessively wet soil can become sticky and challenging to work with.
You will need several tools while harvesting potatoes:
Garden Fork
A Garden fork is useful for lifting potatoes by gently loosening the soil without cutting or bruising the tubers. Usually fork with sturdy and curved tines is effective to use while harvesting potatoes.
Shovel
A shovel can be used as a substitute for a garden fork which should be handled carefully to avoid any damage to the potatoes. You can use a flat and rounded shovel to harvest potatoes particularly. This method reduces breakage and bruises while increasing potato harvest efficiency.
Hand Trowel
You can use a hand trowel in the small areas if you need to dig around particular plants. To use it, place the trowel 4–6 inches into the ground away from the plant's base.
Use your hands to carefully lift the potatoes out once the soil has become loose. Particularly for delicate tubers or in confined spaces, the hand trowel aids in control and precision.
Garden Gloves
These gloves help to protect your hands from dirt and potential cuts and scrapes from the garden or soil. Additionally, they offer grip, which allows handling the potatoes without slipping and allows for easier tool work.
Bucket or Container
You can collect your harvested potatoes in clean buckets or containers to prevent breakage or bruises in them. The excess soil or water can be removed through containers which helps to keep them dry.
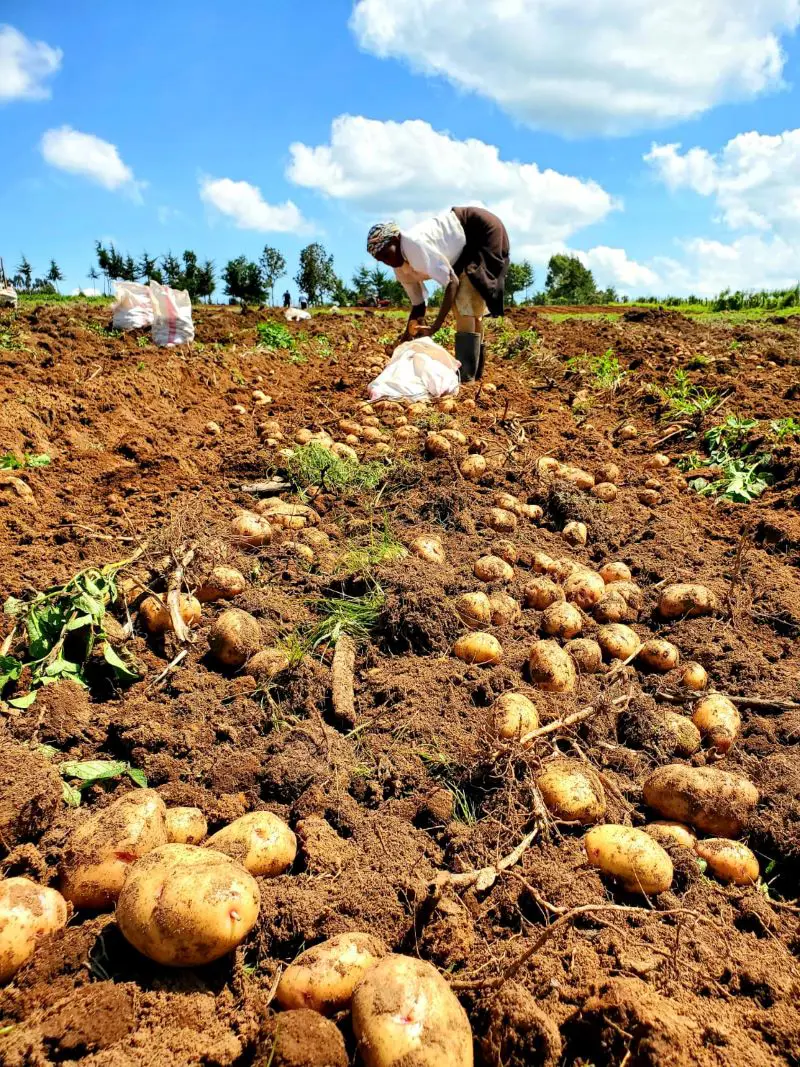
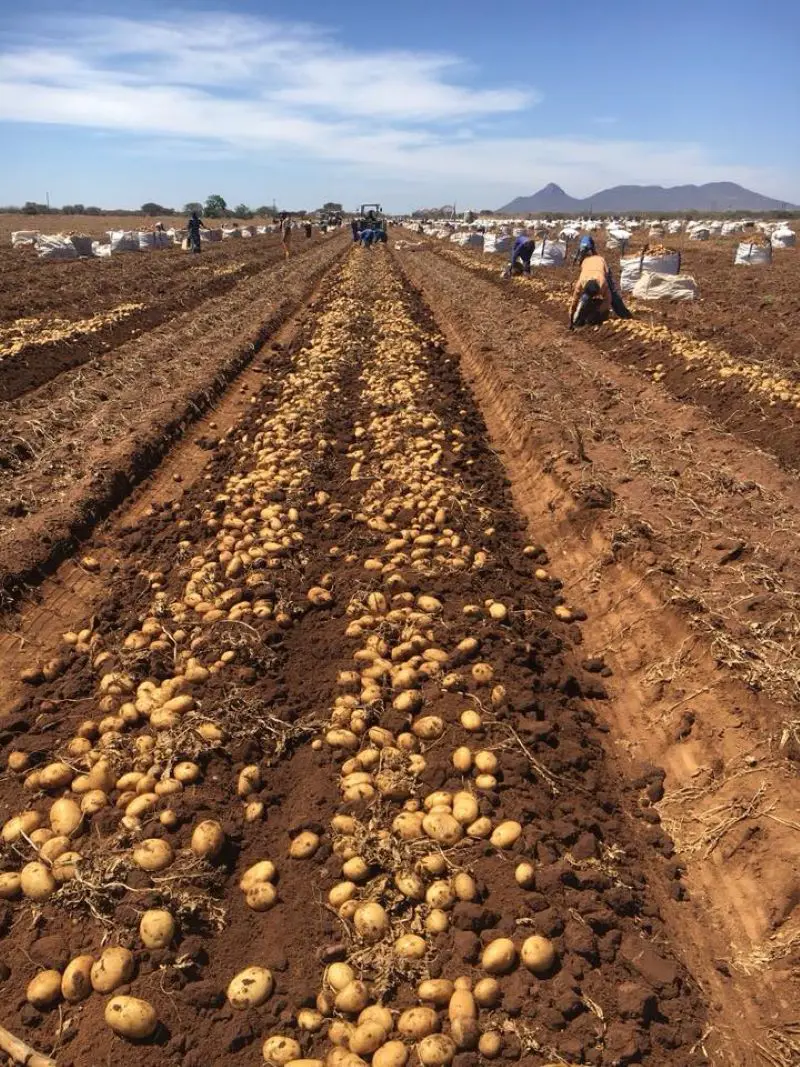
4. Digging
When you are digging the soil for potatoes, you need to start by digging the base of the plant 6-8 inches away to prevent tuber damage. Then you can use a shovel or fork to dig the soil gently.
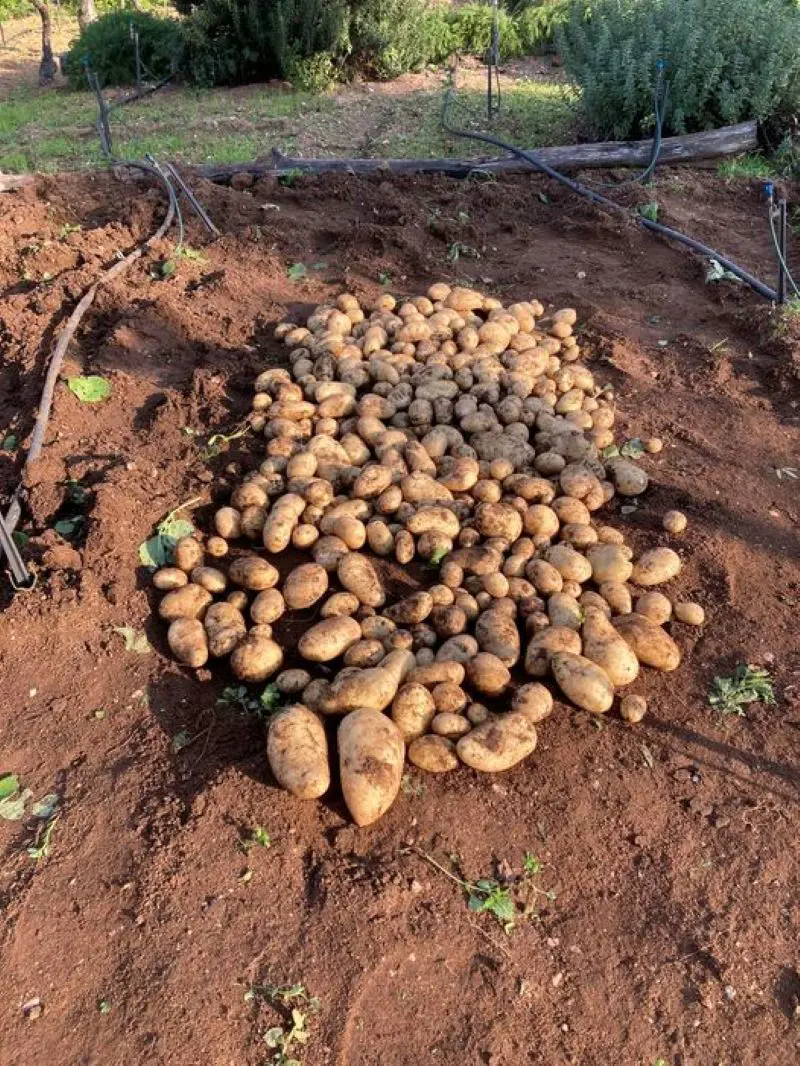
When the soil becomes loose, you can remove the potatoes using your hands from the soil. Remove excess soil and dirt from the potatoes and place them in the container for storage after cleaning them.
5. Inspect and Clean
For properly harvesting potatoes, you need to inspect and clean them to ensure good quality and storage. You need to check for the maturity of the plant to proceed with the harvest process and examine the condition of the soil to check if it is appropriate for harvesting.
After the harvest, the excess soil from the potatoes should be brushed off, but the cleaning from the water should be avoided as it causes the potatoes to rot. After cleaning, they should be stored in cool and dark for few days initially.
6. Cure the Potatoes
To cure potatoes, you should put them in a cool, dark, well-ventilated space with high humidity and a temperature range of 45–60°F. To ensure adequate air circulation, you can spread them out in a single layer and allow them to cure for one to two weeks.
This procedure extends the shelf life of the skins by thickening them and healing small cuts. For long-term storage, check the potatoes for damage after they have cured and keep them in a cool, dark place.
7. Store Properly
After the curing process, you should store your freshly harvested potatoes in a suitable and appropriate place that is dark, cool, and with a temperature of 4-10°C.
You should use an accessible container or bucket to ensure airflow and prevent moisture buildup. To prevent sprouting, you should store them away from fruits that release ethylene gas. To keep them from greening up and sprouting, store them somewhere dark.
When to Harvest Potatoes
Potatoes can be harvested after considering the following factors:
Plant Maturity
When to harvest a potato depends on its variety. When the tubers are still small, you can start harvesting early or new potatoes two to three weeks after flowering.
You should wait until the main-crop potatoes' foliage has completely turned yellow and died back, which usually happens two to three weeks after the foliage starts to wither.
Foliage Condition
As the tubers get bigger, the foliage of the potato plants will begin to wilt and turn yellow. The potatoes are ready for long-term storage once the foliage is completely dead, at which point they will have grown to their full size and the skins will have hardened.
Soil Condition
Wait until the soil is dry and the plants have turned yellow before harvesting potatoes. To minimize the chance of rot and steer clear of muddy tubers, harvest on a dry day.
For easy digging, work with sandy or loamy soil ideally. By doing this, you can keep your potatoes' quality intact and make sure that the harvest goes well.
Test Harvest
You can check the size and condition of the tubers by carefully digging up a few plants to determine the exact harvest time. This helps in determining whether they are mature enough or if they require more time.
Harvesting Ripened Potatoes for Storage
Generally, a perfect harvest time for potatoes is August or September. Use your thumb to feel the skins of potatoes to see if they are mature enough to be stored for a long time. The potatoes are ripe if the skins stay on and don't come off.
If the skins are easily removed, the potatoes are not fully ripe and should be consumed right away as fresh potatoes. Throw away any potatoes with damaged skins or eat them right away, as they won’t last as long in storage.
Properly cured and fully ripened potatoes can last for several months. Keep them out of light during curing and storage to prevent them from turning green.
Keep Some Potatoes for Replanting
Choose the Right Potatoes
When planning to replant the potatoes, you must select healthy, firm potatoes free from cuts, bruises, or no health issues. It's a good idea to choose smaller plants, however, if you use larger potatoes, be sure to cut them into portions that have at least one eye.
Potatoes with eyes should be sought for, as these are the growing places from which new plants will arise. Steer clear of people who have too many or too sprouted eyes. Replanting a particular variety should be done exclusively with that variety to preserve consistent traits.
Cure the Potatoes
The first step in curing potatoes is to lay them out in a single layer in a dark, and well-ventilated space. You need to give them a full two weeks to heal. This procedure aids in the healing of small wounds and bruises as well as toughening the skin. To avoid the growth of mold, keep the temperature between 50 and 60°F and limit the humidity.
To prevent rot, make sure there is adequate air circulation, and handle the potatoes gently to avoid any damage. When the potatoes are ready to be planted, keep them in a cool, dry, and dark place. A proper curing process extends their shelf life and sets them up for fruitful replanting.
You should store the potatoes in a cold place, ideally between 35 and 40°F, to prevent premature sprouting. However, you need to keep them out of the refrigerator. To keep the potatoes from growing toxins and becoming green, store them in a dark spot.
You need to use breathable containers to promote proper air circulation and prevent moisture buildup, which can cause rot. Keep the atmosphere dry and keep an eye out for any signs of rot, mold, or sprouting in the potatoes. Remove any that show these symptoms to preserve the health of the remaining ones.
Monitor for Sprouting
While potatoes are being stored, periodically you should check them for signs of sprouting. See if any tiny sprouts or shoots are coming out of the eyes. You can still plant the potatoes if you observe sprouts, but it's preferable to get rid of them first.
To stop problems from getting worse, you should keep an eye out for any indications of rot or mold on the potatoes and remove them right once. Maintaining the quality of your stored potatoes for replanting will be made easier with routine checks.
Replant in Spring
When it comes time to plant your potatoes again in the spring, get your garden ready by allowing the soil to become looser and ensuring that it drains properly. To lessen the chance of rot, cut larger potatoes into chunks that have at least one sprout on them.
Then, let the pieces dry for a day or two. Plant the chunks in rows spacing them 12 inches apart and 4–6 inches deep. After planting, give them plenty of water, and monitor their growth. Later in the season, you can harvest a fresh crop of potatoes if you give them the proper attention.