The earthy spicy-sweet garlic is a bit tricky vegetable to grow. When harvesting garlic, timing is crucial. If you harvest too soon, you'll get a tiny bulb with small cloves.
However, leaving them too long causes the overripe bulbs to split, making the cloves burst out of their skins and vulnerable to disease. Luckily, it's not too complicated once you know how to harvest them right. Here are a couple of tips and tricks for harvesting garlic plants.
1. Timing
Timing is one of the most important things that you need to know when farming, but this is doubly true, especially for harvesting garlic. Harvest garlic plant at the right time to yield the best, largest, longest-lasting, and highest-quality possible garlic bulbs.
Keep reading to know about the best timing for harvesting potatoes, here are all the things that you need to know when it comes to timing your harvest:
Plant Maturity
For garlic plants, when to harvest is not a big deal if you know the indications for maturity. Since garlic grows under the ground, it's hard to visually check for ripeness like you can for fruits and over-soil-growing vegetables.
In general, most gardeners plant garlic in the fall and wait for them to sprout the following spring. You can also plant them in early spring and harvest them during late summer.
It's important to note that garlic can be harvested three times with the third harvest being the harvest of the bulb. You could ignore the first two harvests but we prefer to at least do the second harvest. The first harvest is usually in early spring when the garlic is only a foot tall, cut off some leaf scallions for using in cuisine.
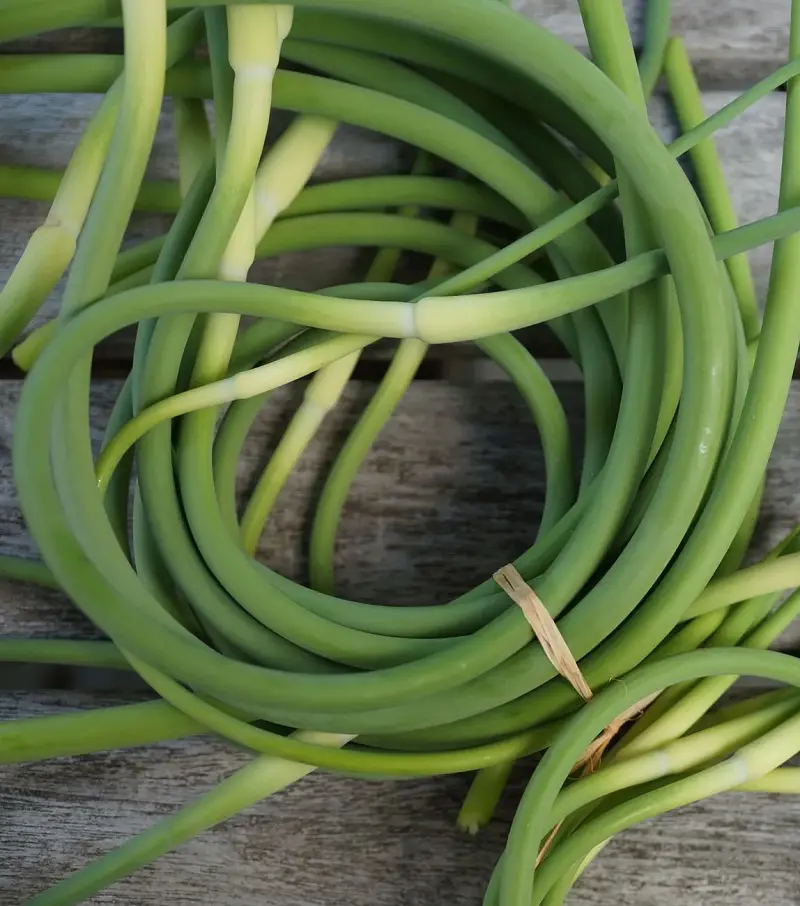
In the second harvest which occurs in June, cut off the scapes to use in cooking. They are very tasty and healthy. The third and main harvest could occur anywhere between July to August where you uproot the entire plant to get the bulbs.
Signs of Ripeness
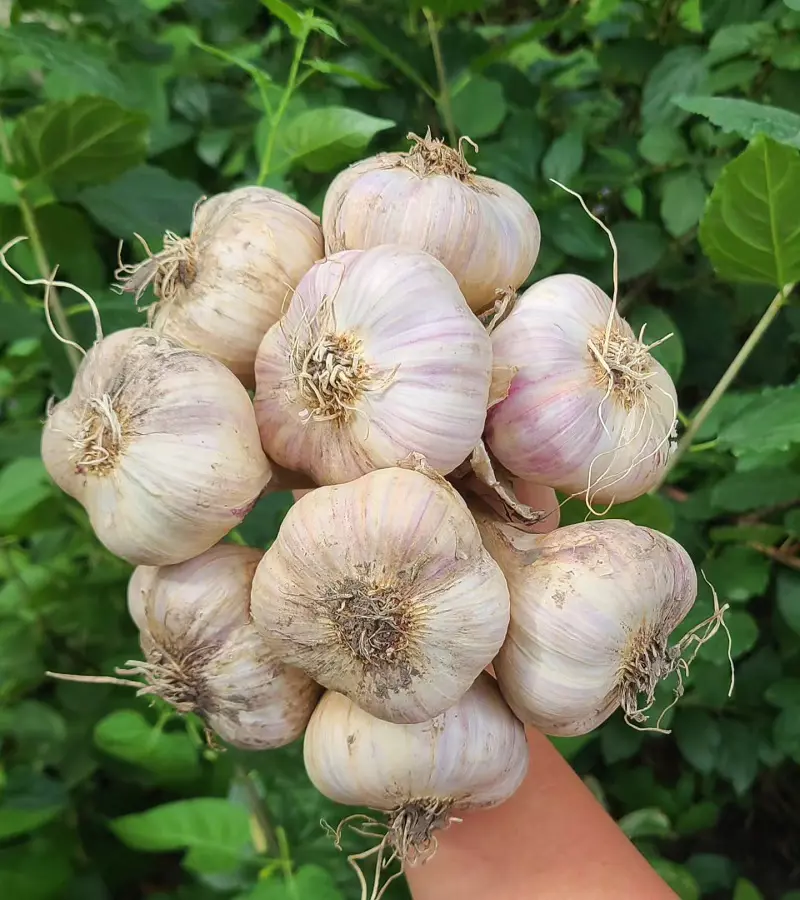
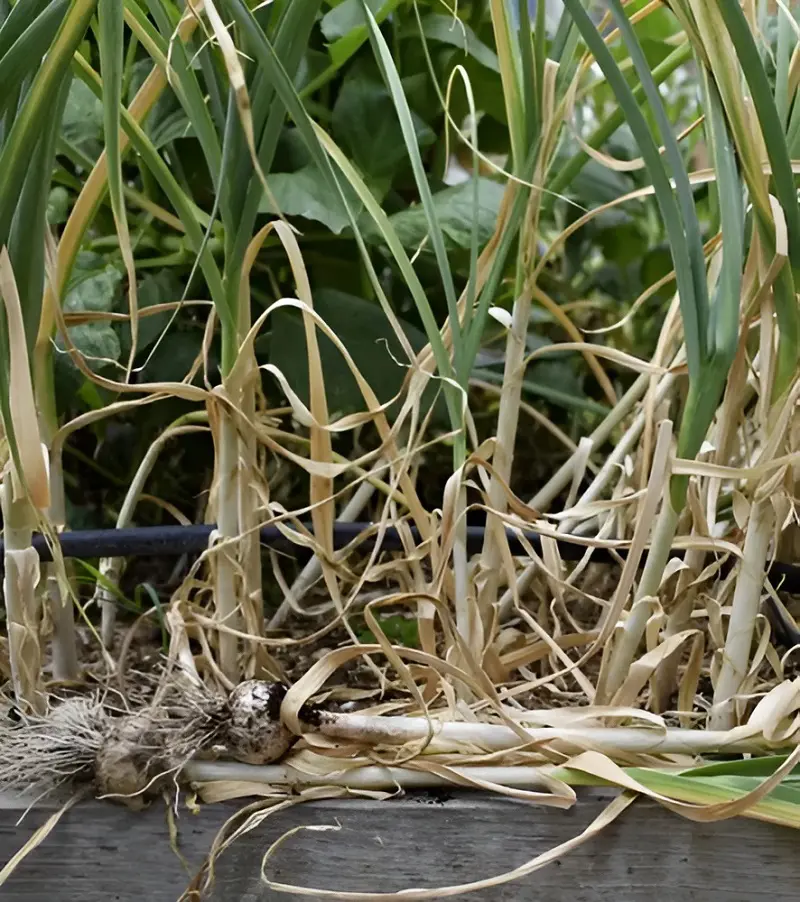
When the bottom leaves begin to turn dry and yellow, harvest time is near. During June or July, when the lower leaves turn brown, dig up a few bulbs to check their progress. For hard-necked varieties, it's best to harvest when 40% of the leaves are brown while soft-necked can be harvested with just 2 brown leaves.
Since they were all planted together, if those bulbs are ripe and if the skin is fully filled with cloves, it's garlic plant harvest time. Given that all the garlic in your garden is of the same variety as different varieties ripen at different times and are influenced by warm or cold weather spells.
Before we get to the talk about testing harvest, keep in mind that the browning should only occur on the lower leaves. Yellowing or browning higher leaves with yellow tips is not an indication of harvest time. Instead, nitrogen might be lacking in your soil.
Just remove a bit of soil around stalks with lower browned leaves from various parts of your garden and examine the bulb's size. If you like the size then harvest them otherwise leave them in the soil for a few more days. However, harvest before half the leaves turn brown.
Timing for Different Varieties
Soft-necked varieties grow best in warm or moderate climates with climates being ideal for both types of garlic. However, only hard-necked garlic should be planted in colder regions as they grow deeper and can survive the winter.
Harvesting is usually the same for both types, but the timing depends on the specific variety of hardnecks and softnecks. You have some varieties that ripen early and can be harvested early in spring (artichoke) while the others need to be harvested in summer (rocambole).
2. Prepare the Area
Now that you know, "When is a garlic plant ready to harvest?", we will answer, "How do you harvest garlic?" First, several appropriate steps must be followed to prepare for a good and ideal harvest of garlic.
Stop pondering on how do you harvest garlic and follow the following steps:
Stop Watering The Plant
Once the leaves on your garlic start to brown, stop watering the plant. A dry spell will help to cure the garlic in the ground so having dry soil will slightly help them in the curing process as they develop, thick and dry skin.
Besides hoping for dry weather, you can cover the soil with a tarp to try and prevent the plants from getting wet from rainfall as wet garlic skins won't be able to be stored for long term despite curing.
Remove Weeds and Debris
Clear out the area where you want to harvest garlic plants. Remove weeds, rocks, and other debris to avoid damage to the garlic bulbs and help make the harvesting process of garlic smoother and more efficient.
You want to do this because garlic is especially delicate and if you drop or hit them on something, their flavor is lost and won't last a long time in storage.
Loosen the Soil
Make use of a shovel or a garden fork to gently loosen the soil surrounding the garlic plants. We recommend using a garden fork as they are easier to use when digging out the garlic bulbs since the soil can slip through the fork tines.
It's important to do this as unlike with onions, the stems or garlic plants are not strong and will break off and damage the bulb in the process when you try to pull it up. You don't want this to happen.
Check Soil Texture
Make sure that the soil is neither wet nor too dry. While we do aim for dry soil, excessively dry soil can be hard and compacted while wet soil is undesirable in the first place and can become sticky and challenging to work with.
It is imperative to prevent wetting the soil once the leaves start to brown for the sake of curing, while if the soil is too dry, dampen it slightly with water if you cannot loosen the soil. A well-composted and fertile soil would never become hard and compacted.
Don't Leave In Sun
Unlike onions, it's not really a good idea to leave your fresh garlic out too long in the sun. So once you harvest the garlic, don’t leave it lying around as you move on to the next plant.
Move the garlic to a shady area with good air circulation such as a porch or a shed or at least under a tree while you are still in the middle of harvest. Don't leave in a bucket as they don't have air circulation.
3. Tools
Now that you know how is garlic harvested, you will need several tools to harvest your garlic bulbs in the best manner possible:
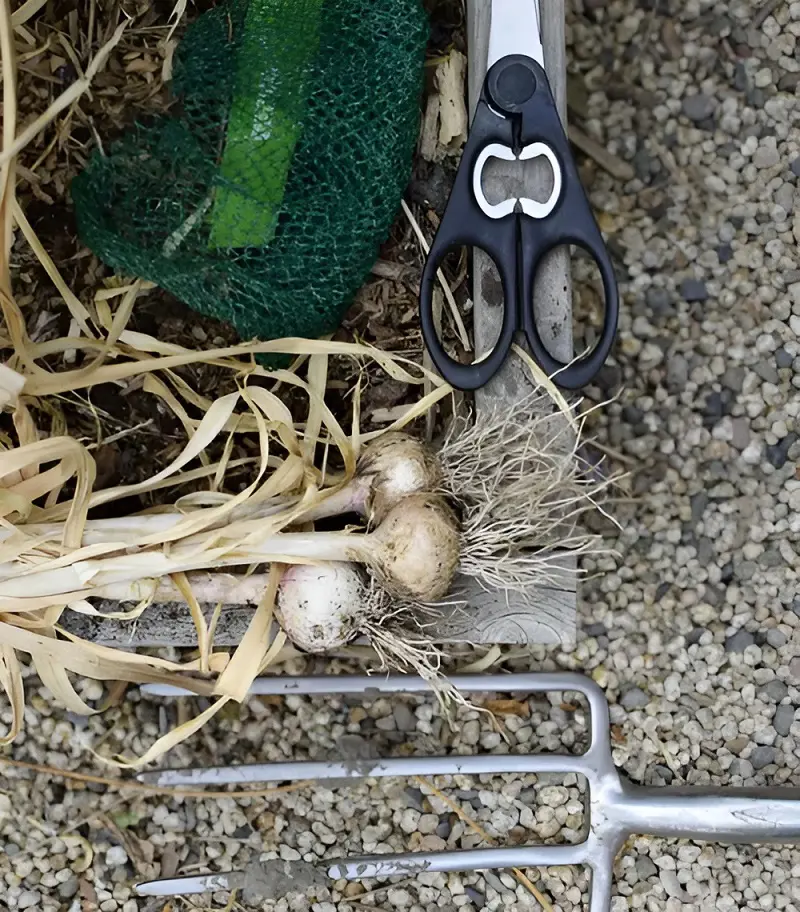
A Garden fork is useful for lifting garlic by first gently loosening the soil and then digging out the garlic without cutting, stabbing, or bruising the bulbs. Forks with sturdy and curved tines are more effective and help prevent the bulbs from getting stuck and bruised between the tines while harvesting garlic plants.
If you notice that the bulbs are either getting stuck and hence bruised from between the tines, or they keep falling through the gap of the tines. Switch to using a shovel instead. Garlic bulbs are delicate and should not be dropped.
Shovel
You can also substitute the garden forks with a trusty good old shovel. Just be sure to handle them carefully and dig with deep steep angles to avoid accidentally cutting the bulbs in half. Flat and rounded shovels perform better as they prevent bulb bruises while increasing harvest efficiency.
Some may find shovels unwieldy or a bit heavy to use, or otherwise the shovel might not always be ideal due to a tightly compacted garden or due to lack of ease of use, then you may consider using hand trowels instead.
Hand Trowel
You can also use a hand trowel in small areas if you need to dig around particular plants without disturbing other plants. To use it, place the trowel 3-4 inches into the ground away from the plant's base.
Use your hands to shift the soil to see if you've unearthed the whole bulb, then carefully lift them out once the soil is sufficiently loose. Hand trowels come useful in confined spaces with control and precision, but they lack harvesting speed.
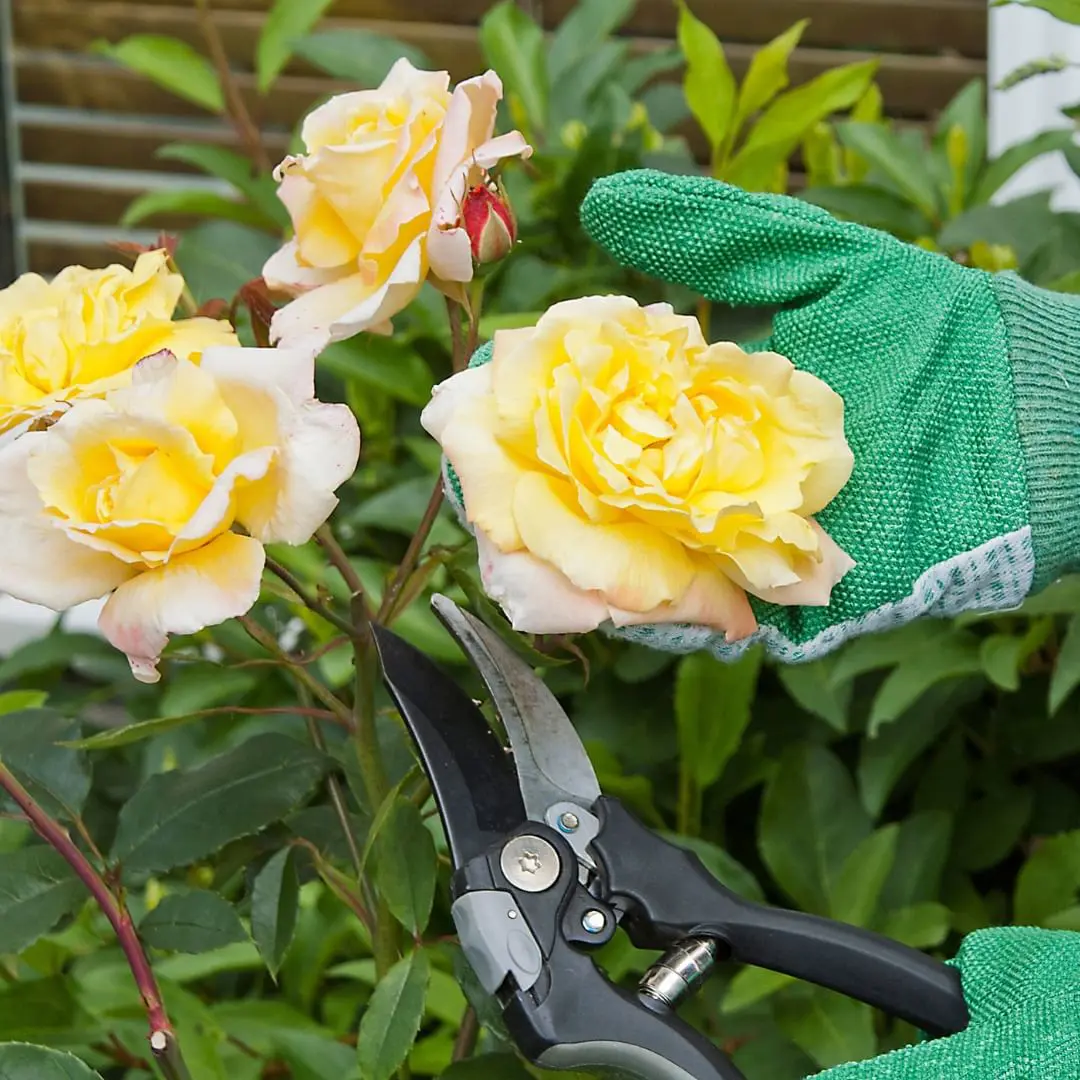
Garden Gloves
These gloves help to protect your hands from dirt and potential cuts and scrapes from the garden or soil. Tetanus bacteria live in the soil so getting a skin cut could easily be a vector for infection.
Additionally, they also offer a better grip, which improves the handling of garlic without slipping and allows for easier tool work.
Bucket or Container
You can collect your harvested garlic in clean buckets or containers but don't leave the garlic there as the bucket has poor air circulation. No, use the bucket to transport large amounts of garlic to a location with decent shade and good air circulation mid-harvest to prevent the garlic bulbs from being damaged by the sun.
This is definitely better than simply leaving your bulbs in the sun. If you want to leave them in the container, use a shallow container filled lined with newspaper such as a woven wicker airy basket and put them in the shade.
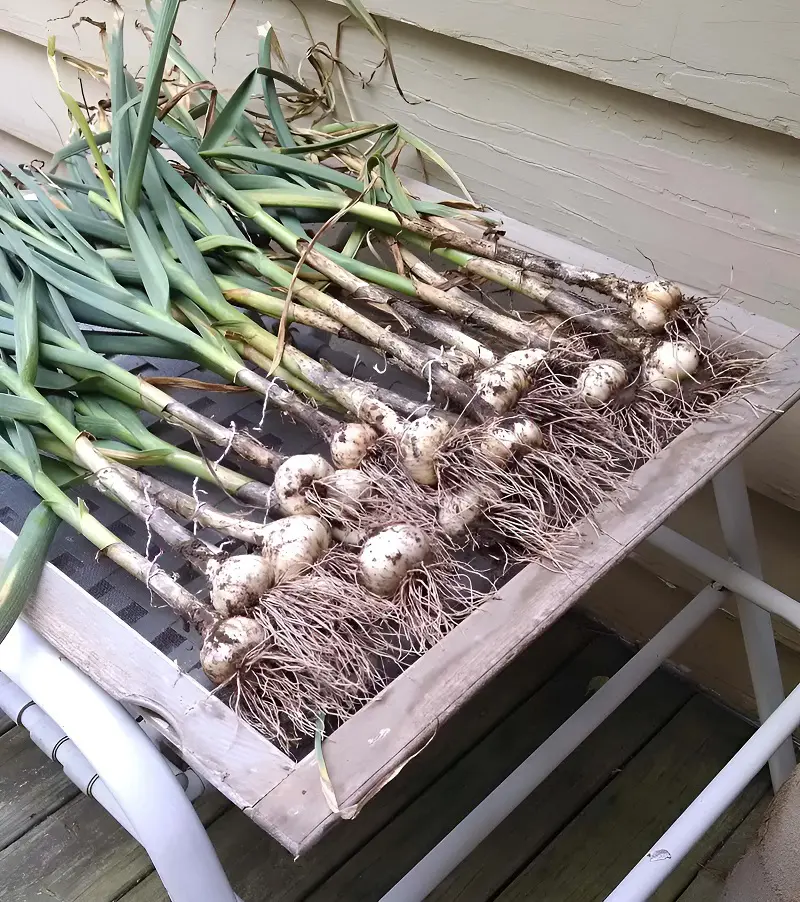
When you are digging the soil, first shift the topsoil near the stem area of the garlic to reveal the top of the bulb so you can get an idea of the bulb size. Start loosening up the soil around 3 inches away to prevent damage.
Once the soil is sufficiently loose, dig up the garlic using either a shovel or a fork but do not pull them from the stems as they could snap off which will result in poor curing and your garlic won't stay fresh very long.
To properly decide what to do with your harvested garlic bulbs, i.e. use immediately, short-term storage, long-term storage, or seeding, you need to first clean then inspect garlic bulbs to be able to properly make your decisions.
Do not use water to clean the garlic. The water will interfere with the curing process and won't allow your garlic to stay good for long-term storage. Simply brush the soil off the bulbs. If the soil is sticky like clay then allow it to dry a bit longer.
Simply put, curing garlic means allowing your garlic to slowly dry down to preserve all the nutrients and flavor for long-term storage. While you can use and cook fresh garlic, it won't taste as intense as cured garlic.
Keep your garlic in a dry and shady place with good air circulation such as a basement, shed, or anywhere with good shade. Hanging them upside down in a cool dark space results in them being cured the quickest but you can also lay them flat on a raised screen instead.
Can I Cure On Sun?
Do not cure the garlic bulbs in the sun as the sunlight will use the moisture inside the garlic to cook the cloves which will alter the flavor of fresh garlic and also prevent it from staying fresh for a long time. It is cooked after all.
Should I Cut The Stalks And Roots?
Don't cut the stalks and roots on the bulbs when curing as the bulb draws energy from them over time and also prevents spoilage from pests and fungi. You can bundle them in groups of 4-12. The smaller the bundle, the quicker it will cure.
Also, avoid removing or breaching the papery outer skin. Any garlic with bruised or breached skin will need to be consumed immediately or preserved in oil or pickles.
How Long Does Curing Take?
Depending on the humidity and the dryness of the room as well as the variety of garlic, it can take anywhere from between two weeks to two months. Instead of relying on a timeline, you should instead physically inspect the garlic.
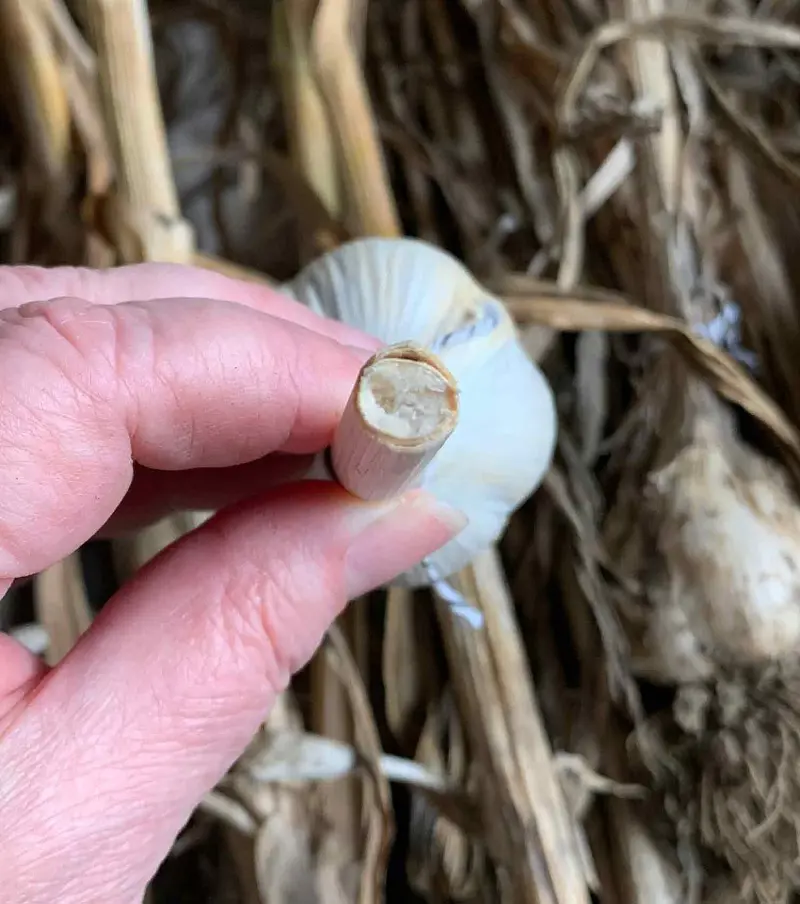
The garlic will have fully cured by the time the tops and the roots have completely dried out and the bulb wrappers papery.
At this point, you can trim the dried-out roots and the stem of the garlic to 1/4 or 1/2 on the garlic head as they no longer serve any purpose. If your garlic is a soft-necked variety, it may be preferable for you to braid the stems together for storage If they are too stiff, wet the stems to make them more pliable.
You can also remove the first layer to remove the soil but don't remove too many as they help keep the freshness. Again, do not wash the bulbs. Look at the interior of the cut stem, they should be uncracked and fully white for a well-cured garlic.
Storing garlic is fairly straightforward. Proper storage will help ensure a long shelf life. A well-stored garlic of the softneck variety will last for 6-8 months whereas the hardneck variety of garlic will last for only 3-4 months.
Follow the given advice and recommendations from our experts to properly store garlic and ensure that you can get the maximum amount of freshness from them without any of your effort and hard work going to waste:
Do Not Refrigerate
Garlic tends to sprout at lower temperatures thus, it is not recommended to store it in a refrigerator. The cold temperatures of the refrigerator mimic the autumn season when garlic is notified to sprout resulting in sprouting within a few weeks.
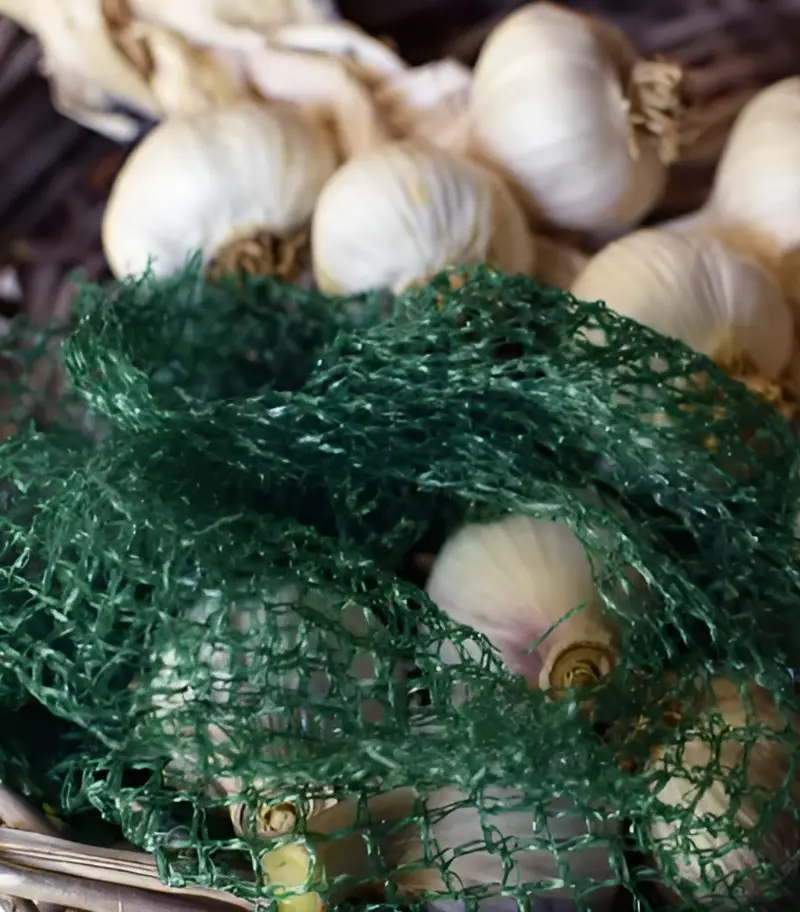
So instead simply toss them into your cupboard or wire shelf with good air circulation, they might have a slightly lower shelf life but it's not that significant compared to storing them improperly. We also recommend using mesh bags.
Ideal Temperature
While commercially stored garlic is kept at 32°F (0°C) which extends its storage life by an additional six months without deteriorating, we still don't recommend refrigerating as home refrigerators are warmer than commercial refrigerators which allow for garlic bulbs to sprout.
Therefore, the ideal temperature range for homes is between 40-60°F (4-15°C). Additionally, the ideal humidity for storing is around 60%, don't store in damp places such as the cellar or basement because it can lead to mold and fungus.
8. Sorting Garlic Bulbs
Once you have completed the curing process, there are only two more things left to do. The first is to sort out all the garlic from each other and the second is to create a proper storage area. Let's start with the first one, sorting the garlic bulbs.
After all growing, harvesting, and curing is never a perfect process and there are always bound to be mistakes and less-than-ideal subpar garlic bulbs despite our best efforts.
Check The Bulb Cover
Check the wrap cover of the bulb. I'm sure you remember me mentioning previously not to remove too many or allow them to get damaged. The secret to the natural longevity of garlic is due to curing and bulbs. Even though successful curing, lacking or having a torn bulb will expose them to the elements.
This exposure will over time spoil or rot the garlic if botulism bacteria doesn't claim it first. Therefore, if any one your cured garlic has torn or missing covers, cook and consume it immediately. Alternatively, you can preserve them in oil, making pickles, or freezing chopped garlic cloves.
Long Lasting Garlic
Only the garlic that is in pristine condition should be stored. That means there should be no breaches in the protective wrapping or any exposed cloves. Also, the stem tip of the hard necks should be solid, and completely white with the least amount of green as possible, and shouldn't have any cracks.
Only garlic fulfilling the above criteria can be approved for long-term storage and they are guaranteed to last well into the winter provided that you have ensured proper storage conditions.
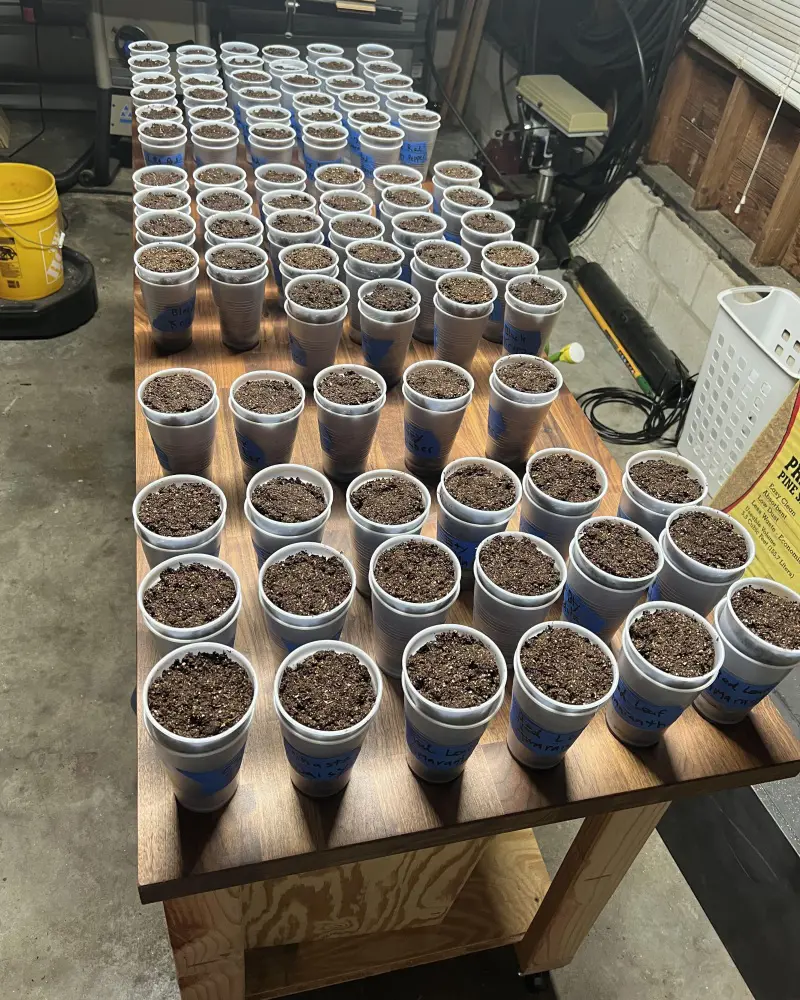
Large Pristine Bulbs For Seeds
Now that this season's batch of garlic is over, it's time to think about growing the next season's batch of garlic. Put aside some of your most significant, healthiest, and largest bulbs. Don't choose small bulbs, bulbs with the largest cloves have the best odds of producing larger bulbs next season.
Since the bulbs are in pristine condition, they should be in a healthy shape for a few months until fall planting can take place. If possible, consider storing the set-aside seeding bulbs at room temperature with relatively high humidity to prevent drying out.