Growing and caring for squash is a rewarding endeavor that offers a bountiful harvest and adds diversity to home gardens. Squash, a versatile and nutritious vegetable, is a staple in many gardens, cherished for its various shapes, sizes, and flavors. For all of us, mastering the art of growing squash can be an enriching experience.
Let's explore the essential steps and techniques needed to cultivate healthy squash plants, from planting seeds to caring for the growing plants, and finally, to harvesting and storing delicious fruits. Let's embark on this journey to discover the secrets of successful squash cultivation.
How To Plant Squash?
Planting squash is relatively straightforward, but following a few key steps can help ensure optimal growth and yield. Here's how to plant squash in your garden:
1. Choose the Right Location:
Select a sunny location in your garden that receives at least 6 to 8 hours of direct sunlight each day. Squash plants thrive in warm, well-drained soil, so choose a spot with fertile soil that drains well.
2. Prepare the Soil:
Before planting, prepare the soil by loosening it to a depth of about 8 to 12 inches. Remove any weeds, rocks, or debris from the planting area. Incorporate organic matter, such as compost or aged manure, into the soil to improve its fertility and drainage.
3. Determine Plant Spacing:
The spacing between squash plants will depend on the specific variety you're growing. Generally, plant bush varieties 18 to 24 inches apart in rows spaced 3 to 4 feet apart. For vining varieties, space plants 3 to 4 feet apart in rows spaced 6 to 8 feet apart. This allows the plants enough room to spread and prevents overcrowding.
4. Planting Seeds:
Sow squash seeds directly into the prepared soil once the danger of frost has passed and the soil temperature has warmed to at least 60°F (16°C). Plant seeds 1 inch deep and cover them lightly with soil. Water the area gently to ensure the soil stays moist but not waterlogged.
5. Transplanting Seedlings:
If you're starting with seedlings, transplant them into the garden once they have developed a few sets of true leaves and all danger of frost has passed. Dig a hole slightly larger than the root ball of the seedling and gently place it in the hole. Backfill with soil and water thoroughly.
How To Care For Squash?
Once planted, squash plants require proper care to ensure healthy growth and a bountiful harvest. Here's a step-by-step guide on how to grow squash successfully:
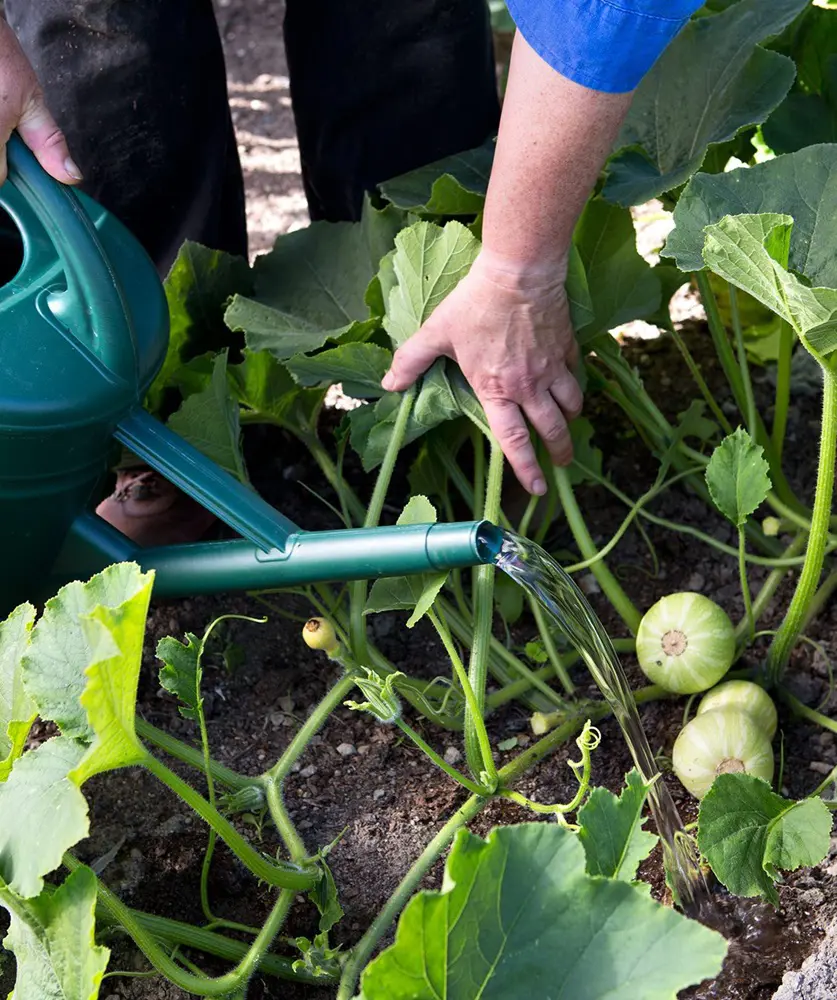
1. Provide Adequate Water:
Squash plants need consistent moisture throughout the growing season, especially during flowering and fruit development. Water the plants deeply, providing around 1 to 1.5 inches of water per week, either through rainfall or irrigation. Water at the base of the plants to keep the foliage dry and prevent disease.
2. Mulch the Soil:
Apply a layer of organic mulch, such as straw, shredded leaves, or grass clippings, around the base of the squash plants. Mulching helps retain soil moisture, suppresses weed growth, and maintains even soil temperature. It also prevents soil from splashing onto the leaves, reducing the risk of soil-borne diseases.
3. Fertilize Regularly:
Squash plants are heavy feeders and benefit from regular fertilization throughout the growing season. Before planting, incorporate a balanced fertilizer into the soil. Additionally, side-dress the plants with compost or a balanced fertilizer every 3 to 4 weeks to provide essential nutrients for healthy growth and fruit development.
4. Control Weeds:
Keep the area around squash plants free of weeds, which can compete for nutrients, water, and sunlight. Regularly remove weeds by hand or use mulch to suppress weed growth. Be careful not to disturb the shallow roots of the squash plants while weeding.
5. Support Vining Varieties:
Provide support for the vining varieties of squash plants to climb and spread. Use trellises, cages, or garden stakes to support the vines and keep the fruit off the ground. This not only saves space but also reduces the risk of fruit rot and pest damage.
6. Monitor for Pests and Diseases:
Keep an eye out for common pests such as squash bugs, cucumber beetles, and powdery mildew. Regularly inspect the plants for signs of pest infestation or disease, and take appropriate measures to control them. Consider using organic pest control methods or insecticidal soap to manage pests while minimizing harm to beneficial insects.
7. Pruning:
Regularly prune squash plants to remove any dead or diseased foliage, as well as any runners or suckers that may divert energy away from fruit production. Pruning helps improve air circulation around the plants, reduces the risk of disease, and encourages better fruit development.
Types of Squash
Squash comes in a variety of shapes, sizes, and colors, each with its own unique flavor and culinary uses. Here are some popular types of squash to consider growing in your garden:
1. Summer Squash:
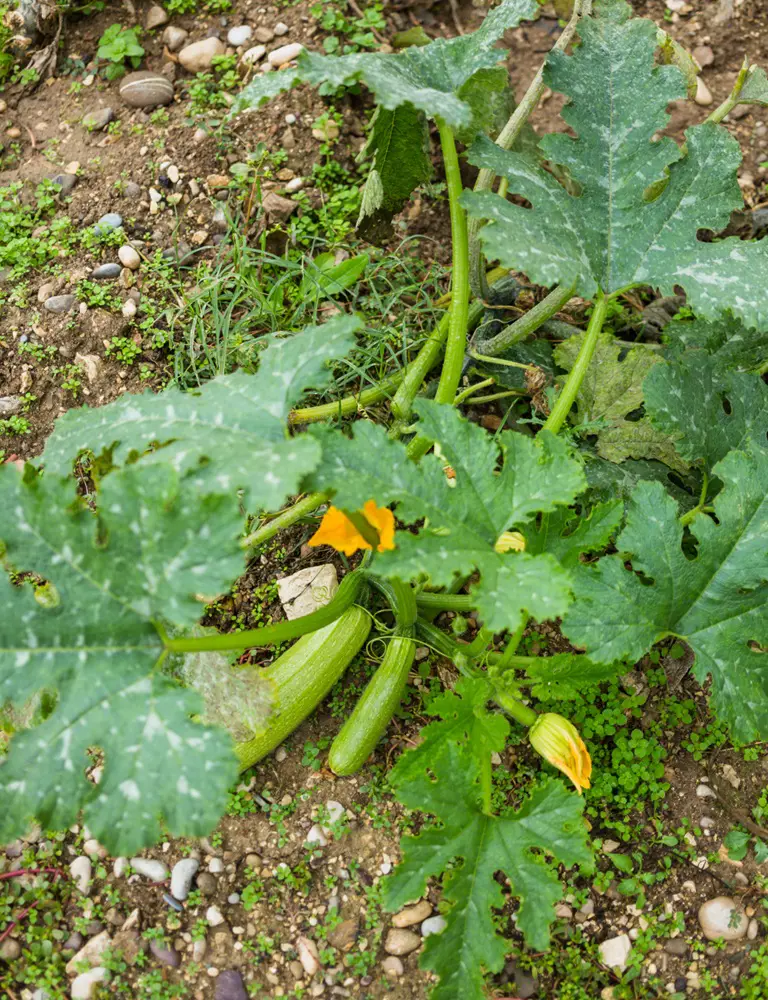
- Zucchini: Long, cylindrical fruits with dark green or yellow skin. Tender and mild-flavored, perfect for grilling, sautéing, or baking.
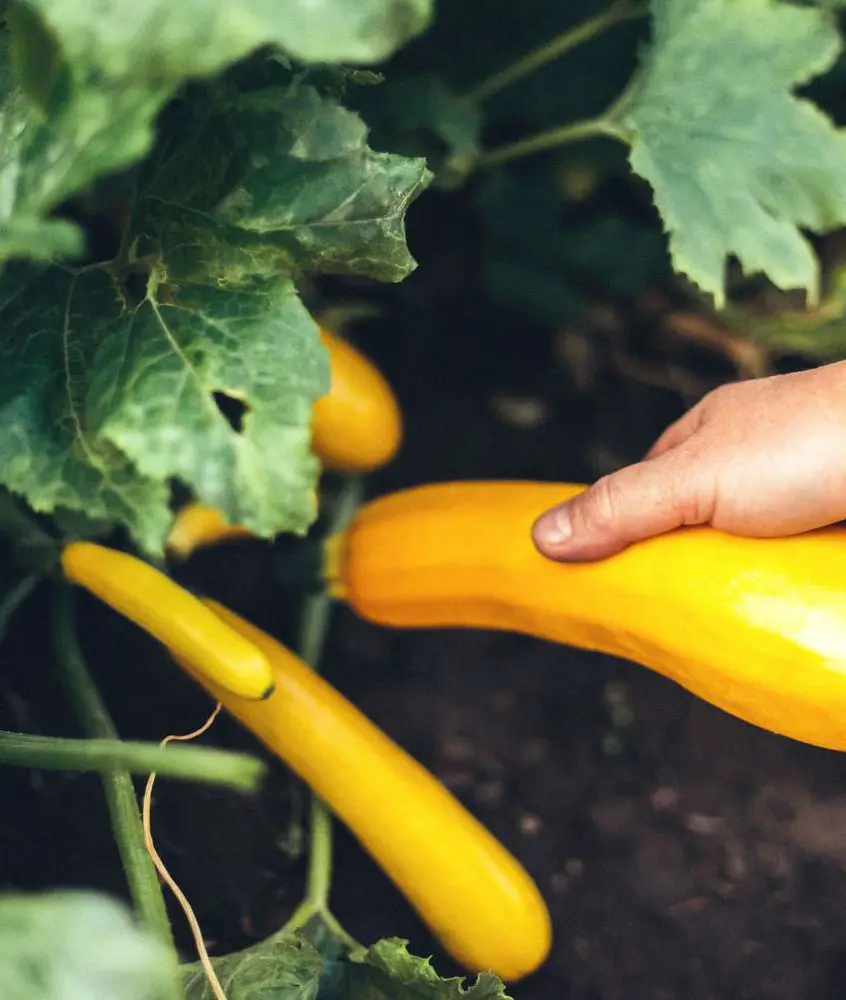
- Yellow Squash: Yellow-skinned with a similar shape to zucchini but with a sweeter flavor. Ideal for frying, steaming, or adding to soups and stews.
- Crookneck Squash: Distinctive curved neck and bulbous base with yellow skin. Versatile and flavorful, great for grilling, roasting, or using in casseroles.
2. Winter Squash:
- Butternut Squash: Bell-shaped with tan skin and sweet, nutty flesh. Excellent for roasting, soups, or purées.
- Acorn Squash: Small, acorn-shaped fruits with dark green or orange skin and sweet, nutty flavor. Perfect for stuffing, baking, or roasting.
- Spaghetti Squash: Oval-shaped with pale yellow skin. When cooked, the flesh separates into strands resembling spaghetti. Ideal for use as a low-carb pasta alternative.
3. Specialty Squash:
- Pattypan Squash: Also known as scallop squash, these small, scallop-shaped fruits come in various colors and have a mild, buttery flavor. Best when harvested young and tender.
- Delicata Squash: Cylindrical with cream-colored skin striped in green or orange. Sweet and creamy with edible skin. Great for roasting or stuffing.
Growing Yellow Squash
Yellow squash, a popular type of summer squash, is prized for its tender texture and mild, sweet flavor. Here's how to grow yellow squash in your garden:
1. Planting Yellow Squash:
Plant yellow squash seeds directly in the garden once the soil has warmed to at least 60°F (16°C). Sow seeds 1 inch deep and space them 18 to 24 inches apart in rows spaced 3 to 4 feet apart. Alternatively, transplant seedlings into the garden once they have developed a few sets of true leaves.
2. Providing Care:
Water yellow squash plants regularly, providing about 1 to 1.5 inches of water per week. Mulch the soil to retain moisture and suppress weeds. Fertilize the plants every 3 to 4 weeks with a balanced fertilizer to promote healthy growth and fruit development.
3. Harvesting Yellow Squash:
Harvest yellow squash when the fruits are young and tender, typically when they are 6 to 8 inches long. Use a sharp knife to cut the fruits from the vine, taking care not to damage the plant. Regular harvesting encourages continued fruit production throughout the growing season.
Growing Squash From Seedling
Starting squash from seedlings is a great way to get a head start on the growing season. Here's how to grow squash from seedlings:
1. Purchasing Seedlings:
Purchase squash seedlings from a reputable nursery or garden center. Choose healthy, vigorous seedlings with dark green leaves and no signs of disease or damage.
2. Transplanting Seedlings:
Transplant squash seedlings into the garden once all danger of frost has passed and the soil has warmed to at least 60°F (16°C). Dig a hole slightly larger than the root ball of the seedling and gently place the seedling into the hole, making sure to cover the roots completely with soil.
Press the soil gently around the base of the seedling to secure it in place. Water the seedlings thoroughly after transplanting to help them establish in their new environment.
3. Providing Care:
Care for squash seedlings by providing them with adequate water and sunlight. Water the seedlings regularly, keeping the soil consistently moist but not waterlogged. Protect young seedlings from extreme temperatures and strong winds by providing shade or using row covers.
Monitor the seedlings for signs of pests or disease, and take appropriate measures to address any issues.
4. Hardening Off:
Before transplanting squash seedlings into the garden, it's essential to harden them off to acclimate them to outdoor conditions gradually. About 7 to 10 days before transplanting, gradually expose the seedlings to outdoor conditions by placing them outdoors in a sheltered, shady location for a few hours each day.
Increase the exposure gradually over a week, taking care to bring the seedlings indoors at night if temperatures are still cool.
Growing Squash From Seed
Growing squash from seed is a cost-effective and rewarding way to start your garden. Here's how to grow squash from seed:
1. Selecting Seeds:
Choose high-quality squash seeds from a reputable supplier or seed catalog. Select varieties that are well-suited to your growing region and garden conditions. Consider factors such as plant size, fruit shape, color, and flavor when choosing squash seeds.
2. Starting Seeds Indoors:
Start squash seeds indoors 3 to 4 weeks before the last expected frost date in your area. Use biodegradable seedling pots or trays filled with seed-starting mix. Plant one or two seeds per pot, pressing them gently into the soil and covering them lightly with additional soil.
3. Providing Optimal Conditions:
Place the seedling pots in a warm, sunny location or under grow lights. Keep the soil consistently moist but not waterlogged, and maintain a temperature of around 70°F (21°C) for optimal germination. Use a heat mat if necessary to provide bottom heat and encourage germination.
4. Transplanting Seedlings:
Once the seedlings have developed a few sets of true leaves and all danger of frost has passed, transplant them into the garden. Harden off the seedlings for 7 to 10 days before transplanting by gradually exposing them to outdoor conditions.
5. Planting Seedlings:
Dig a hole slightly larger than the root ball of the seedling and gently place it in the hole. Backfill with soil and water thoroughly to help the seedling establish in its new environment. Space the seedlings according to the specific requirements of the variety you're growing.
6. Providing Care:
Care for squash plants by watering them regularly, providing adequate sunlight, and fertilizing them throughout the growing season. Monitor the plants for signs of pests and diseases, and take appropriate measures to address any issues that arise.
Dealing With Pests And Diseases
Dealing with pests and diseases on squash plants requires a combination of preventive measures, regular monitoring, and timely interventions. Here are some effective strategies:
Pests
-
Squash Bugs:
- Identification: Look for brownish-black adults and clusters of bronze-colored eggs on the undersides of leaves.
- Control: Handpick bugs and crush eggs. Use row covers to protect young plants and remove debris where bugs can overwinter.
-
Squash Vine Borers:
- Identification: Watch for wilting vines and frass (sawdust-like excrement) near the base of the plant.
- Control: Use floating row covers until plants start flowering. Inject Bt (Bacillus thuringiensis) into the vines if borers are detected. Destroy infected vines after the season.
-
Aphids:
- Identification: Check for clusters of small, soft-bodied insects on the undersides of leaves and on new growth.
- Control: Spray plants with a strong jet of water to dislodge aphids. Use insecticidal soap or neem oil if infestations are severe.
Diseases
-
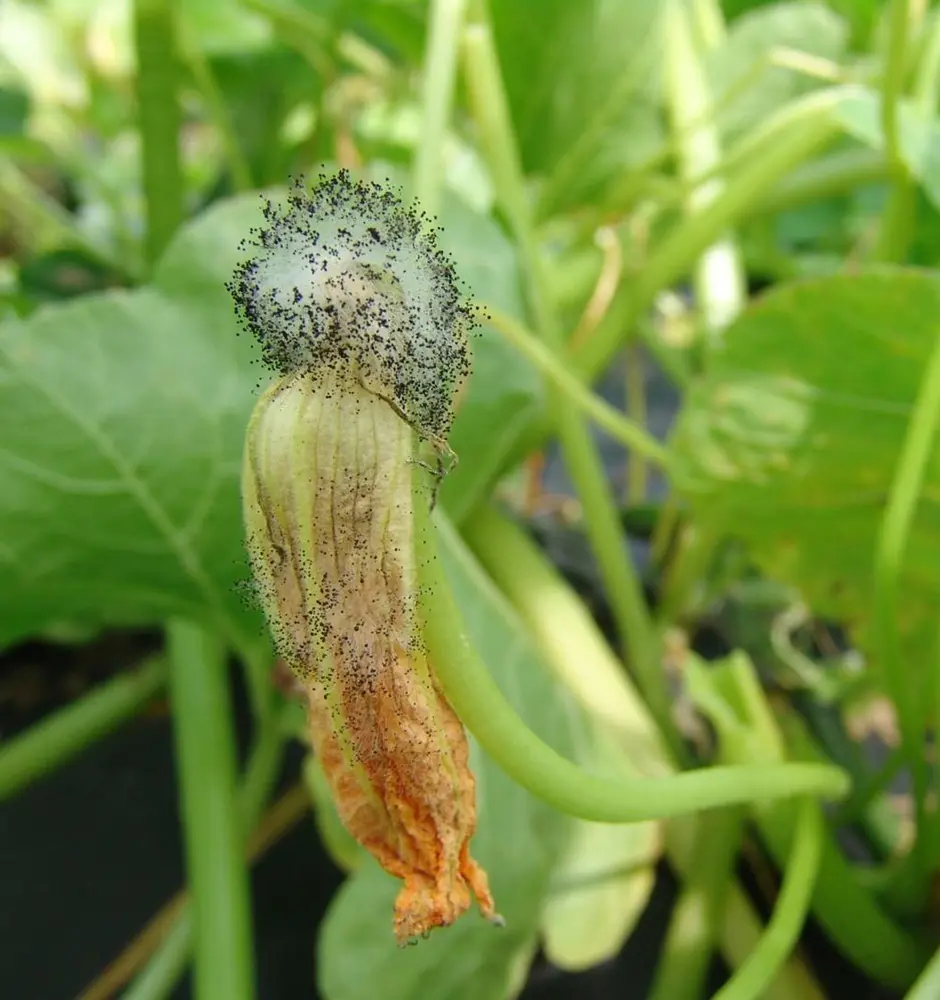
Powdery Mildew:
- Identification: Look for white, powdery spots on leaves and stems.
- Control: Ensure good air circulation by spacing plants properly. Water at the base to keep foliage dry. Apply fungicides like sulfur or potassium bicarbonate at the first sign of infection.
-
Downy Mildew:
- Identification: Yellowish spots on the upper leaf surface and gray mold on the underside.
- Control: Remove infected leaves and improve air circulation. Use fungicides like copper-based sprays as a preventive measure.
-
Bacterial Wilt:
- Identification: Sudden wilting of leaves and stems, which doesn’t recover with watering.
- Control: Remove and destroy infected plants. Control cucumber beetles, which spread the bacteria, with row covers and insecticides.
General Tips
- Crop Rotation: Avoid planting squash in the same spot every year to prevent soil-borne diseases.
- Healthy Soil: Maintain soil health with organic matter and proper fertilization.
- Regular Monitoring: Inspect plants regularly for early signs of pests and diseases to manage them promptly.
- Clean Garden Practices: Remove plant debris and weeds that can harbor pests and pathogens.
By combining these practices, you can effectively manage and reduce the impact of pests and diseases on your squash plants.
How To Store Squash?
Proper storage is essential to extend the shelf life of harvested squash and preserve its flavor and texture. Here's how to store squash for long-term freshness:
1. Harvesting:
Harvest squash when the fruits are fully mature but still tender, typically before the first frost in the fall. Use a sharp knife or pruning shears to cut the fruits from the vine, leaving a short stem attached.
2. Curing:
Before storing, allow winter squash varieties, such as butternut squash and acorn squash, to cure in a warm, dry location for 10 to 14 days. This helps the skin toughen and enhances flavor and storage life.
3. Cleaning:
Wipe the harvested squash with a clean, dry cloth to remove any dirt or debris. Avoid washing the squash, as excess moisture can promote mold and decay during storage.
4. Storage:
Store harvested squash in a cool, dry location with good air circulation. Ideal storage conditions include temperatures between 50°F and 55°F (10°C to 13°C) and relative humidity of around 50% to 70%.
5. Proper Handling:
Handle squash carefully to avoid bruising or damaging the skin, as this can lead to spoilage. Check stored squash regularly for any signs of decay or mold, and remove any damaged or rotten fruits promptly to prevent the spread of decay.
6. Long-Term Storage:
For longer-term storage, consider storing winter squash varieties in a root cellar, cool basement, or unheated garage. Arrange the squash in a single layer on shelves or racks, ensuring they are not touching each other.