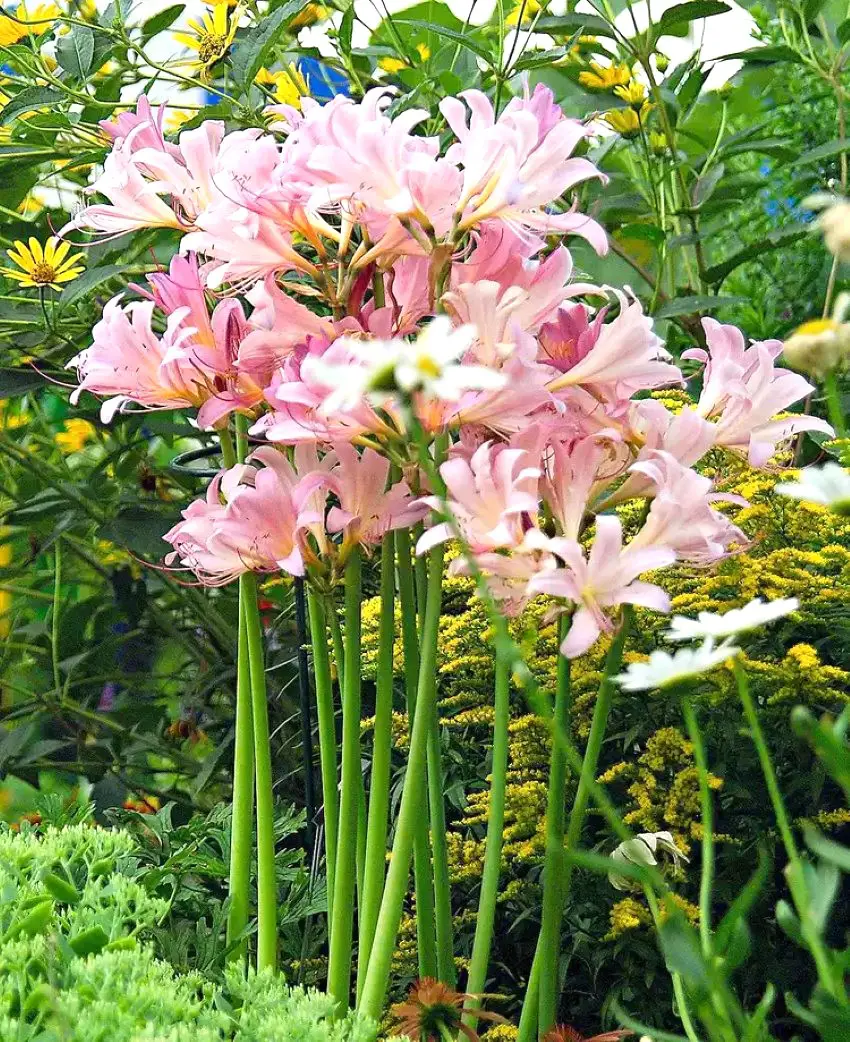
Spider lilies, known for their striking, spider-like blooms, are a captivating addition to any garden. These perennial bulbs, with their elegant flowers and minimal care requirements, offer a unique aesthetic appeal.
In this guide, we'll explore the essential steps for growing and caring for spider lilies, from planting and watering to addressing common pests and diseases. Whether you're a novice or an experienced gardener, our tips will help you cultivate healthy, vibrant spider lilies in your garden.
Growing Spider Lily
Growing spider lilies requires understanding their specific needs and providing the right conditions to thrive. Here’s a comprehensive guide on how to grow these stunning flowers:
1. Choosing the Right Location
Spider lilies prefer full sun to partial shade. They thrive in well-drained soil and can tolerate a range of soil types, from sandy to loamy. Ensure the planting site gets at least 6 hours of sunlight daily for optimal growth.
2. Planting Bulbs
- Timing: The best time to plant spider lily bulbs is in late summer to early fall, before the first frost.
- Depth: Plant the bulbs about 4-6 inches deep with the pointed end facing up.
- Spacing: Space the bulbs 6-12 inches apart to allow for growth and air circulation.
3. Soil Preparation
Prepare the soil by adding organic matter like compost to improve fertility and drainage. Spider lilies prefer slightly acidic to neutral soil (pH 6.0-7.0).
4. Watering
Water the bulbs thoroughly after planting. Keep the soil consistently moist but not waterlogged. Once established, spider lilies are relatively drought-tolerant but perform best with regular watering.
5. Mulching
Apply a layer of mulch around the plants to conserve moisture, suppress weeds, and regulate soil temperature. Organic mulch, such as straw or shredded leaves, works well.
6. Fertilizing
Fertilize the plants in spring with a balanced, slow-release fertilizer. Avoid over-fertilizing, as too much nitrogen can lead to excessive foliage growth at the expense of flowers.
How to Care for Spider Lily
Caring for spider lilies involves maintaining their health throughout the growing season and ensuring they continue to thrive year after year. Here’s how to care for your spider lilies:
1. Watering Needs
While spider lilies are relatively drought-tolerant, they benefit from consistent watering, especially during dry spells. Water the plants deeply but infrequently, allowing the soil to dry out slightly between watering sessions.
2. Fertilization
Fertilize the plants annually in early spring with a balanced fertilizer. If the soil is particularly poor, you can add a second application in late summer. Avoid high-nitrogen fertilizers that promote leaf growth over flowers.
3. Pruning and Deadheading
Pruning is minimal for spider lilies. Remove spent flowers to prevent the plant from putting energy into seed production. This encourages the bulbs to store more energy for the next season’s blooms.
4. Winter Care
In colder climates, spider lilies may need some winter protection. Apply a thick layer of mulch over the bulbs to insulate them from freezing temperatures. In mild climates, spider lilies can be left in the ground year-round.
5. Dividing and Transplanting
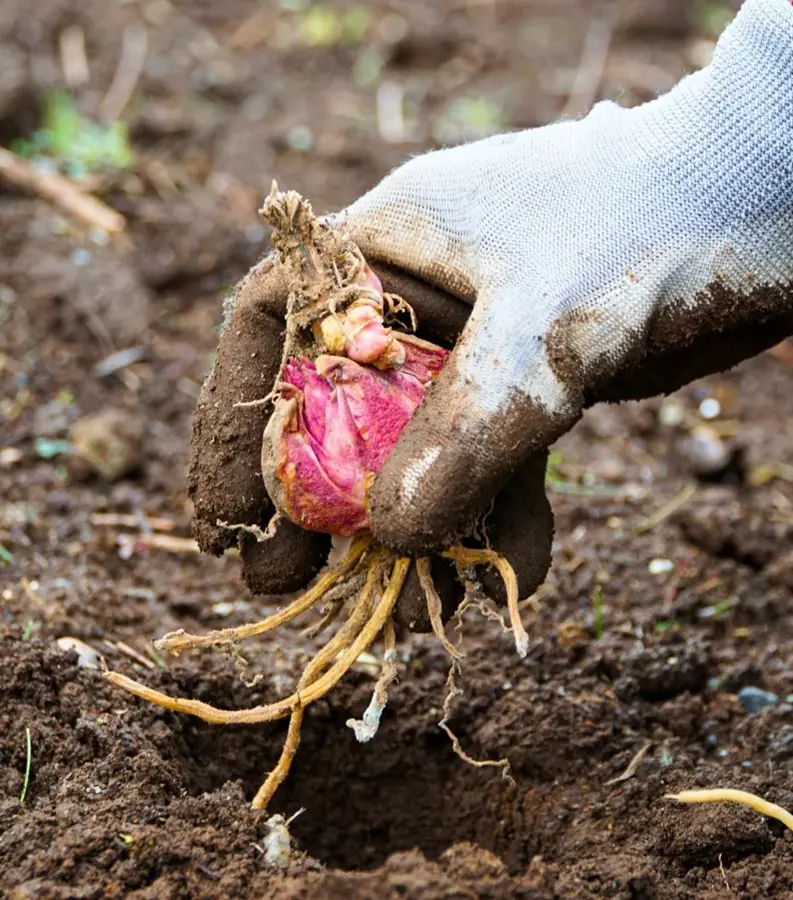
Divide and transplant spider lily bulbs every 3-5 years to prevent overcrowding and rejuvenate the plants. The best time to divide is in the fall after the foliage has died back.
- When to Divide: The best time to divide spider lilies is in the fall, after the foliage has died back but before the first frost. This allows the bulbs to establish themselves before the winter dormancy.
- Digging Up the Bulbs: Carefully dig around the clump of bulbs with a garden fork or spade, taking care not to damage the bulbs. Lift the clump from the ground and gently shake off excess soil.
- Separating the Bulbs: Separate the bulbs by gently pulling them apart. Each bulb should have some roots attached. If the bulbs are tightly clumped, you can use a sharp knife to cut them apart.
- Preparing the New Site: Choose a new location for the divided bulbs or prepare the same site by adding fresh compost to the soil. Ensure the planting site has good drainage and receives adequate sunlight.
- Replanting the Bulbs: Plant the divided bulbs at the same depth they were originally growing, about 4-6 inches deep. Space the bulbs 6-12 inches apart to allow room for growth. Water the newly planted bulbs thoroughly.
- Aftercare: Mulch the newly planted bulbs to retain moisture and regulate soil temperature. Water them regularly to help them establish. Avoid fertilizing until the next growing season.
Pest And Disease Management

Common Pests
-
Aphids:
- Symptoms: Aphids are small, sap-sucking insects that can cause yellowing leaves, distorted growth, and sticky honeydew residue.
- Solution: Spray the plants with a strong stream of water to dislodge the aphids. Use insecticidal soap or neem oil for severe infestations. Encourage natural predators like ladybugs and lacewings.
-
Spider Mites:
- Symptoms: Spider mites cause fine webbing on the undersides of leaves, yellow speckling, and leaf drop.
- Solution: Increase humidity around the plant by misting it regularly. Use insecticidal soap or neem oil. Introduce predatory mites or ladybugs as biological control.
-
Bulb Mites:
- Symptoms: These mites attack the bulbs, causing stunted growth and deformed flowers.
- Solution: Avoid planting in overly wet soil. Treat affected bulbs with a miticide before planting. Ensure good soil drainage to prevent mite proliferation.
Common Diseases
-
Leaf Scorch:
- Symptoms: Leaf scorch manifests as brown, dry tips on leaves, often due to fungal infections or environmental stress.
- Solution: Improve air circulation around the plants. Water at the base of the plant to keep foliage dry. Remove and destroy affected leaves.
-
Botrytis Blight:
- Symptoms: This fungal disease causes gray mold on leaves, flowers, and stems.
- Solution: Remove and discard infected plant parts. Apply a fungicide labeled for use on ornamental plants. Ensure good air circulation and avoid overhead watering.
-
Basal Rot:
- Symptoms: Caused by fungi, basal rot leads to yellowing leaves, wilting, and rotting bulbs.
- Solution: Use well-draining soil and avoid overwatering. Treat bulbs with a fungicide before planting. Remove and destroy any infected bulbs to prevent the spread.
Prevention Tips
- Proper Planting: Plant spider lilies in well-draining soil and avoid overcrowding to ensure good air circulation.
- Watering Practices: Water at the base of the plant to keep the foliage dry and reduce the risk of fungal infections.
- Regular Monitoring: Regularly inspect plants for signs of pests and diseases. Early detection is crucial for effective management.
- Sanitation: Clean up fallen leaves and plant debris to minimize the risk of fungal diseases.
Companion Plants for Spider Lilies
Spider lilies can be paired with a variety of companion plants that complement their striking appearance and enhance the overall beauty of the garden. Here are some excellent companion plants for spider lilies:
1. Hostas
Hostas, with their lush foliage and varied textures, provide a beautiful contrast to the slender, upright flowers of spider lilies. They thrive in similar conditions and can fill in the gaps between the lilies.
2. Ferns
Ferns add a delicate, feathery texture to the garden and thrive in partial shade, making them ideal companions for spider lilies. Their foliage provides a soft backdrop that highlights the bold flowers of the lilies.
3. Daylilies
Daylilies and spider lilies have similar growing requirements and blooming periods. The vibrant colors of daylilies complement the exotic appearance of spider lilies, creating a harmonious display.
4. Astilbes
Astilbes offer plumes of flowers in shades of pink, red, and white that pair well with spider lilies. They prefer moist, well-drained soil and partial shade, making them suitable companions.
5. Sedums
Sedums, with their succulent foliage and late-summer blooms, provide a contrasting texture to spider lilies. They are drought-tolerant and thrive in similar conditions, making them a low-maintenance companion.
Types of Spider Lily
There are several types of spider lilies, each with its distinct characteristics. Here are some popular varieties:
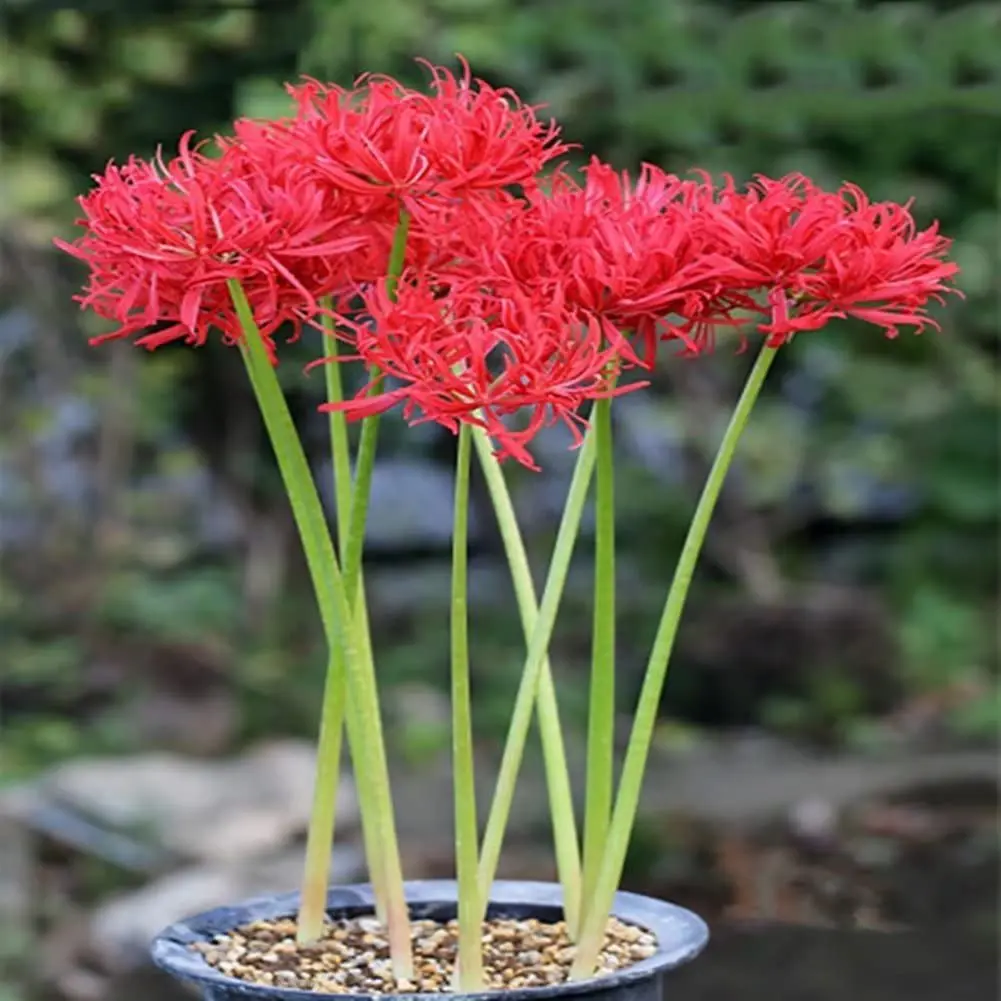
1. Lycoris radiata (Red Spider Lily)
The red spider lily is perhaps the most well-known variety. Its bright red flowers are an autumnal delight, often blooming around September. This type is often associated with festivals and cultural events in Japan.
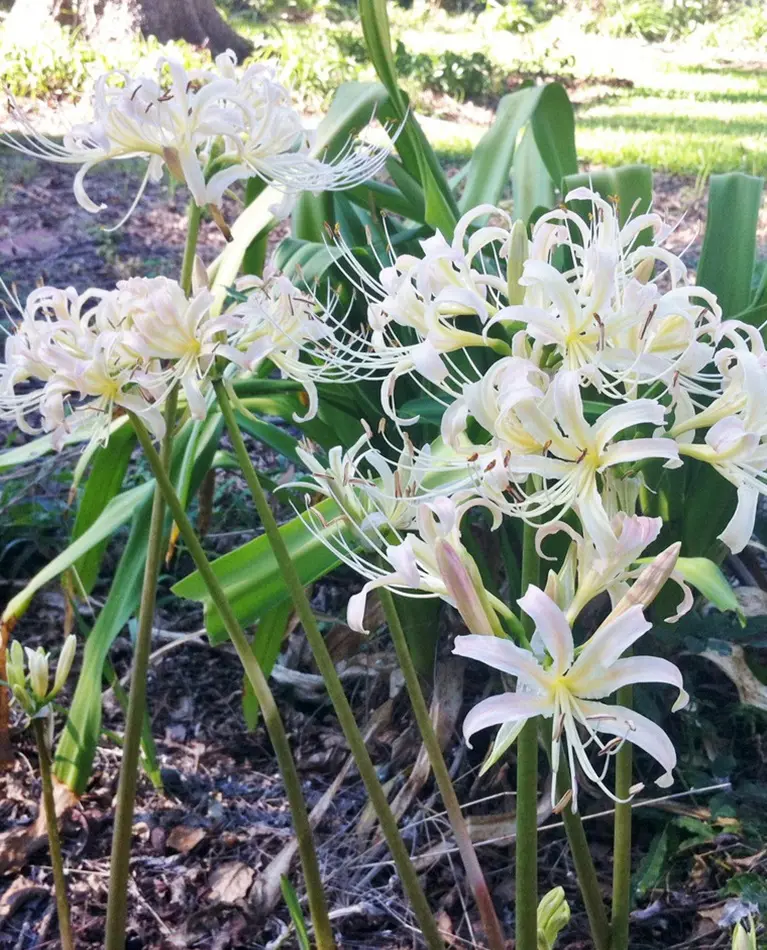
2. Lycoris albiflora (White Spider Lily)
The white spider lily produces pristine white flowers that add a touch of elegance to gardens. It is less common than its red counterpart but equally captivating.
3. Lycoris aurea (Golden Spider Lily)
The golden spider lily, with its striking yellow flowers, blooms later than other varieties, often in late fall. This type is perfect for adding late-season color to the garden.
4. Lycoris squamigera (Resurrection Lily)
Also known as the surprise lily, this variety produces pink flowers. It is called the resurrection lily because it appears to spring from the ground unexpectedly, often after the leaves have disappeared.
5. Lycoris sanguinea (Blood Lily)
This type has deep orange to red flowers and is known for its smaller size compared to other spider lilies. It’s ideal for borders and smaller garden spaces.