Chances are, you've encountered or used a loofah sponge at some point in your life, whether in the shower or for household cleaning. However, did you realize it originates from a vegetable? Many are surprised to learn that loofah is a vegetable, and growing one's own loofah sponges can be eye-opening.
These sponges, derived from the fibrous flesh of mature loofah gourds, grow on land and can be cultivated in home gardens. Embracing these natural sponges offers a planet-friendly alternative. So, if you're enthusiastic about growing your own loofah, refer to the complete guide provided below for tips on how to grow loofah.
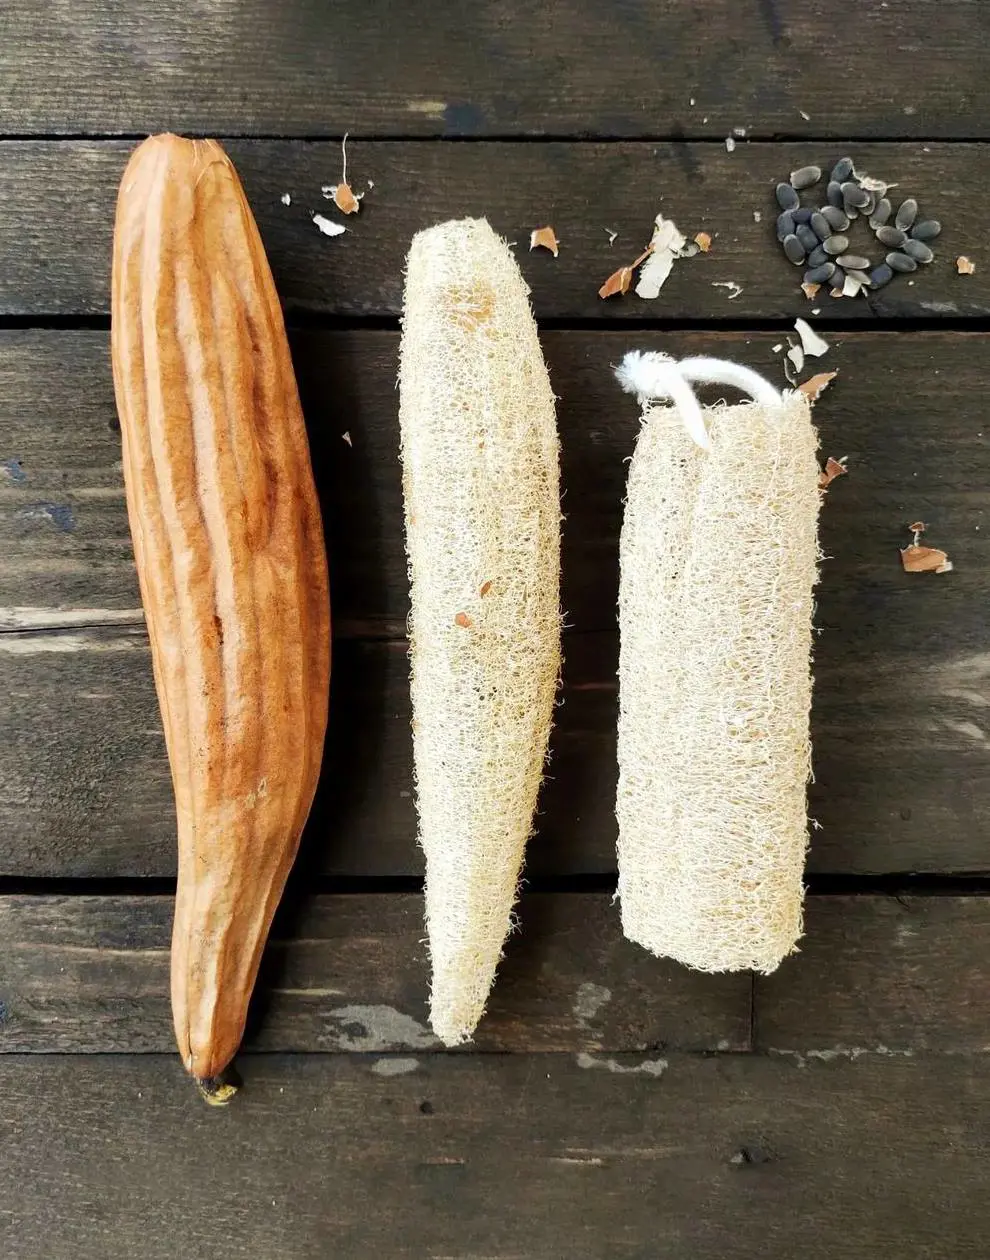
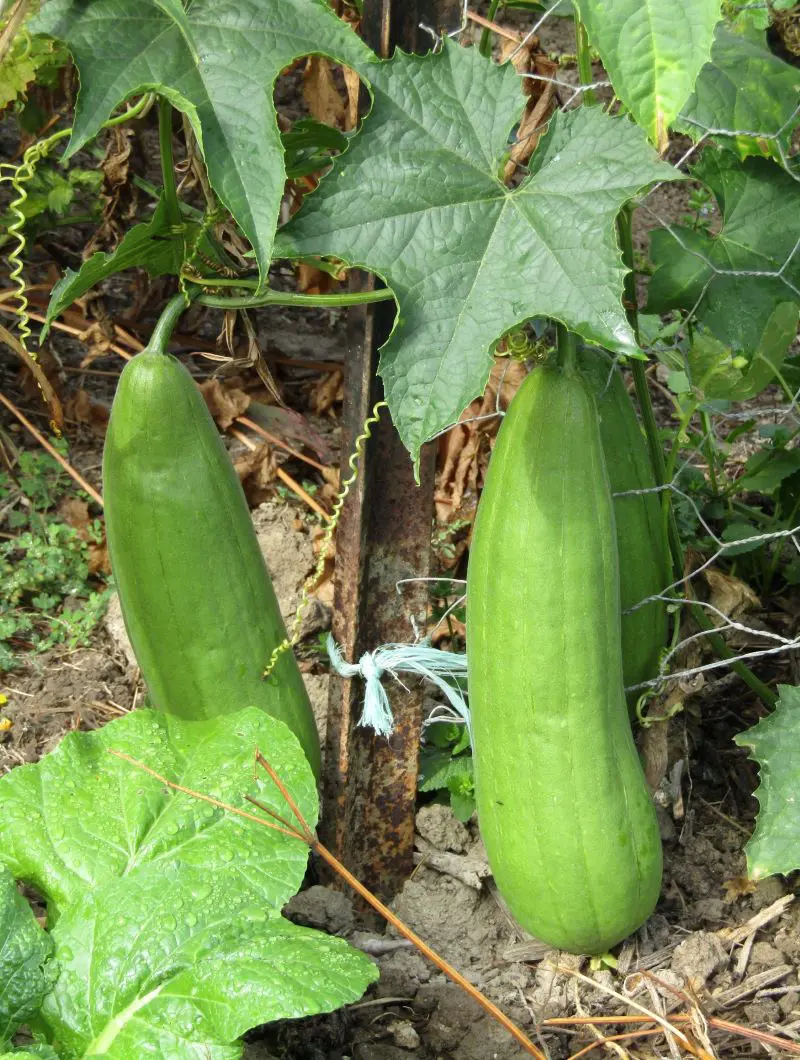
The loofah plant, also called luffa or sponge gourd, is a tropical vine from the Cucurbitaceae family, which also includes cucumbers. It produces long, elongated fruits that can reach several feet in length. The young fruits are edible and commonly used in various Asian cuisines, prized for their mild flavor and crisp texture.
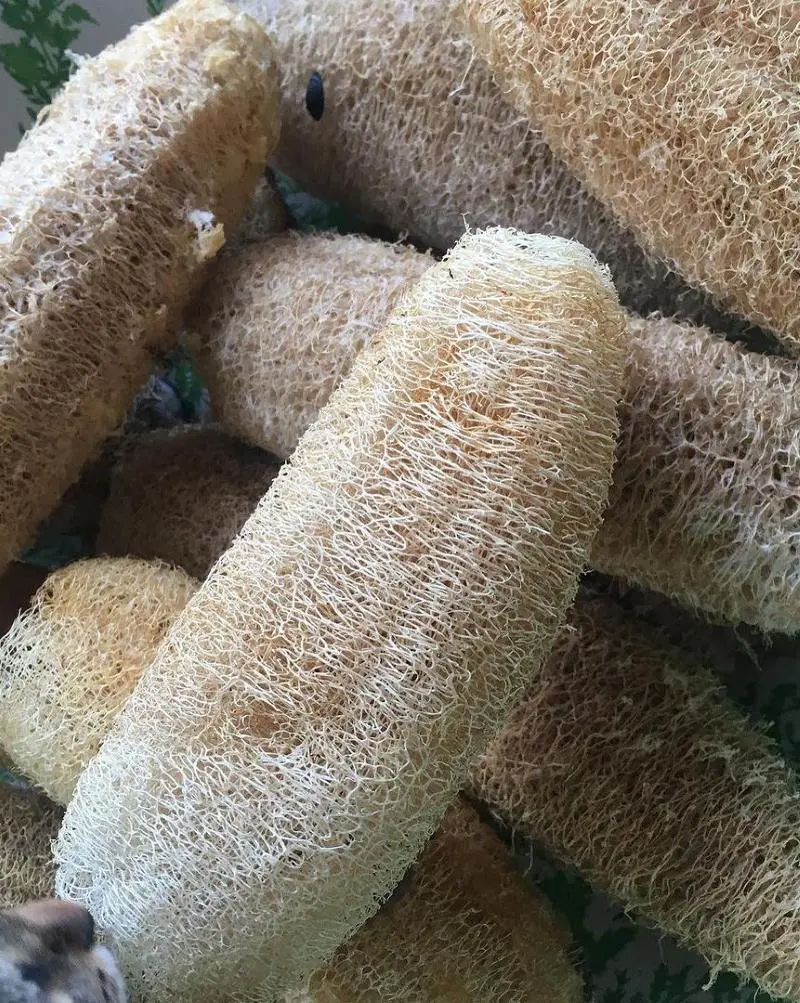
When these fruits mature, their interiors become fibrous and, once the outer skin is removed, transform into natural sponges. These sponges are highly valued for their exfoliating qualities and serve as eco-friendly alternatives to synthetic sponges in skincare and cleaning.
Hence, the loofah plant highlights nature's dual purpose, offering both nourishment and practical use in its edible and sponge forms.
You can find loofah seeds from various sources both online and offline. Online, you can explore seed companies like Burpee and Johnny's Selected Seeds, marketplaces such as Amazon and Etsy, and specialty gardening sites like Seed Savers Exchange.
Offline, local garden centers, nurseries, and farmers' markets are good options. Larger chains like Home Depot may also carry them seasonally. Additionally, local gardening clubs and seed exchange events can be excellent places to find and trade loofah seeds. Always check for seed viability and consider organic options if preferred.
Prepare the Soil
To prepare the soil for planting loofah, choose a sunny location with good drainage. Check the soil pH, aiming for a range of 6.0 to 6.8, using a home testing kit or consulting a local extension service. Clear the area of weeds, rocks, and debris to minimize nutrient competition.
For heavy clay soil, add organic matter such as compost, peat moss, or well-rotted manure to improve drainage. Add 2-4 inches of compost or aged manure and mix it into the top 6-8 inches of soil. Apply a balanced fertilizer (e.g., 10-10-10) according to the package instructions to supply essential nutrients.
Planting Loofah Seeds
Planting loofah involves a few key steps, especially if you're in a colder zone. Here's a concise guide:
Step 1: If you live in a cooler climate, begin planting your Luffa seeds indoors 6-8 weeks before the last expected frost date.
Step 2: Use fresh Luffa seeds for better germination results, and soak them in water for 24 hours before planting. Older seeds that have been stored for years typically have low germination rates.
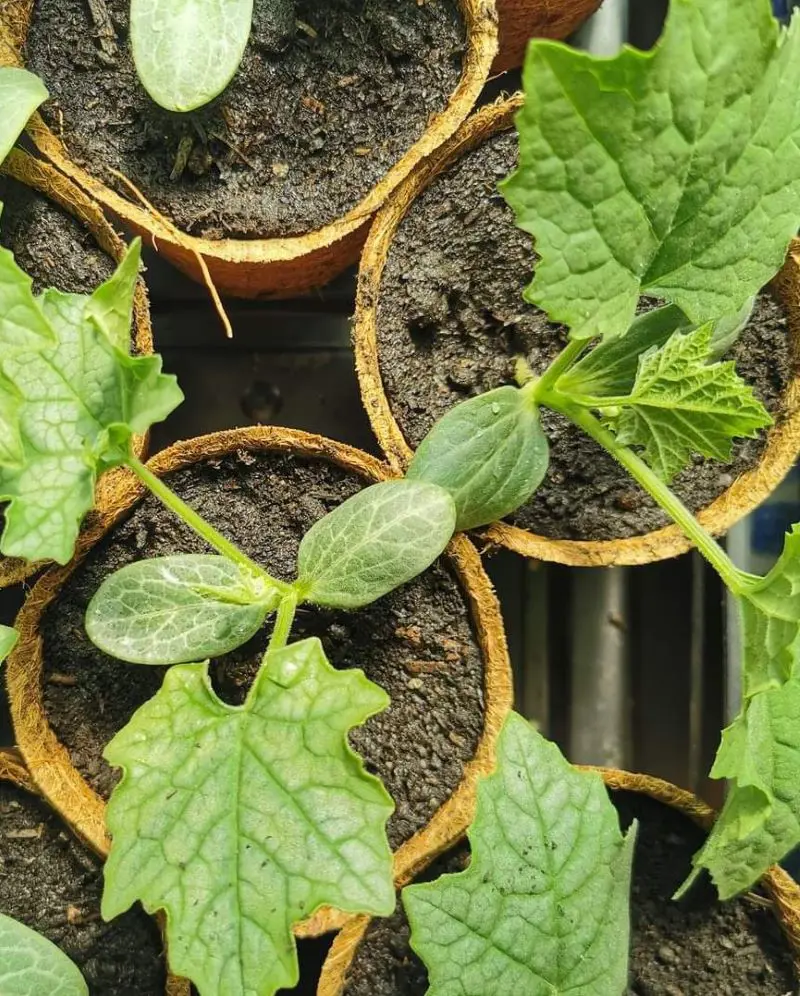
Step 3: Sow the seeds in a 4-inch pot filled with moist soil, planting them about ½ inch deep. Cover the pot with plastic wrap or a humidity dome until the seeds sprout, which typically takes around 7-10 days.
Step 4: Using a seed heat pad to germinate Luffa seeds can enhance success rates. After sowing the seeds, place the pots or tray on the warmth heat pad to facilitate germination. Luffa seeds can also be grown in soil blocks.
Step 5: Once the seeds have sprouted, remove the plastic wrap or dome to allow proper air circulation and continue caring for the seedlings as they grow. Monitor the soil moisture levels carefully, aiming to maintain a state of slight moisture without excessive wetness.
Step 1: Once spring temperatures have risen, and the threat of frost has passed, it's time to harden off loofah seedlings. This means getting them used to being outside after growing indoors.
Step 2: After about a week of hardening off, it's time to plant your seedlings in a sunny spot. Before planting, make sure to remove any weeds and debris from the area. Improve the soil quality by adding compost or aged manure. If the drainage is not good, consider forming raised beds to help with drainage.
Step 3: Dig holes or trenches about 1 inch deep in the soil. Space the seedlings 6-12 inches apart, with rows spaced 6 feet apart. When planting, position the seedlings at the base of a sturdy structure that their vines can climb and attach to as they grow.
Step 4: If there's a sudden cold snap after planting, shield the seedlings with a vented cloche or a cut-off plastic pop bottle. Cold weather can pause Luffa growth for a few days and may take up to a month for recovery.
Note: If you live in a warmer climate, you can sow seeds directly outdoors after the last frost.
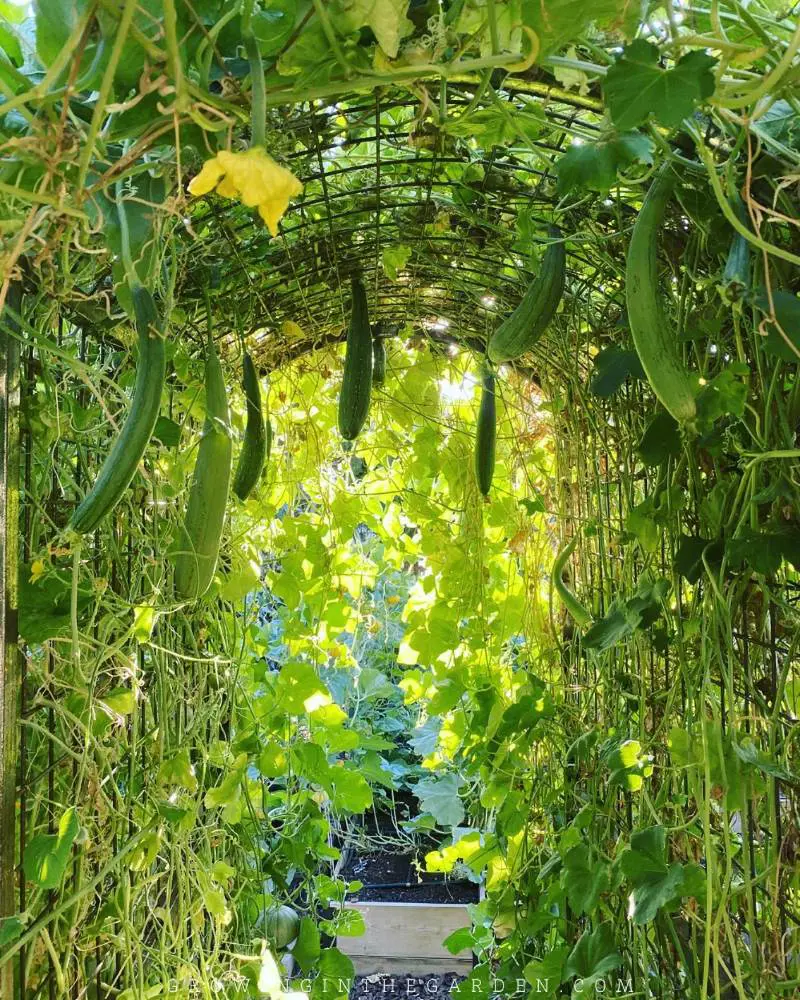
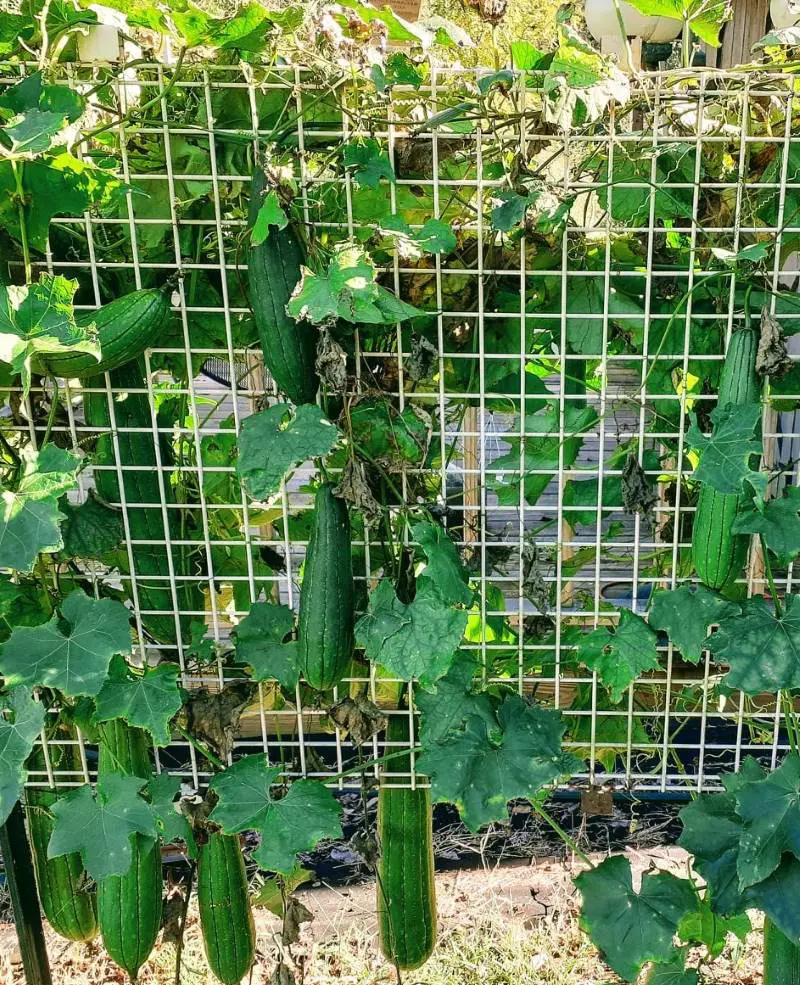
Provide Support
After planting loofah outside, ensure sturdy support for the vines' vertical growth. Install a tall trellis or support structure nearby, positioning it to allow easy access for the vines. As the vines grow, gently guide them towards the support and loosely tie them using garden twine or ties.
Regularly check and adjust their positioning to encourage upward growth, pruning any overcrowded or dead branches to maintain airflow and health. Providing adequate support helps the loofah vines climb effectively, resulting in a fruitful harvest.
Proper watering is crucial for the health of loofah plants. Water deeply and consistently, ensuring the soil remains consistently moist but not waterlogged. During dry spells, increase watering frequency, especially when the plants are young and establishing roots.
Avoid overhead watering to prevent fungal diseases; instead, water at the base of the plant. Mulching around the base helps retain moisture and suppress weeds. Monitor soil moisture regularly, adjusting watering as needed based on weather conditions and plant growth stage.
Fertilization
Increasing the amount of fertilizer during the growth period may lead to larger and more abundant luffas. Employing either a slow-release fertilizer at intervals or a liquid fertilizer applied more regularly can achieve this.
Regularly remove dead or damaged branches to promote airflow and prevent disease. Additionally, prune overcrowded areas to allow sunlight penetration and encourage fruit development. As the vines grow, trim lateral shoots to focus energy on main vine growth and fruit production.
Avoid excessive pruning, especially during the early stages, to prevent stress on the plant. By practicing proper pruning techniques, such as removing unwanted growth and shaping the plant, you can ensure robust loofah vines and a successful harvest.
Pinching Luffa Plants
Many gardeners ponder the value of pinching or pruning their plants, as its worth varies depending on your objectives. For those cultivating luffa for sponges, consider pinching new growth later in the season to redirect the plant's energy towards the already-developing fruits.
In an ideal setting, a single luffa plant can produce anywhere from 5 to 20 fruits when located optimally.
Pest and Disease Control
Monitor regularly for common pests such as aphids, spider mites, and cucumber beetles, which can damage foliage and reduce yield. Use organic methods like insecticidal soap or neem oil to deter pests. Additionally, practice good garden hygiene by removing weeds and debris, which can harbor pests and diseases.
Prevent fungal diseases like powdery mildew by ensuring proper air circulation and avoiding overhead watering. Promptly remove and destroy infected plant parts to prevent the spread of disease, ensuring robust loofah growth.
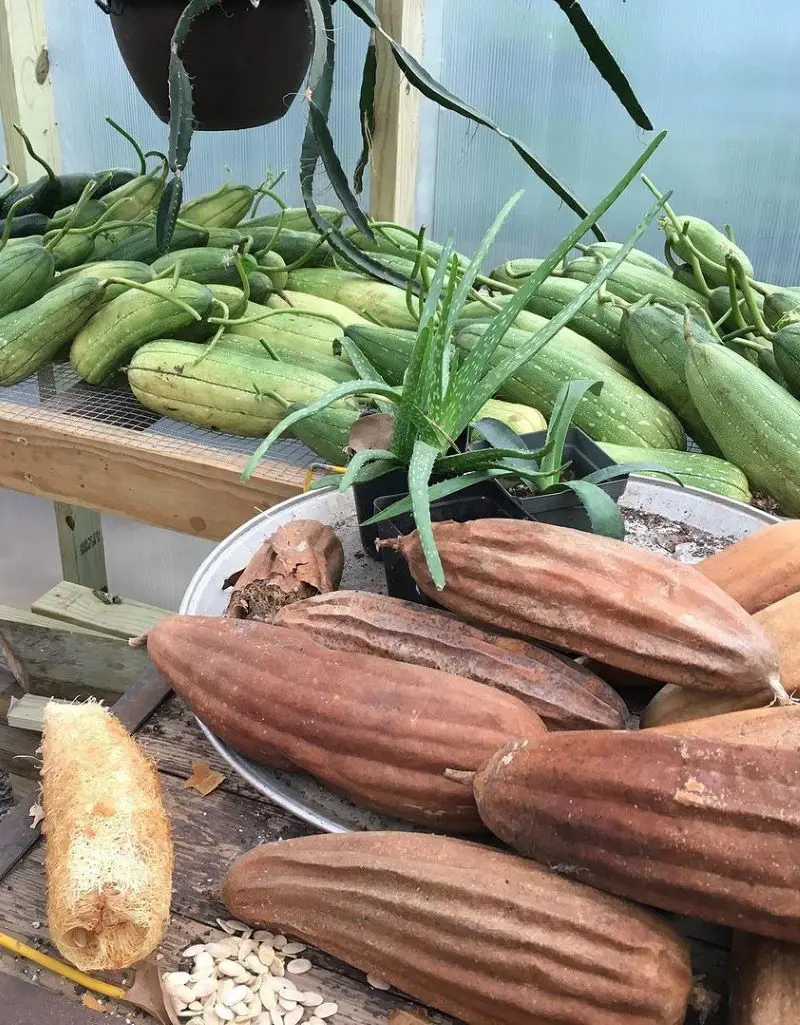
Allow the initial fruits that appear on the vine to mature into sponges. They are ripe for harvesting when the green skin transitions to a dark yellow or brown hue, begins to detach from the fiber inside, and the fruit feels light.
Aim to keep the fruit on the vine for as long as possible to maximize sponge fiber growth, but promptly harvest and peel them if affected by frost. If any fruit doesn't mature well enough for sponges, it's best for composting.
Harvesting Loofah for Eating
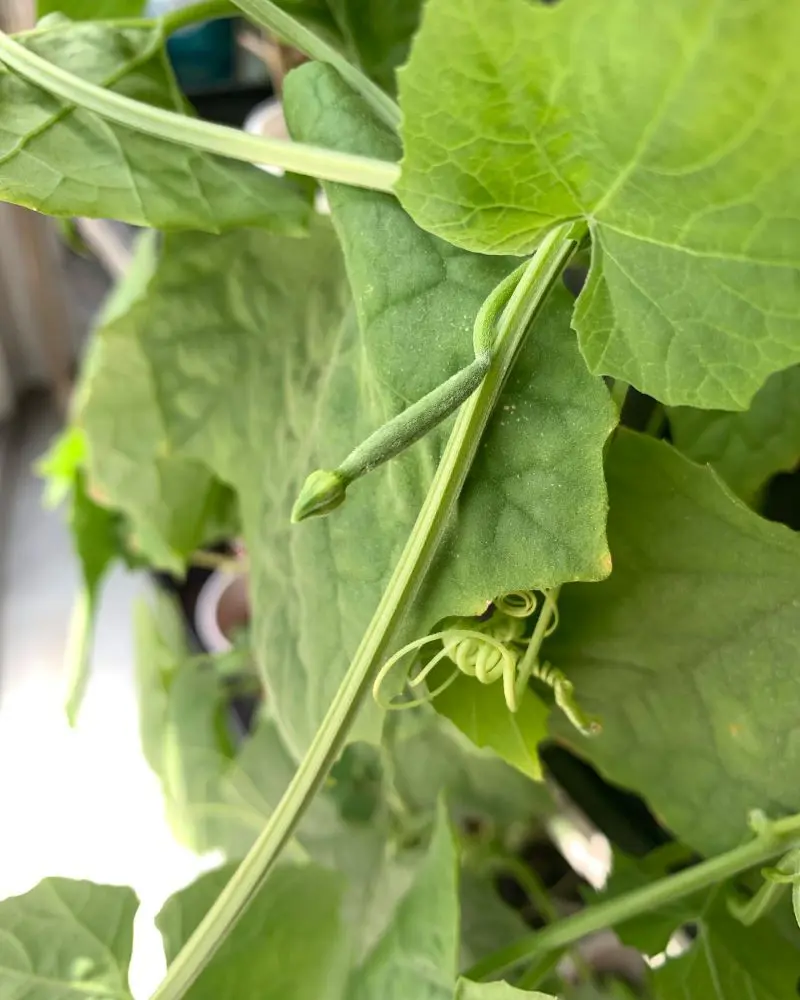
Picking luffa flower buds, blooms, and small green fruits for consumption is a viable option. A sharp knife or hand pruner may be needed if the stem doesn't snap easily. They offer a taste similar to summer squash and serve as a great use for flowers or fruits appearing later in the season, as they may not mature into sponges before frost arrives.
Enjoy them raw or cooked; try sauteing, slicing in stir-fries, adding to soups, stews, or curries, or breading and frying. These edible parts are packed with nutrients like vitamin A, potassium, copper, manganese, vitamins B5 and B6, and vitamin C.
To reveal your sponge, begin by removing the sturdy outer skin. If it's already cracked, you can simply peel it off in fragments. If it is intact, gently press the fruit to induce cracks, then widen them by squeezing and pulling at the torn edges of the skin using your thumbs.
If the skin is particularly dry, soak the fruit in water for a few minutes and then attempt to remove it. After removing the skin, shake out the seeds. Next, cleanse the sponge by rinsing it with a strong jet of water or soaking it in a bucket of water with a small amount of dishwashing soap to wash out any remaining sap.
If there are any dark spots, you can treat the sponge with a non-chlorine laundry bleach to achieve a more consistent tan color.
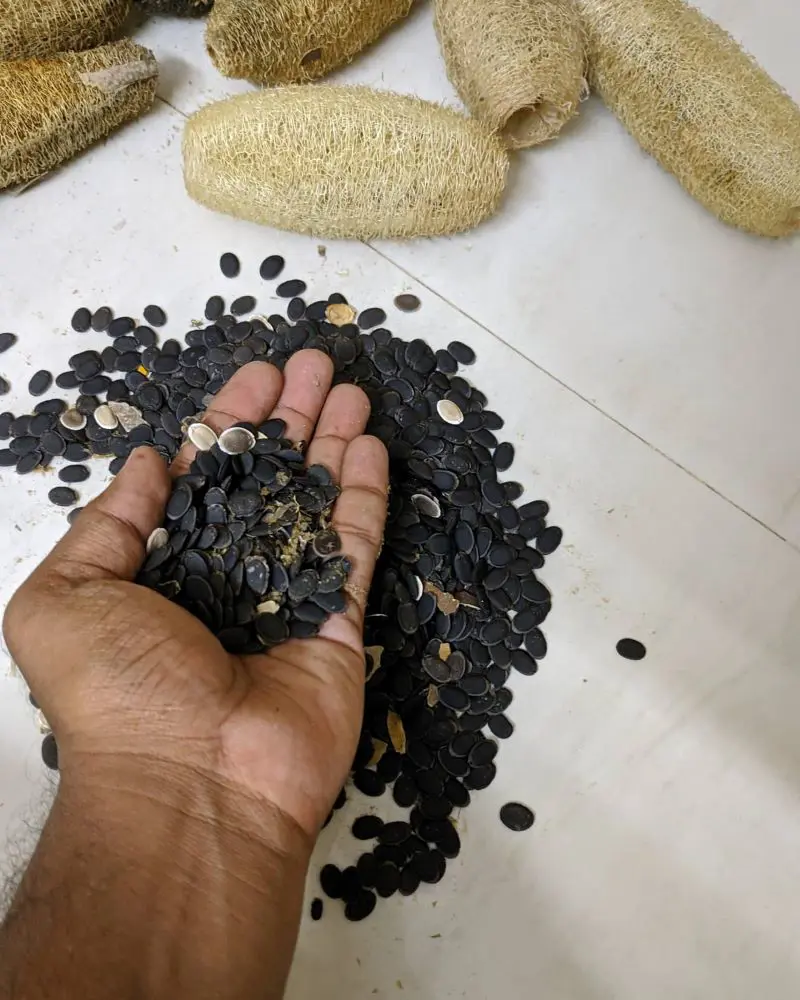
Saving Loofah Seeds
Each luffa is filled with seeds that can be used for growing more luffa in the next season. Removing the seeds from the fibrous interior is simple. After extraction, rinse the seeds under cool water to remove any remaining pulp or debris. Spread them out on a paper towel or a fine mesh screen to let them dry completely.
Place the cleaned seeds in a well-ventilated spot away from direct sunlight to ensure thorough drying. Once dry, transfer the luffa seeds to an airtight container like a glass jar or a resealable plastic bag. Store the container in a cool, dry place until you're ready to plant them next year.
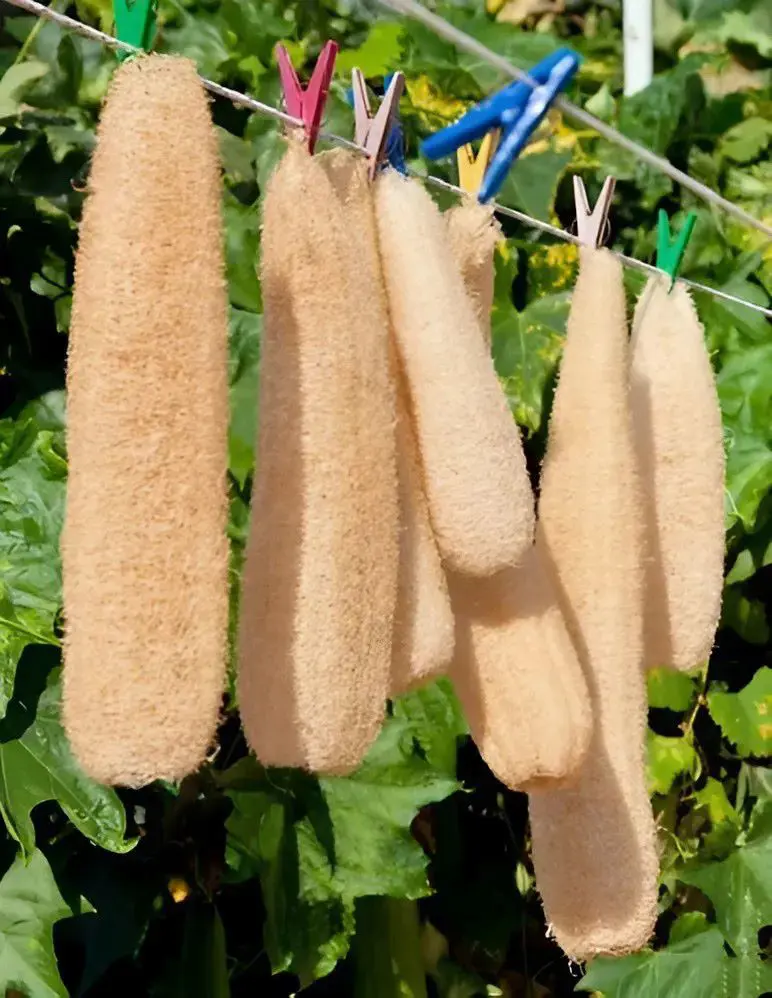
After peeling and processing luffa into sponges, proper drying is crucial to prevent mold and ensure they are ready for use. Here's how to dry luffa sponges:
Remove Excess Moisture: After peeling and processing the luffa, gently squeeze out any excess moisture from the sponge.
Spread Out: Lay the luffa sponges in a single layer on a clean, dry surface such as a countertop or drying rack. Ensure they are not overlapping to allow for proper airflow.
Dry in a Well-Ventilated Area: Place the sponges in a well-ventilated area with good air circulation. Avoid direct sunlight, as this can cause the sponges to dry too quickly and potentially become brittle.
Rotate Sponges: Periodically rotate the sponges to ensure even drying. This helps prevent any moisture buildup and ensures uniform drying.
Monitor for Dryness: The drying process typically takes around 1-2 weeks, depending on humidity levels. The sponges should feel completely dry to the touch and lightweight.
Store in a Dry Place: Once fully dried, store the luffa sponges in a dry place away from moisture. A breathable container such as a mesh bag or paper bag is ideal for storage.
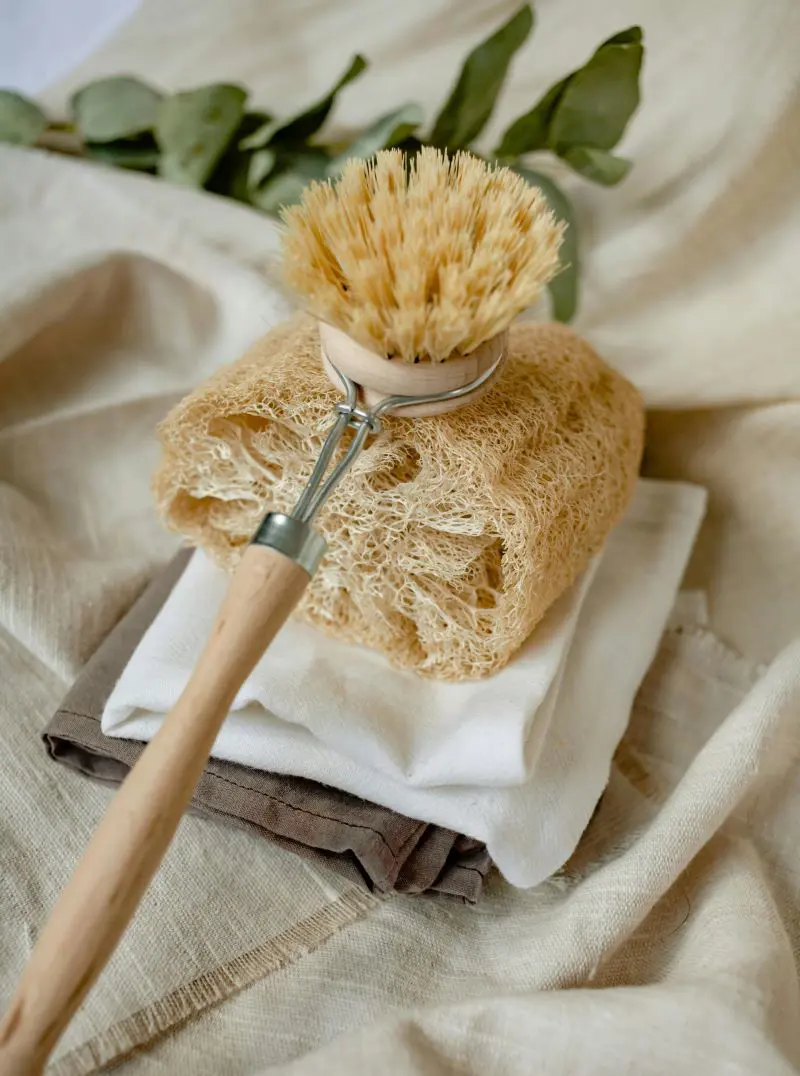
There are several ways to utilize your loofah sponges: you can use them whole, cut flat sections from the outer layer for scrub pads, or slice them into crosswise pieces to create smaller scrubbers (which can also be incorporated into bars of soap).
Dermatologists advise ensuring that your luffa dries completely between uses and replacing it with a new one every three or four weeks, discarding the old one in the compost.
Loofah has versatile uses beyond personal hygiene. It is great for cleaning gardening tools, pots, and outdoor surfaces. Its fibrous texture makes it suitable for crafting birdhouses, baskets, and decorative items. In the kitchen, luffa serves as a natural sponge for washing dishes, cleaning countertops, and scrubbing vegetables.
Cleaning loofah sponges is essential to prevent bacteria buildup and maintain their effectiveness. Here's how to clean them:
Rinse Thoroughly: After each use, rinse the loofah sponge under warm running water to remove any soap residue and debris.
Soak in Vinegar Solution: Soak the sponge in a solution of equal parts water and white vinegar for 5-10 minutes to disinfect.
Scrub with Baking Soda: Scrub the sponge with baking soda to remove stains and odors and rinse thoroughly.
Bleach Solution: Soak your loofah in a diluted bleach solution once a week to prevent it from becoming a breeding ground for germs.
Air Dry: Squeeze out excess water from the loofah sponge and hang it to dry in a well-ventilated area.
Microwave Sterilization (Optional): For extra disinfection, you can microwave the damp loofah sponge on high for 1-2 minutes. This kills bacteria and fungi effectively.
Replace Regularly: Replace the loofah sponge every 3-4 weeks or sooner if it starts to show signs of wear and tear, such as fraying or discoloration.